Overview
This guide walks you through the Delsys API digital integration between the Delsys Trigno systems and Vicon Nexus 2.16+ so you can stream EMG directly into Nexus and time-synchronize it with motion capture data. You will learn how to install the Delsys Vicon Digital Device (VDD), pair and configure sensors in Trigno Discover, wire the Vicon Lock+/Lock Lab sync output to the Delsys Trigno System, and set up start-triggered capture in Nexus.
Requirements
Material/Tool | Description |
|---|---|
Software | Trigno Discover v2.0.1.3+ Delsys API VDD v1.0.2+ |
Hardware: System | Trigno Centro Trigno Research Base Station Vicon Lock + or Lock Lab |
Firmware: System | Trigno Centro: 06-05-00 | 04-01 + Trigno Research Base Station: Digital: 2919 | 1506 | 0806 | 2008 | 0000 Analog: 2919| 1506 | 0806 | 2008| 0901 |
Hardware: Sensors | Avanti-Style Sensors Trigno Maize Sensors |
Firmware: Sensors | Avanti-Style Sensor: 40-49 Maize Sensor: 60-29 |
Operating System | Windows 11 |
Accessories | BNC (Male) to RCA Cable |
User Account Permissions | Windows admin rights to install Nexus and place the .vdd + dependent .dll files into the Nexus program directory. |
Step-by-Step Instructions
Step 1: Install Software
Install Trigno Discover v2.0.1.3+ (See Trigno Discover License Management ).
Install Nexus v2.16+ (Our Software Downloads | Vicon Motion Capture)
Download the Delsys VDD plug-in (API VDD) and extract the zip.
Important
Close Nexus while installing the plug-in
Step 2: Extract & install the Delsys VDD plug-in files
Download the latest version of the VDD from our website. Extract all files from the downloaded zip folder.
Create (if needed)
C:\\Program Files\\Vicon\\Nexus 2.16*\\DigitalDevices.Copy
DelsysViconPlugin.vddfrom the extracted zip folder into that DigitalDevices folder.Copy the .dll dependencies from the extracted zip into
C:\\Program Files\\Vicon\\Nexus 2.16*\\(root program folder).
Important
Do not use the Nexus 2.x folder. Use the folder that matches the version of Nexus that is installed (Nexus 2.16, Nexus 2.17, etc)
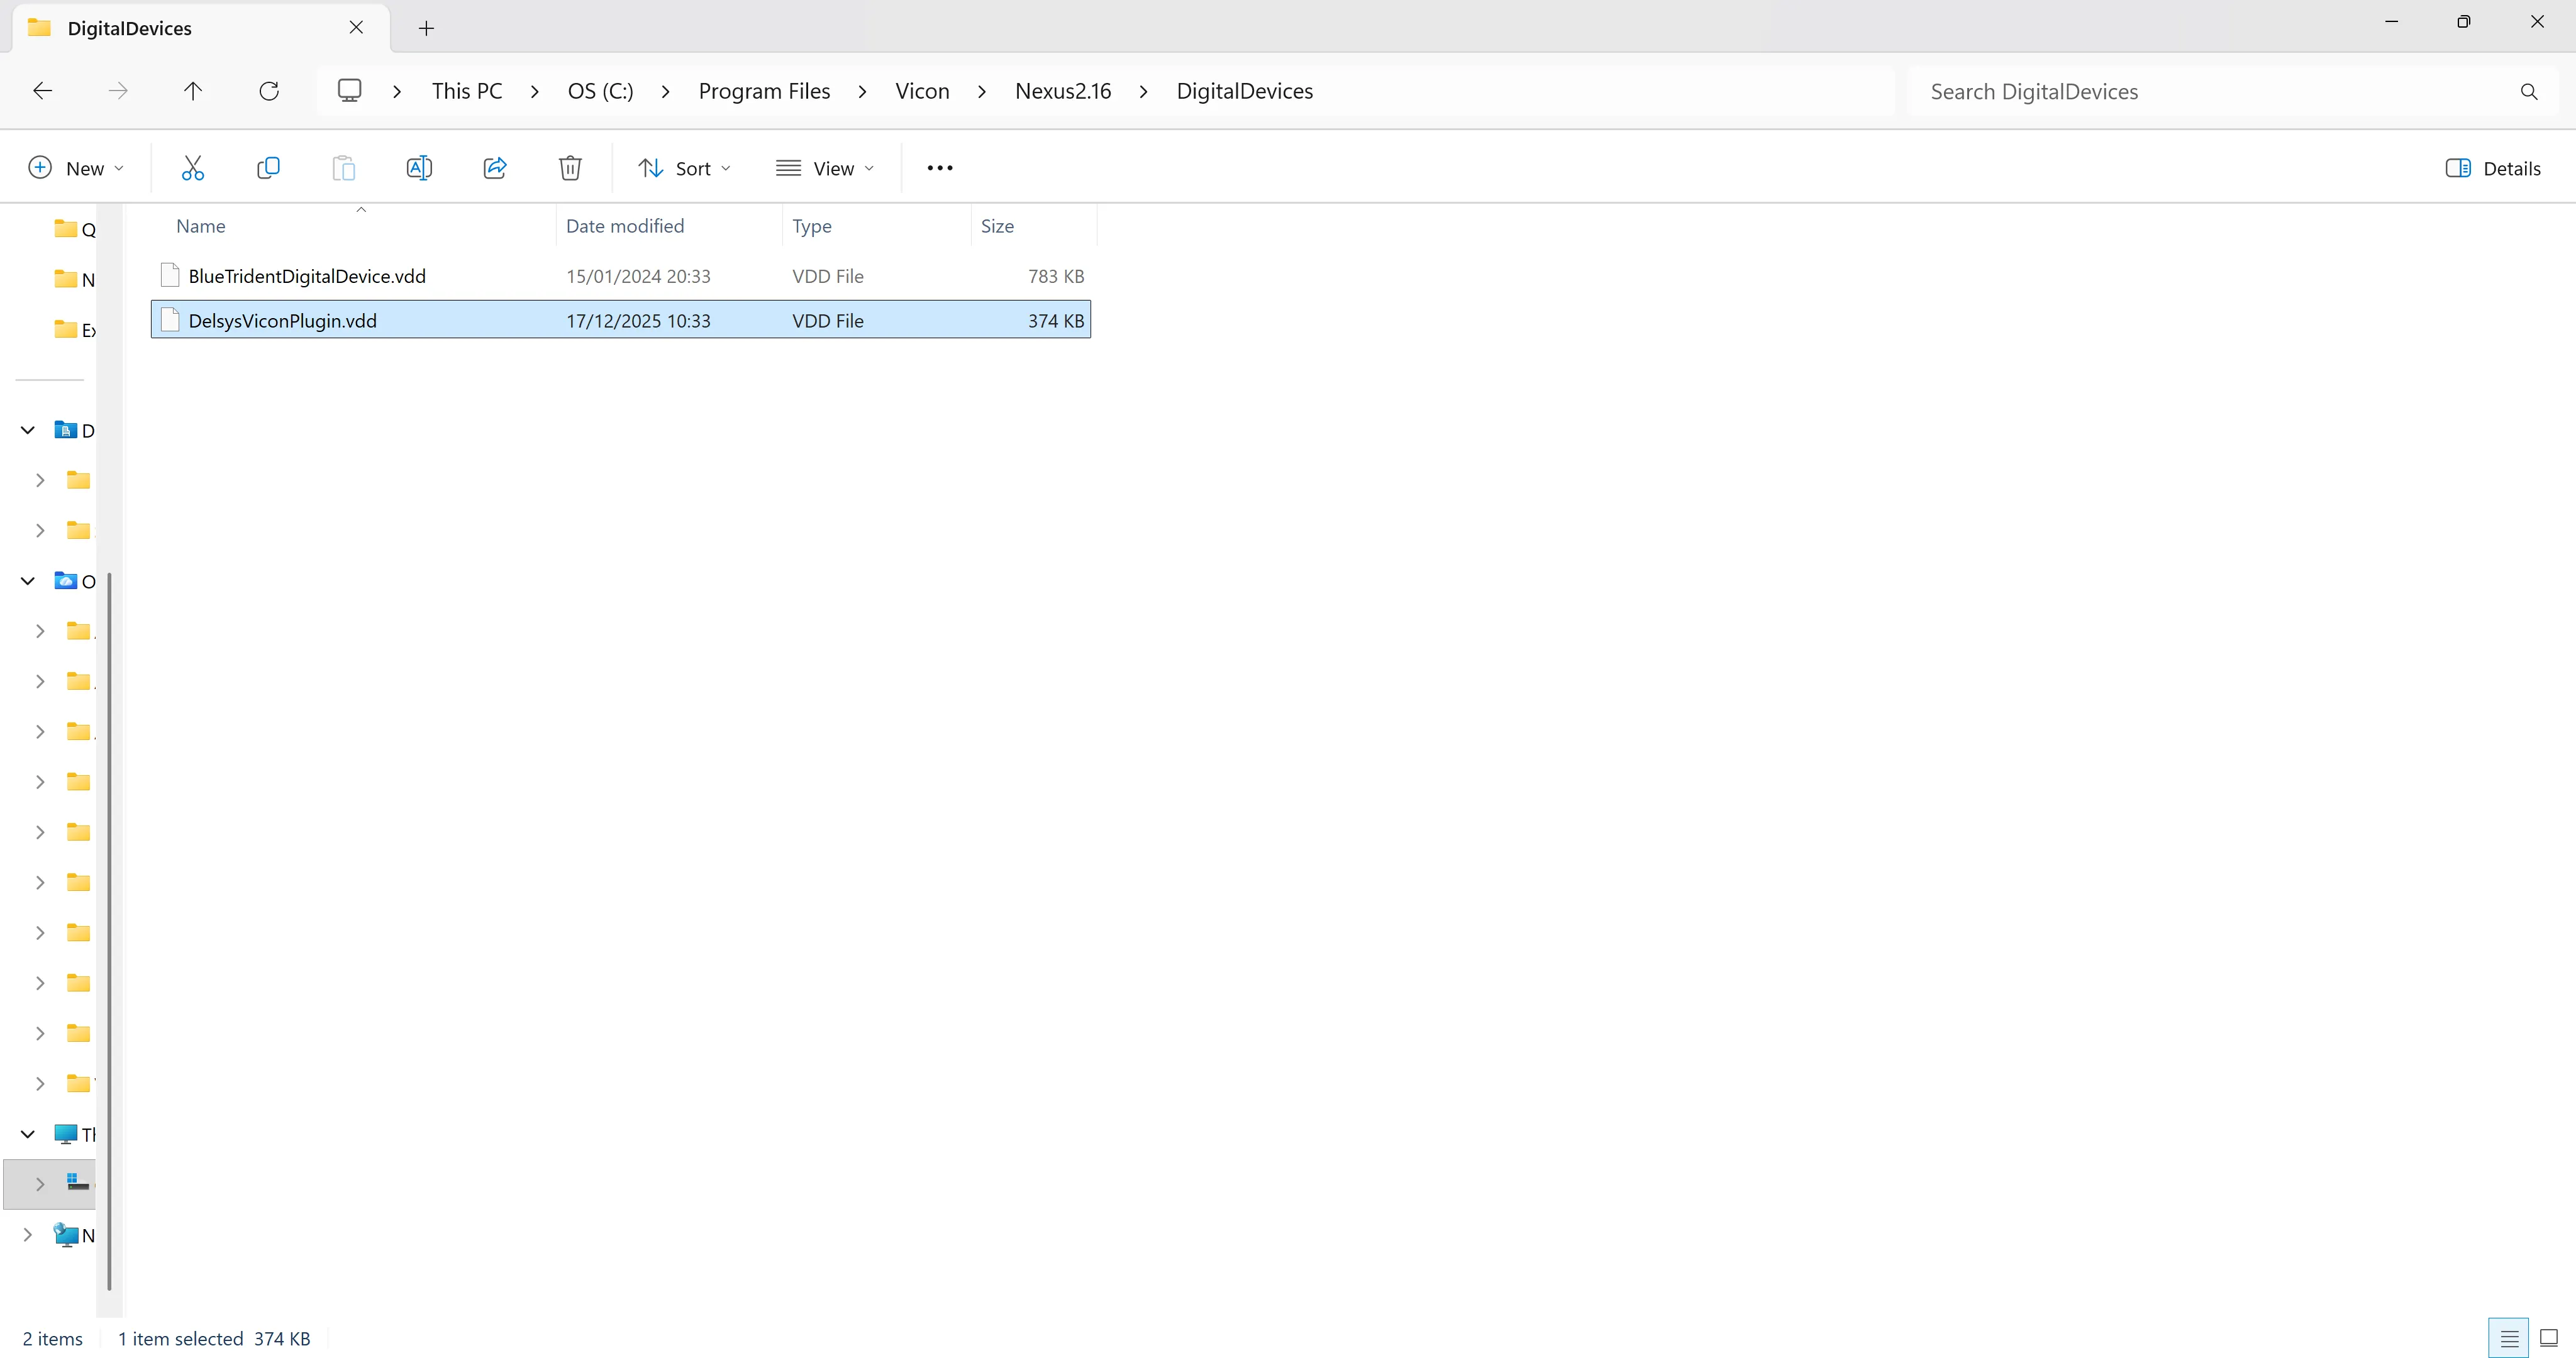
Figure 1. Screenshot of the necessary file path for the .VDD file
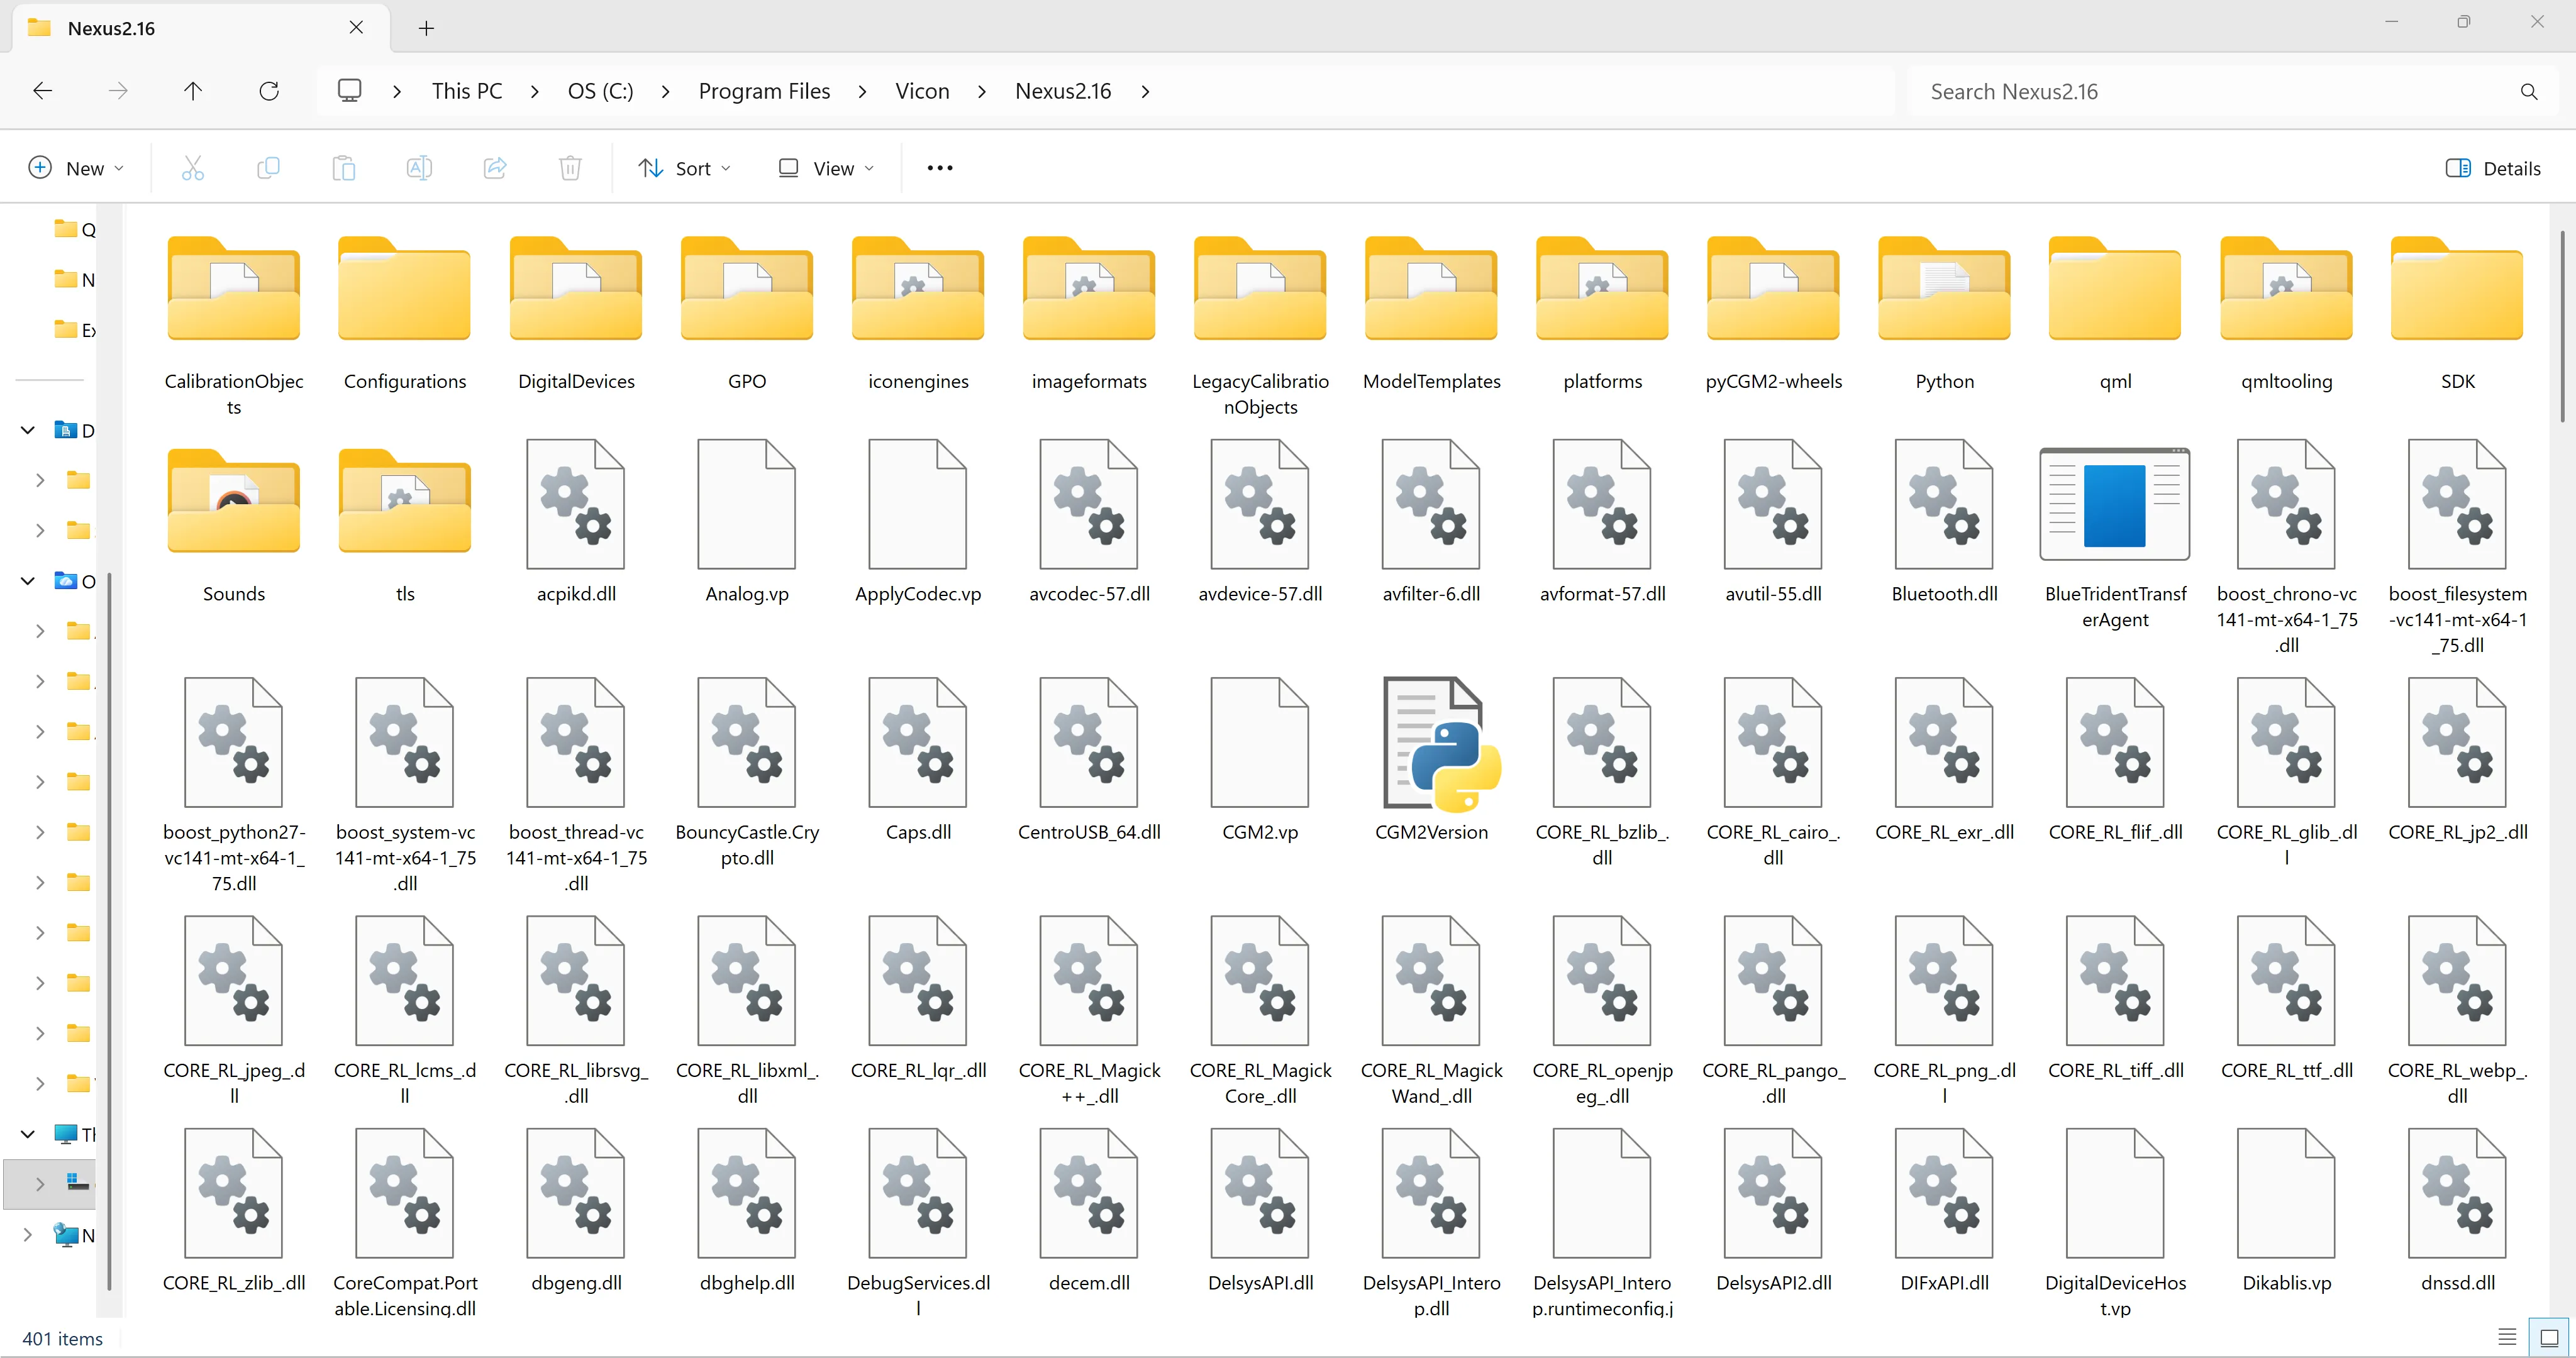
Figure 2. Screenshot of the necessary file path for the .dll files
Step 3: Pair & Configure sensors in Trigno Discover
Connect the Trigno System to power and USB first, then launch Trigno Discover.
Pair sensors (first-time: Add Sensor; otherwise Scan for Sensors (See Trigno Discover: System Configuration).
Configure sensor names, channel names, and sensor modes (See Trigno Discover: Trial Setup).
Run a short Signal Preview to save the configuration.
Close Trigno Discover when done.
Important
Sensor settings are preserved from Discover; Nexus does not resample during live data collection.
Previewing the signals, or starting a data collection, must be performed in Trigno Discover for system configuration changes to carry through to Vicon Nexus.
Trigno Discover must be closed before opening Vicon Nexus.
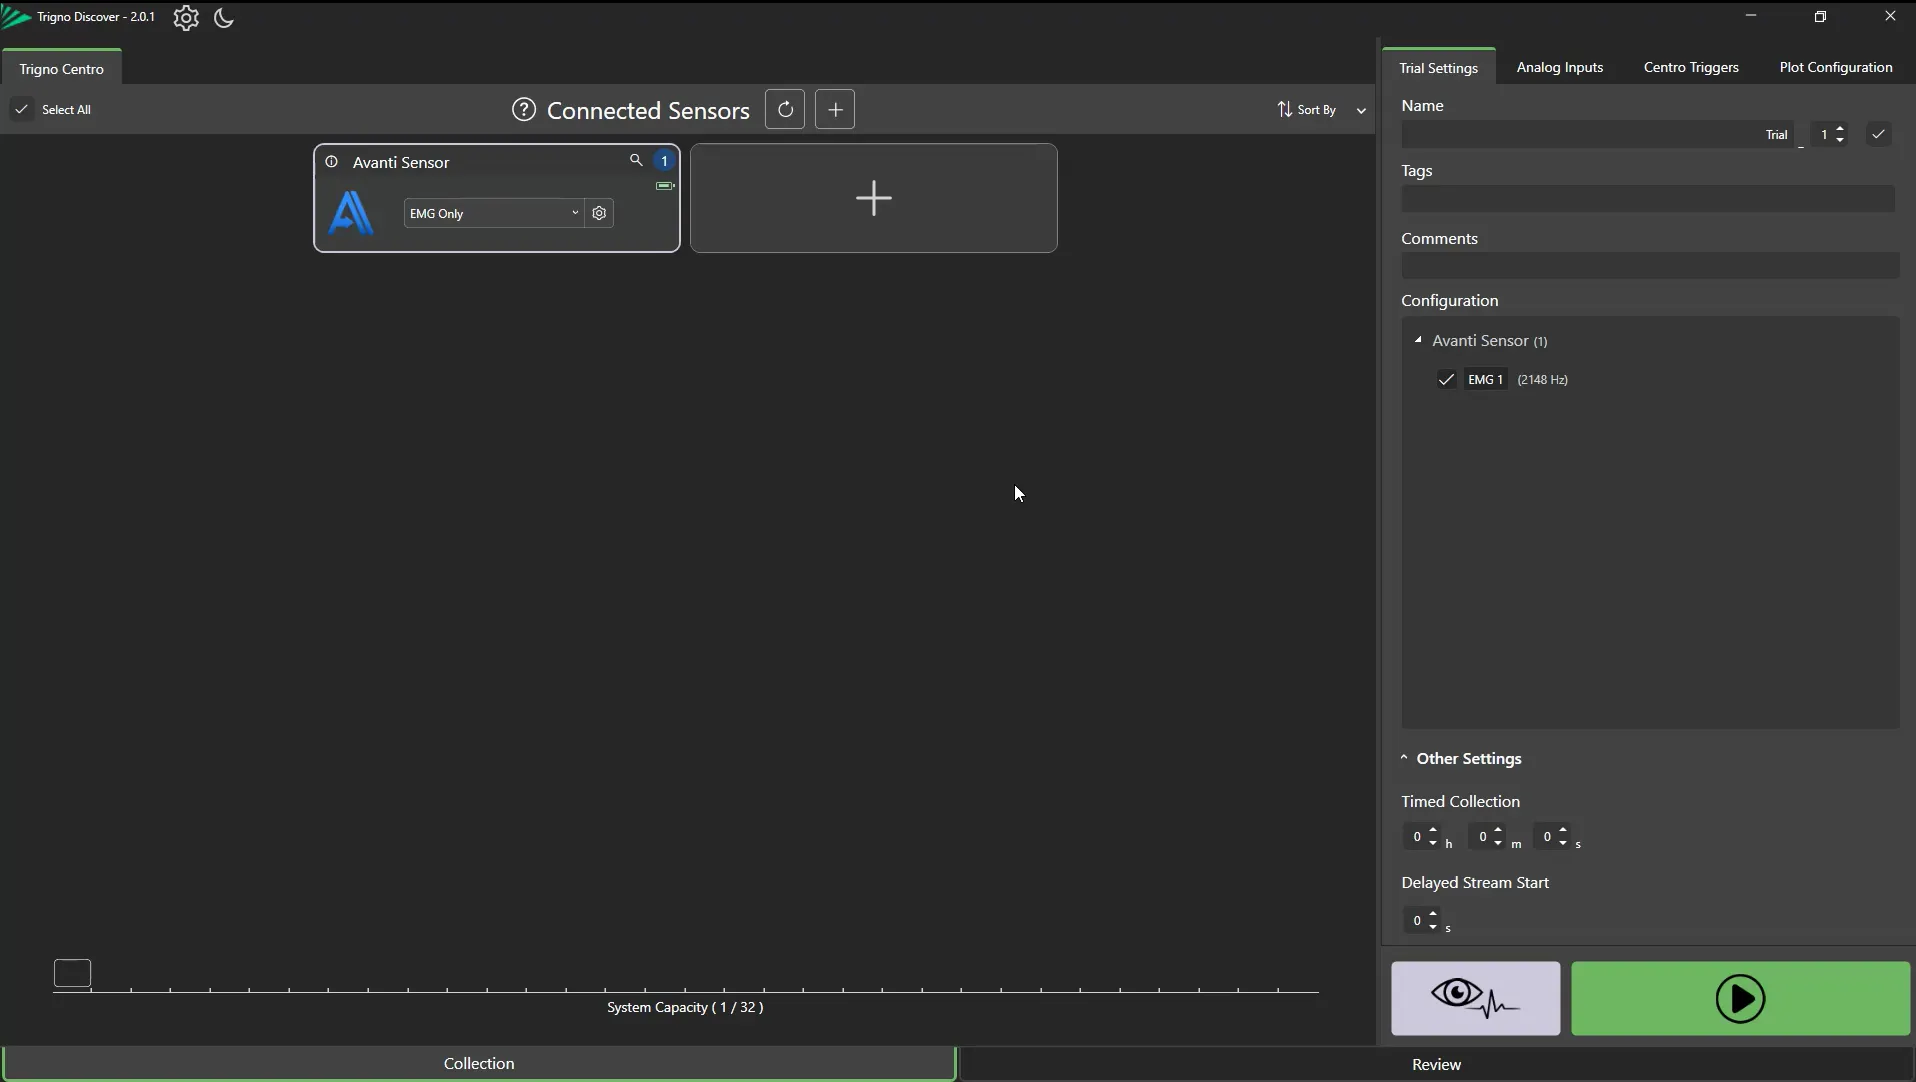
Figure 3. The Trigno Discover Software
Step 4: Hardware and Triggering Configurations
The Delsys API digital integration supports both the Trigno Centro and Trigno Research Base Station. Either system can be used, but the hardware and triggering configuration will differ depending on which system is being used.
Important
This wiring lets Nexus send a 5V start pulse to the Delsys Trigno system so the first Vicon frame and first EMG sample occur at t = 0 s. Without the trigger, synchronization is not guaranteed.
Option A: Trigno Centro
On Trigno Centro, connect BNC end of the BNC→RCA cable to Sync Port 1.
On the Vicon Lock/Lock+ box, connect the RCA end to any Sync Output port.
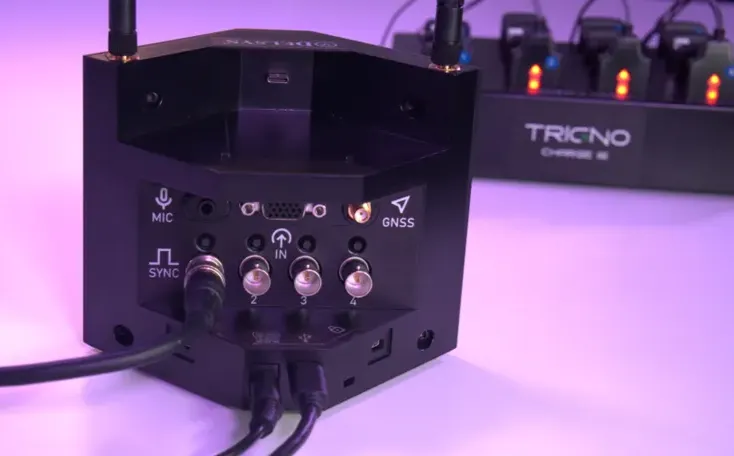
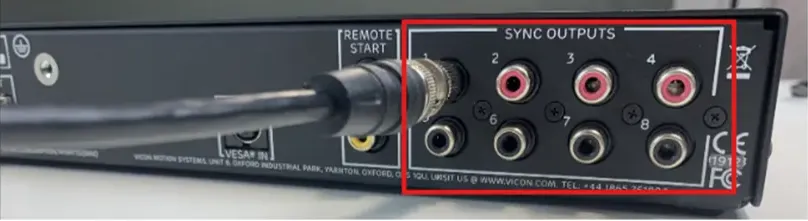
Figure 4: (A) Image of the Trigno Centro Triggering Ports. (B) Image of the Vicon Lock Box.
Option B: Trigno Research Base Station
On the Trigno Research Base Station, Connect the Delsys Trigger Module to the Trigger Port via the Lemo Connector. Ensure the red dot of the LEMO connector points towards the bottom of the base when connecting.
Connect the BNC end of the BNC→RCA cable to the “Sync In” port of the trigger module.
Ensure that the Trigger Module settings are as shown Figure 5 with the switch set to the rising edge.
Connect the RCA end of the cable to any “Sync Ouput” port of the Vicon Lock Box.
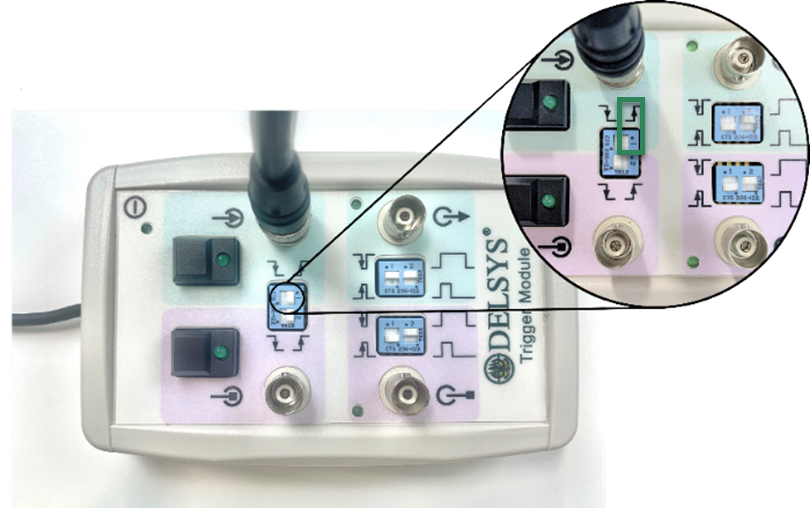
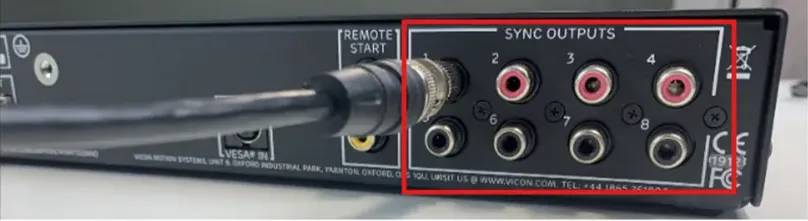
Figure 5. (A) Image of the Trigger Module Port Settings. (B) Image of the Vicon Lock Box.
Step 5: Add the Delsys Digital Device in Nexus
Launch Vicon Nexus 2.16+.
In the System panel, right-click Devices → Add Digital Device → Add Delsys System.
A virtual Delsys device set appears under your local Vicon system, organized by sampling rate; with sensor channels populated beneath.
Important
Add the Delsys System at the start of each session. Changes to sensor count or modes require re-adding/reconfiguring the digital device.
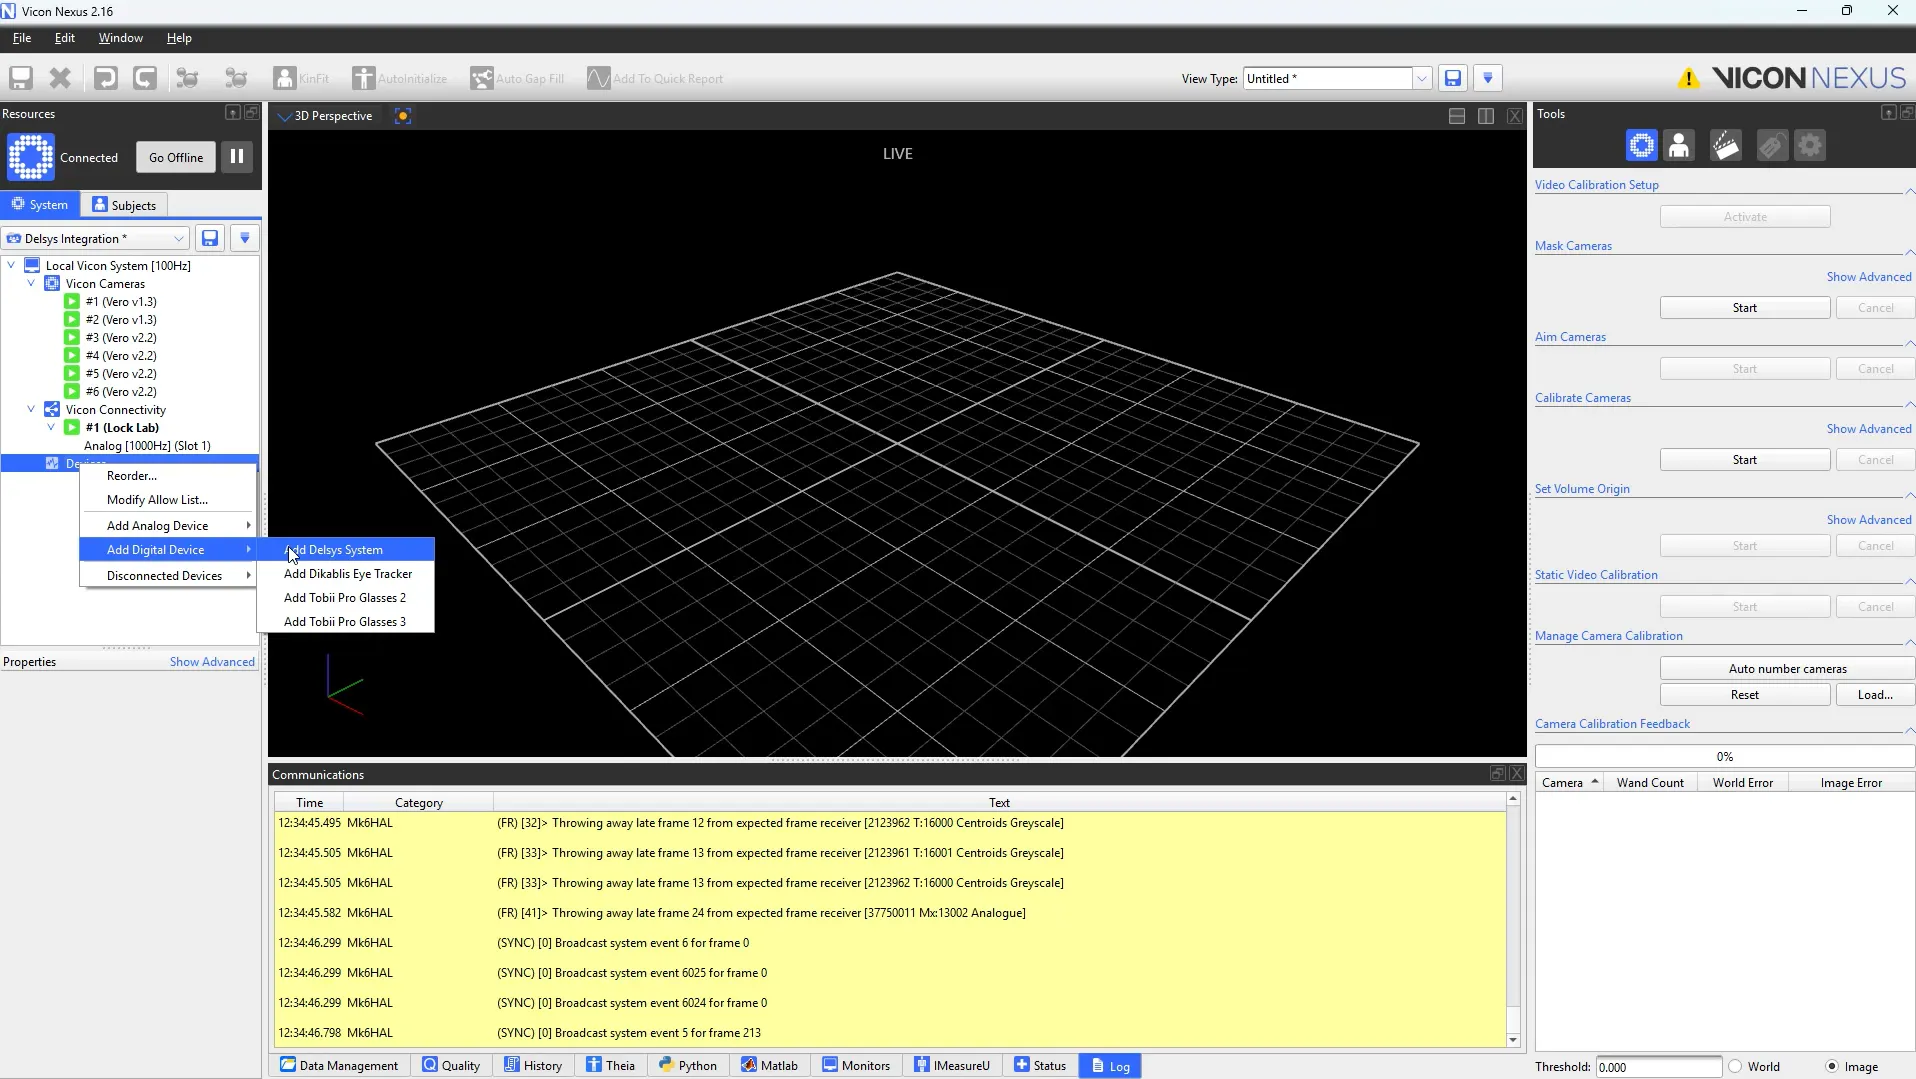
Figure 6. Adding a Digital Device into Vicon Nexus 2.x
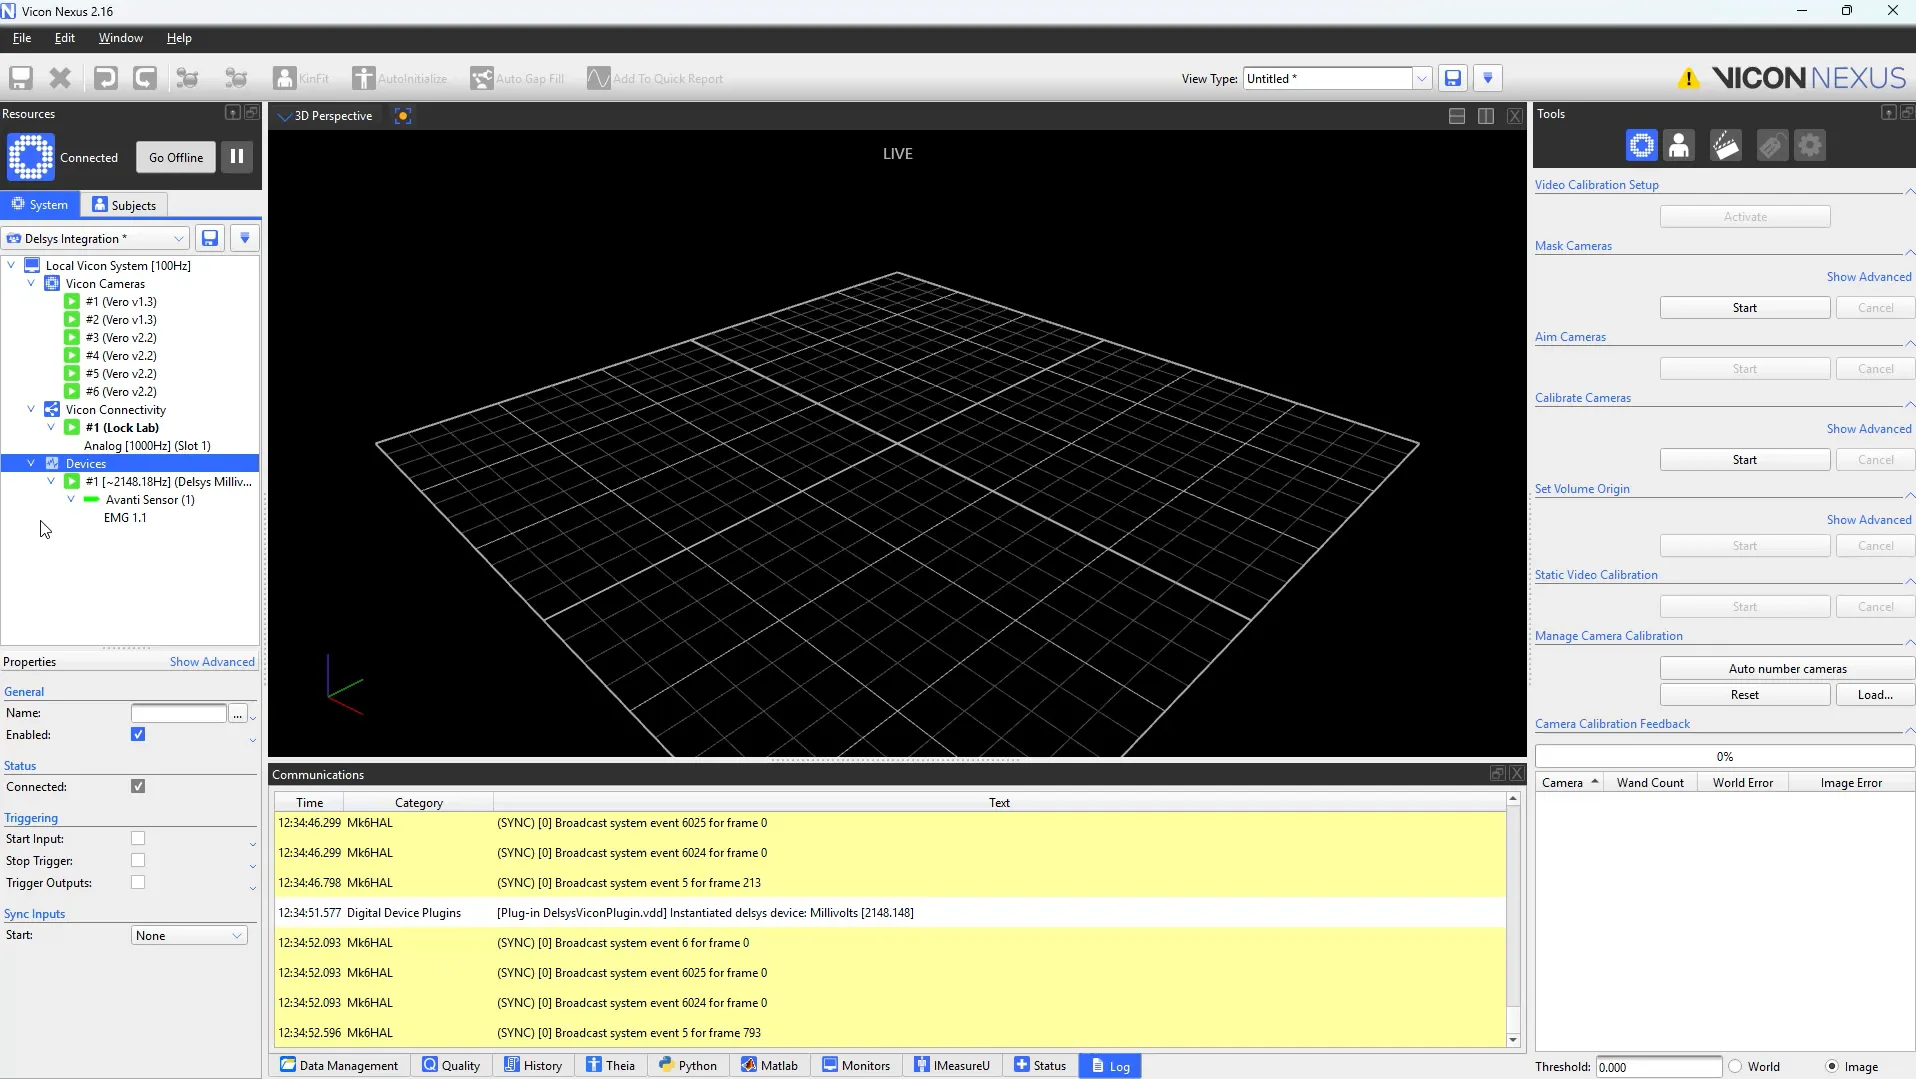
Figure 7. Delsys EMG Devices containing data streaming from the Trigno Centro System
Step 6: Enable start-triggered capture in Nexus
Select the first Delsys channel in the Devices tree to expose Properties.
In Properties → Triggering, enable Start Input.
In Properties → Sync Inputs → Start, choose the GPO port that is wired to the Delsys Trigno system (your Lock/Lock+ output as configured in step 4).
Important
Ensure the selected GPO matches the physical RCA output you used on the Lock/Lock+ box.
Recommendation
Resynchronize regularly to prevent drift occurring between motion capture and EMG data.
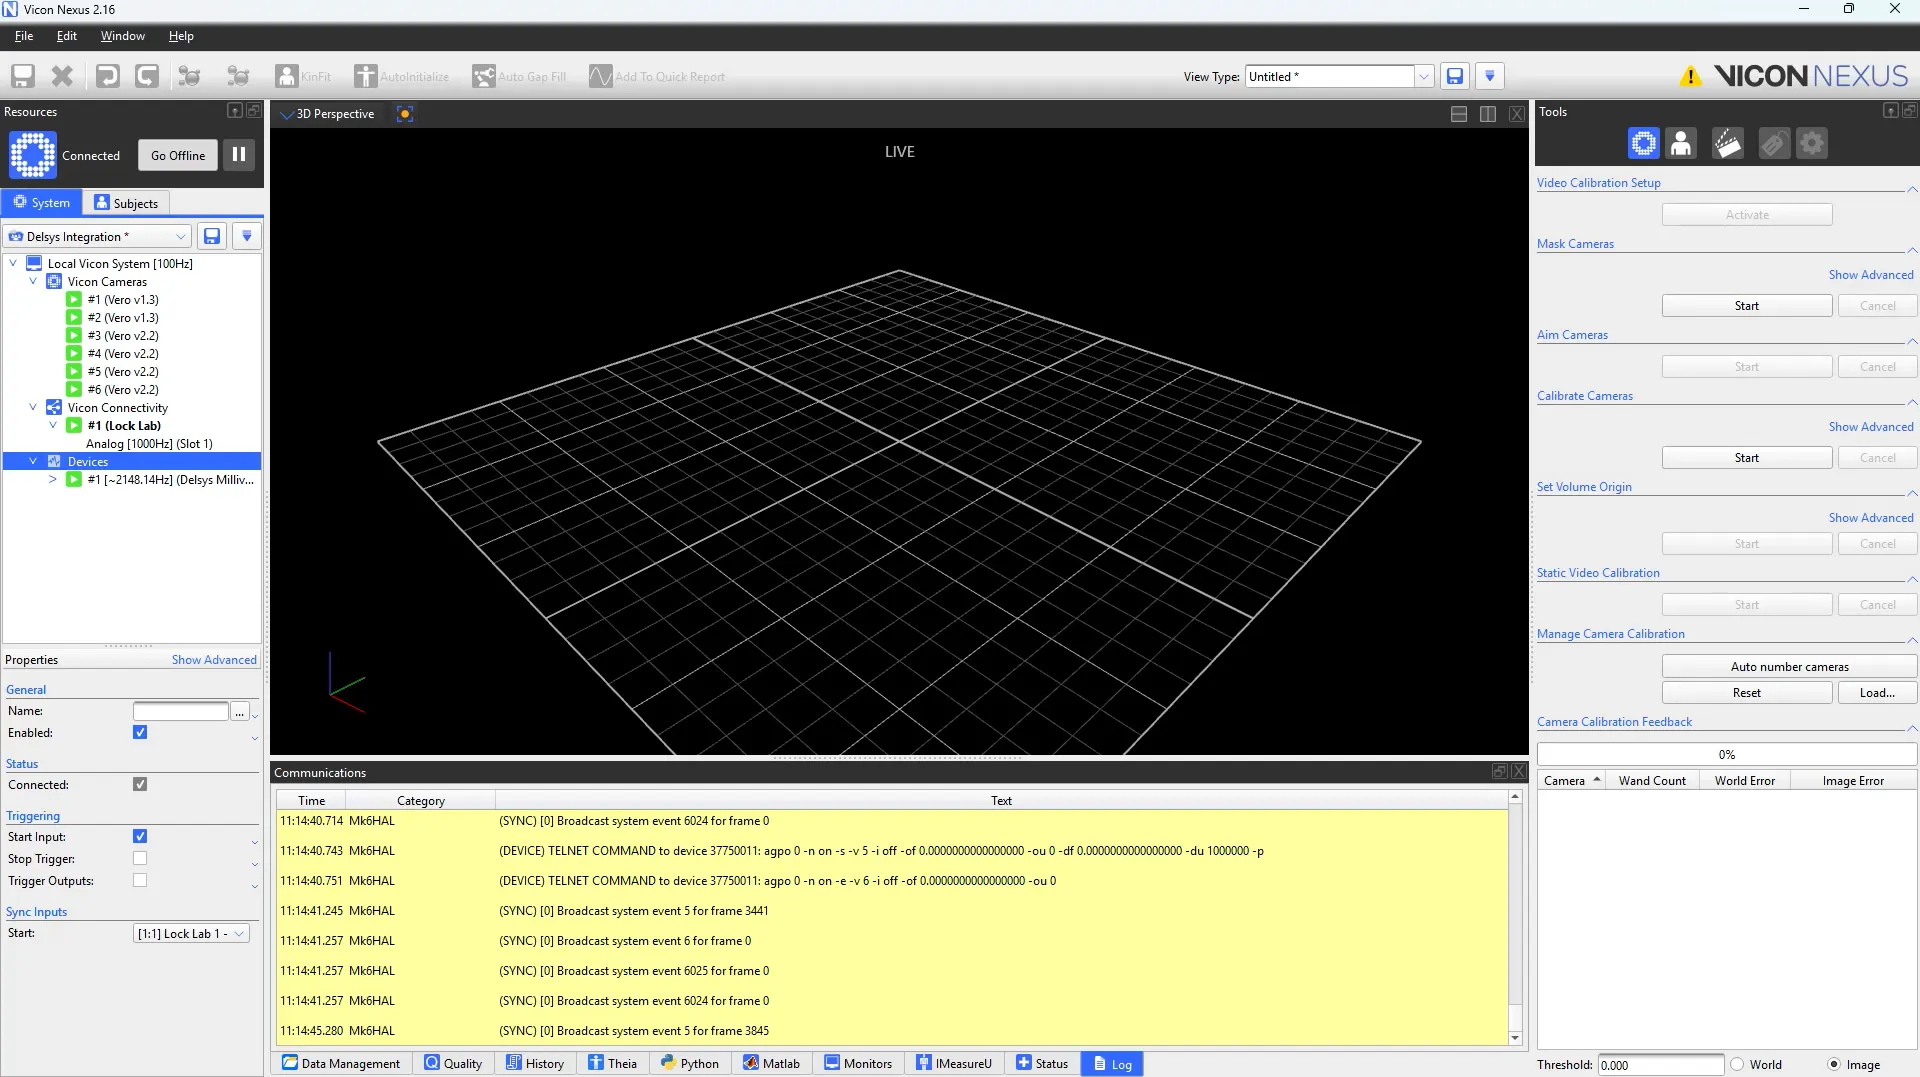
Figure 8. Selecting Triggering settings and Sync Inputs in the “Properties” menu
Step 7: Capture & verify synchronization
Click Start Capture in Nexus. Nexus emits a 5V pulse to the Delsys Trigno system.
The Delsys Trigno system begins EMG acquisition immediately; data streams directly into Nexus with time alignment to the motion system.
Verify EMG signals in Nexus’ data panes.
Recommendation
Resynchronize regularly to prevent drift occurring between motion capture and EMG data.
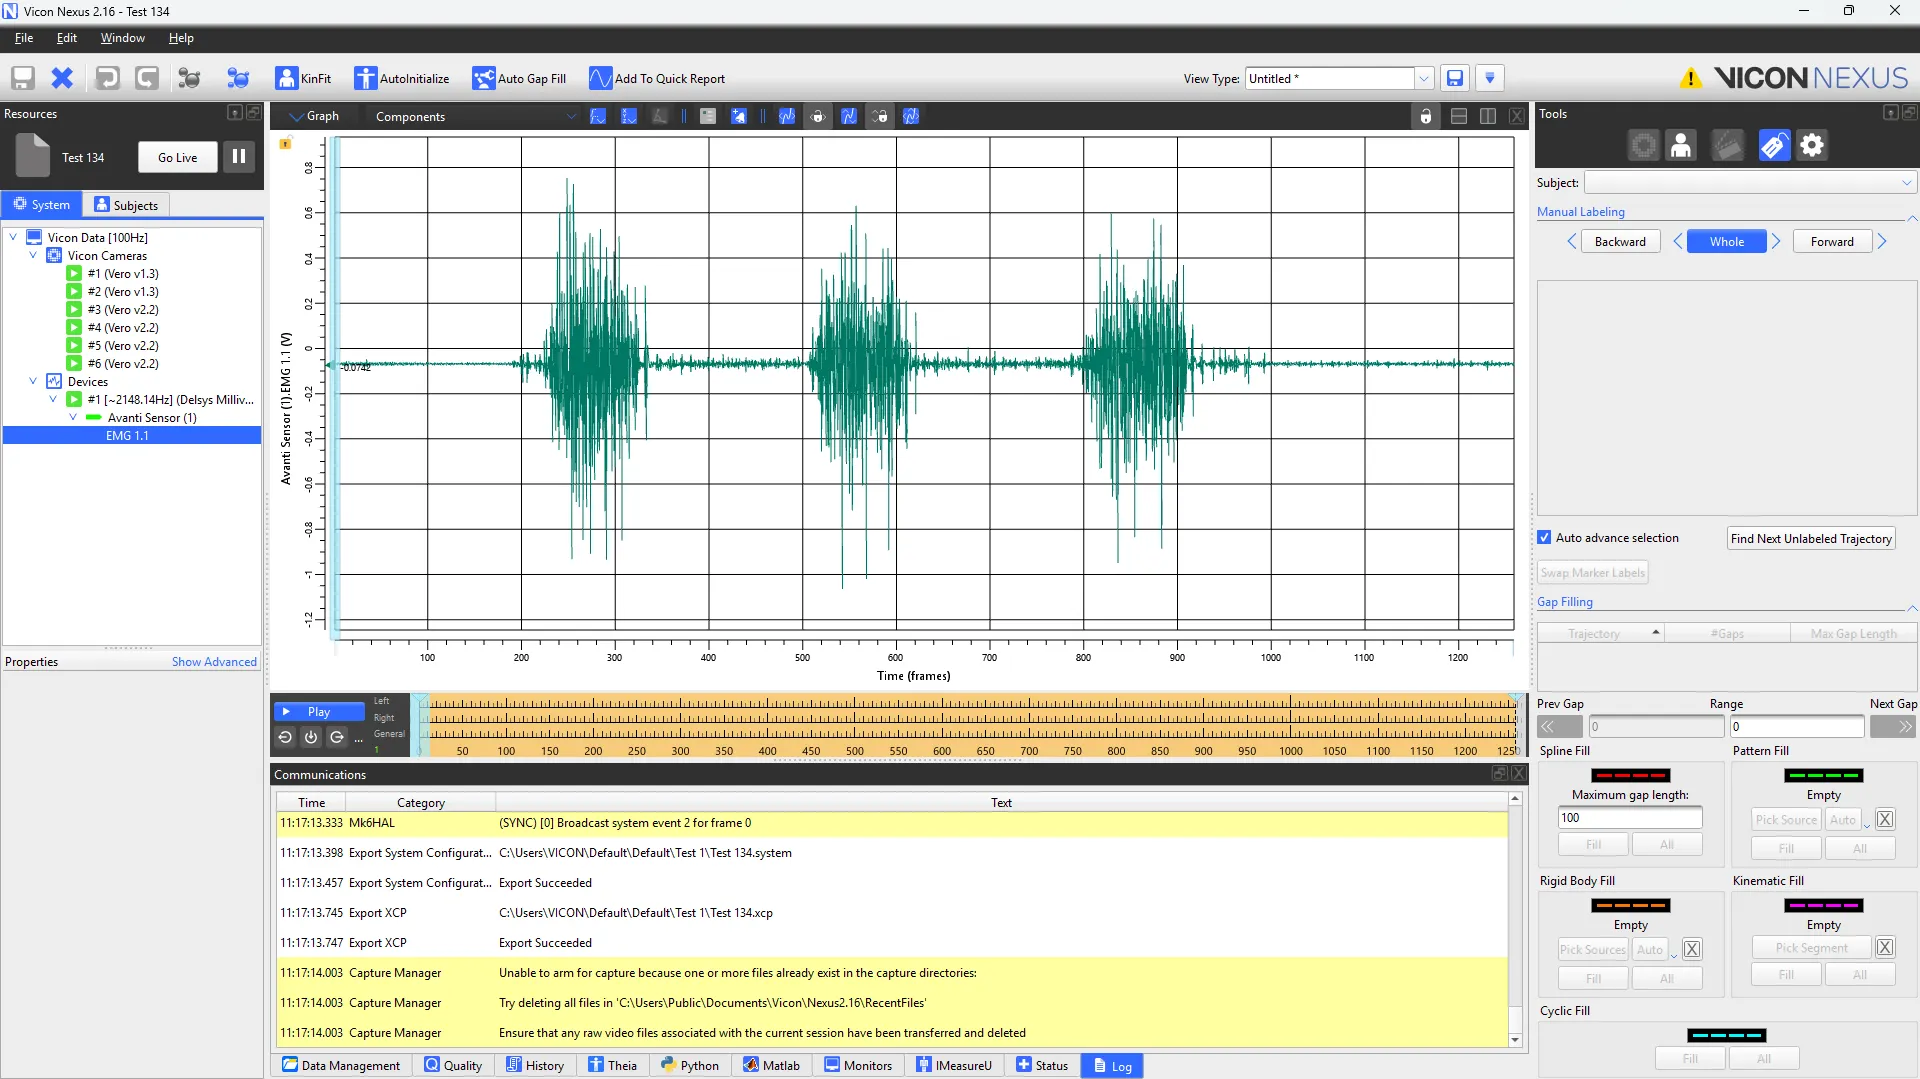
You are now integrated! Delsys EMG data streams into Vicon Nexus in real time, aligned at frame zero with Vicon motion capture data.
DOC-685-1-0

