Overview
This guide covers configuring sensors and trial settings in Trigno Discover, enabling real-time data collection and visualization with Delsys Trigno systems. You'll learn how to select and configure sensors, adjust sampling and bandwidth settings, apply calibrations, and manage trial metadata. The guide also covers advanced features like timed collection, analog input setup, and Trigno Centro triggering configuration. For a visual walkthrough, please refer to the Trigno Discover video tutorials on Trial Set-Up.
Information
This article refers to Trigno Discover version 2.0.1. Please note that the user interface may vary depending on the version you have installed. You can find your current version of Trigno Discover in the top left corner of the application window.
Trigno Discover Getting Started Video Tutorial: Trial Set-Up
System Requirements
Material/Tool | Description |
|---|---|
Software | Trigno Discover 2.0 + |
Hardware: System | Trigno Centro; Trigno Lite; Trigno Research Base Station |
Firmware: System | Trigno Centro: 06-05-00 | 04-01 + Trigno Lite: 02-02 + Trigno Research Base Station: Digital: 2919 | 1506 | 0806 | 2008 | 0000 Analog: 2919| 1506 | 0806 | 2008| 0901 |
Hardware: Sensors | Avanti-Style Sensors |
Firmware: Sensors | Avanti-Style Sensor: 40-49 Maize Sensor: 60-29 |
Operating System | Windows 11 |
PC Specifications |
|
Step-by-Step Instructions
Step 1: Sensor Selection and Management
Selecting Sensors for Streaming
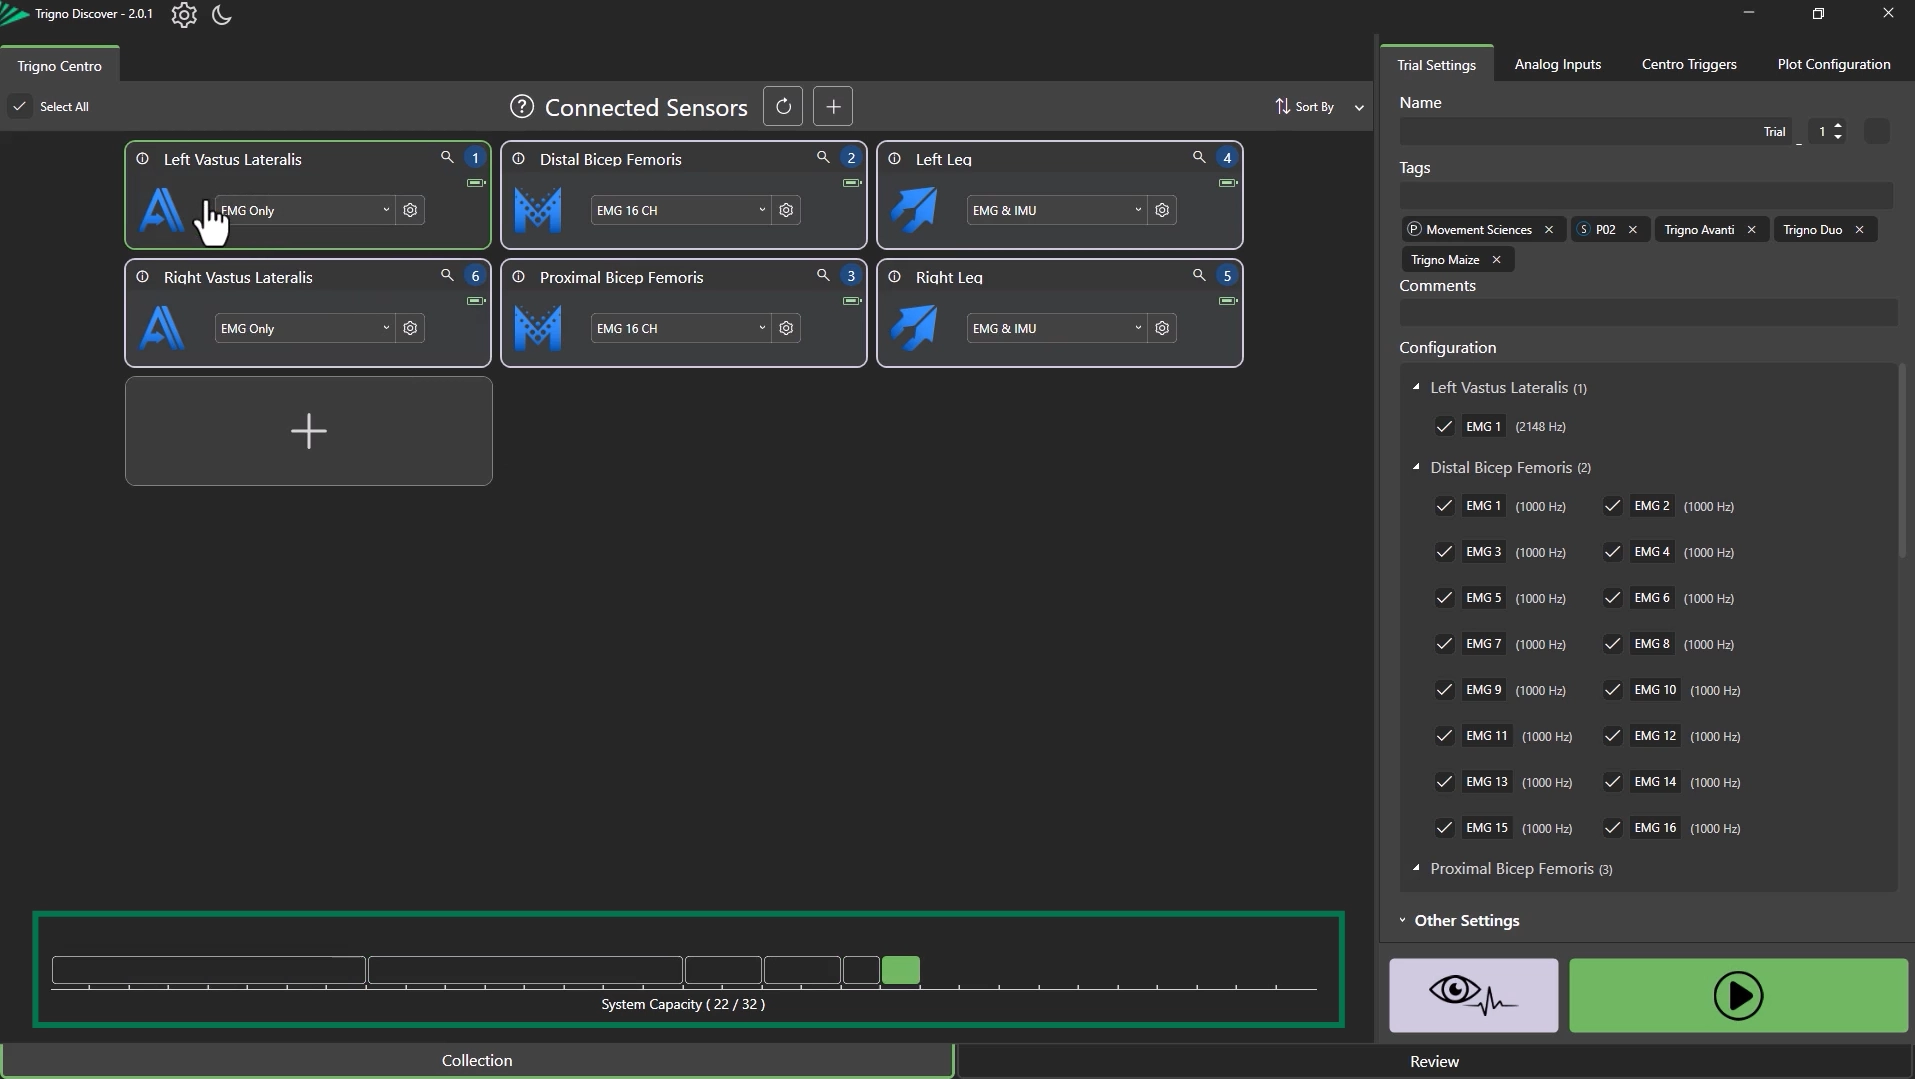
After successful Pairing (See Activating & Pairing Sensors), sensors can be selected or deselected for streaming by selecting the sensor in the Connected Sensors window.
Use the System Capacity Visual to monitor the number of transmission slots being used
Renaming Sensors
Sensors can be renamed directly in the Connected Sensors window by clicking in the Sensor Name.
If a previously paired sensor is re-added and shows an existing name:
Highlight the sensor name.
Press Delete to revert to the default name.
Step 2: Changing Sensor Configuration
Selecting Sensor Modes
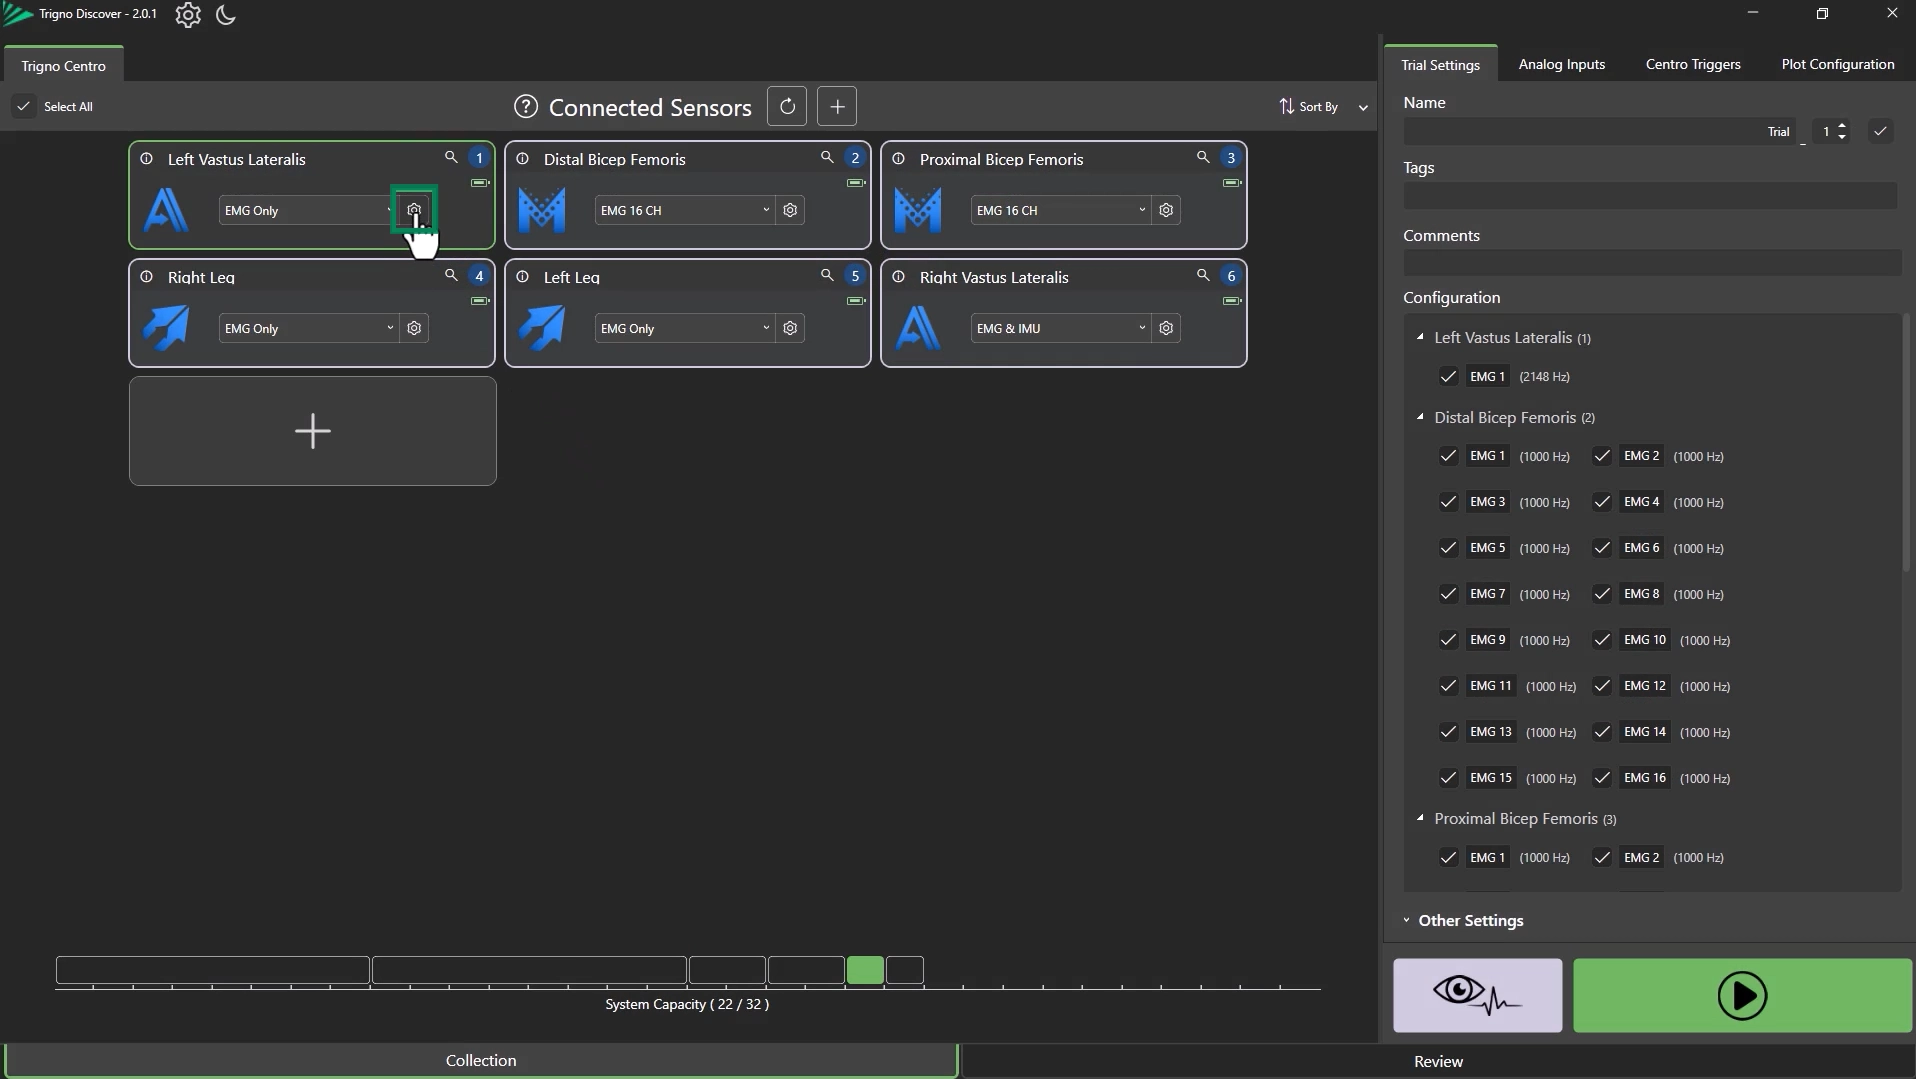
Choose from pre-defined sensor modes via the dropdown menu.
For adjusting sampling and collection modes, click the Settings Icon.
Adjusting Sampling & Collection Modes
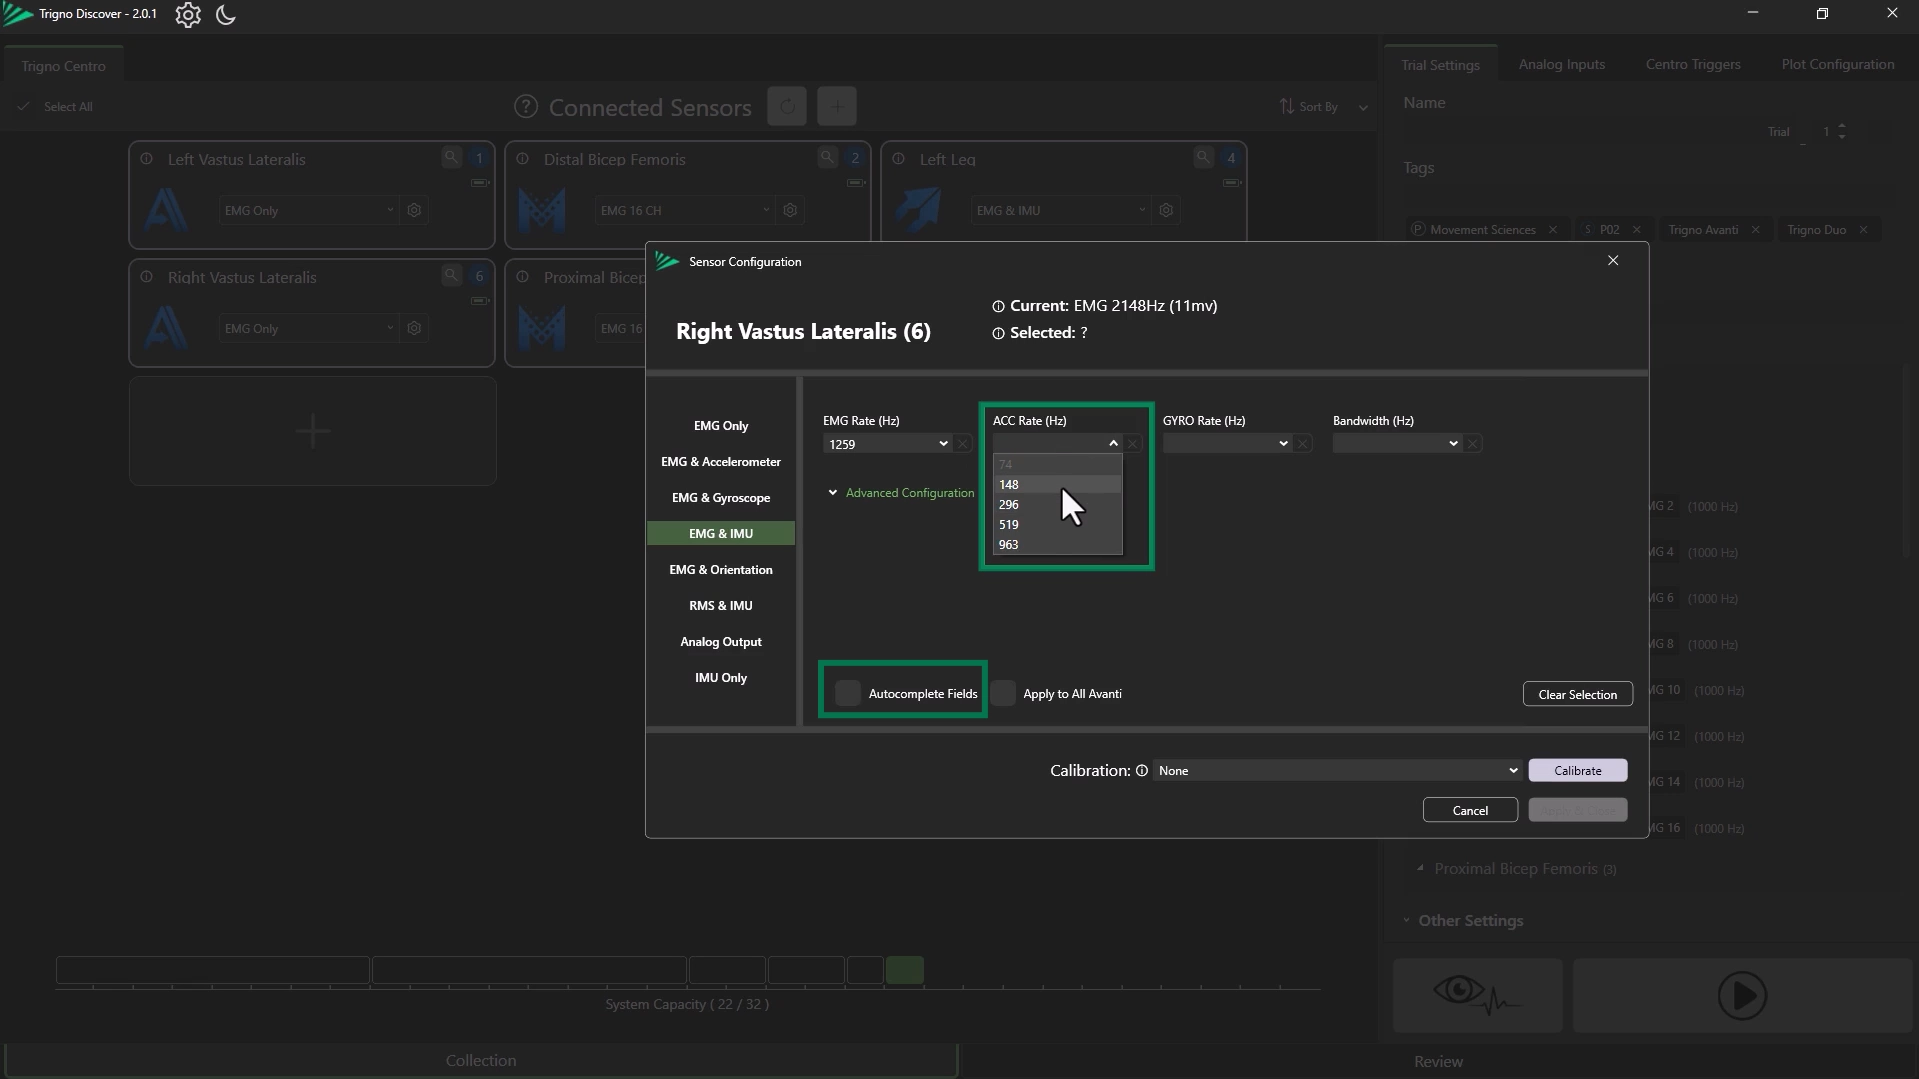
Modify sampling frequency, bandwidth, and collection mode by using the drop-down.
Use “Autocomplete Fields” to auto-fill compatible frequencies.
To start fresh, click “Clear Selection.”
Advanced Settings
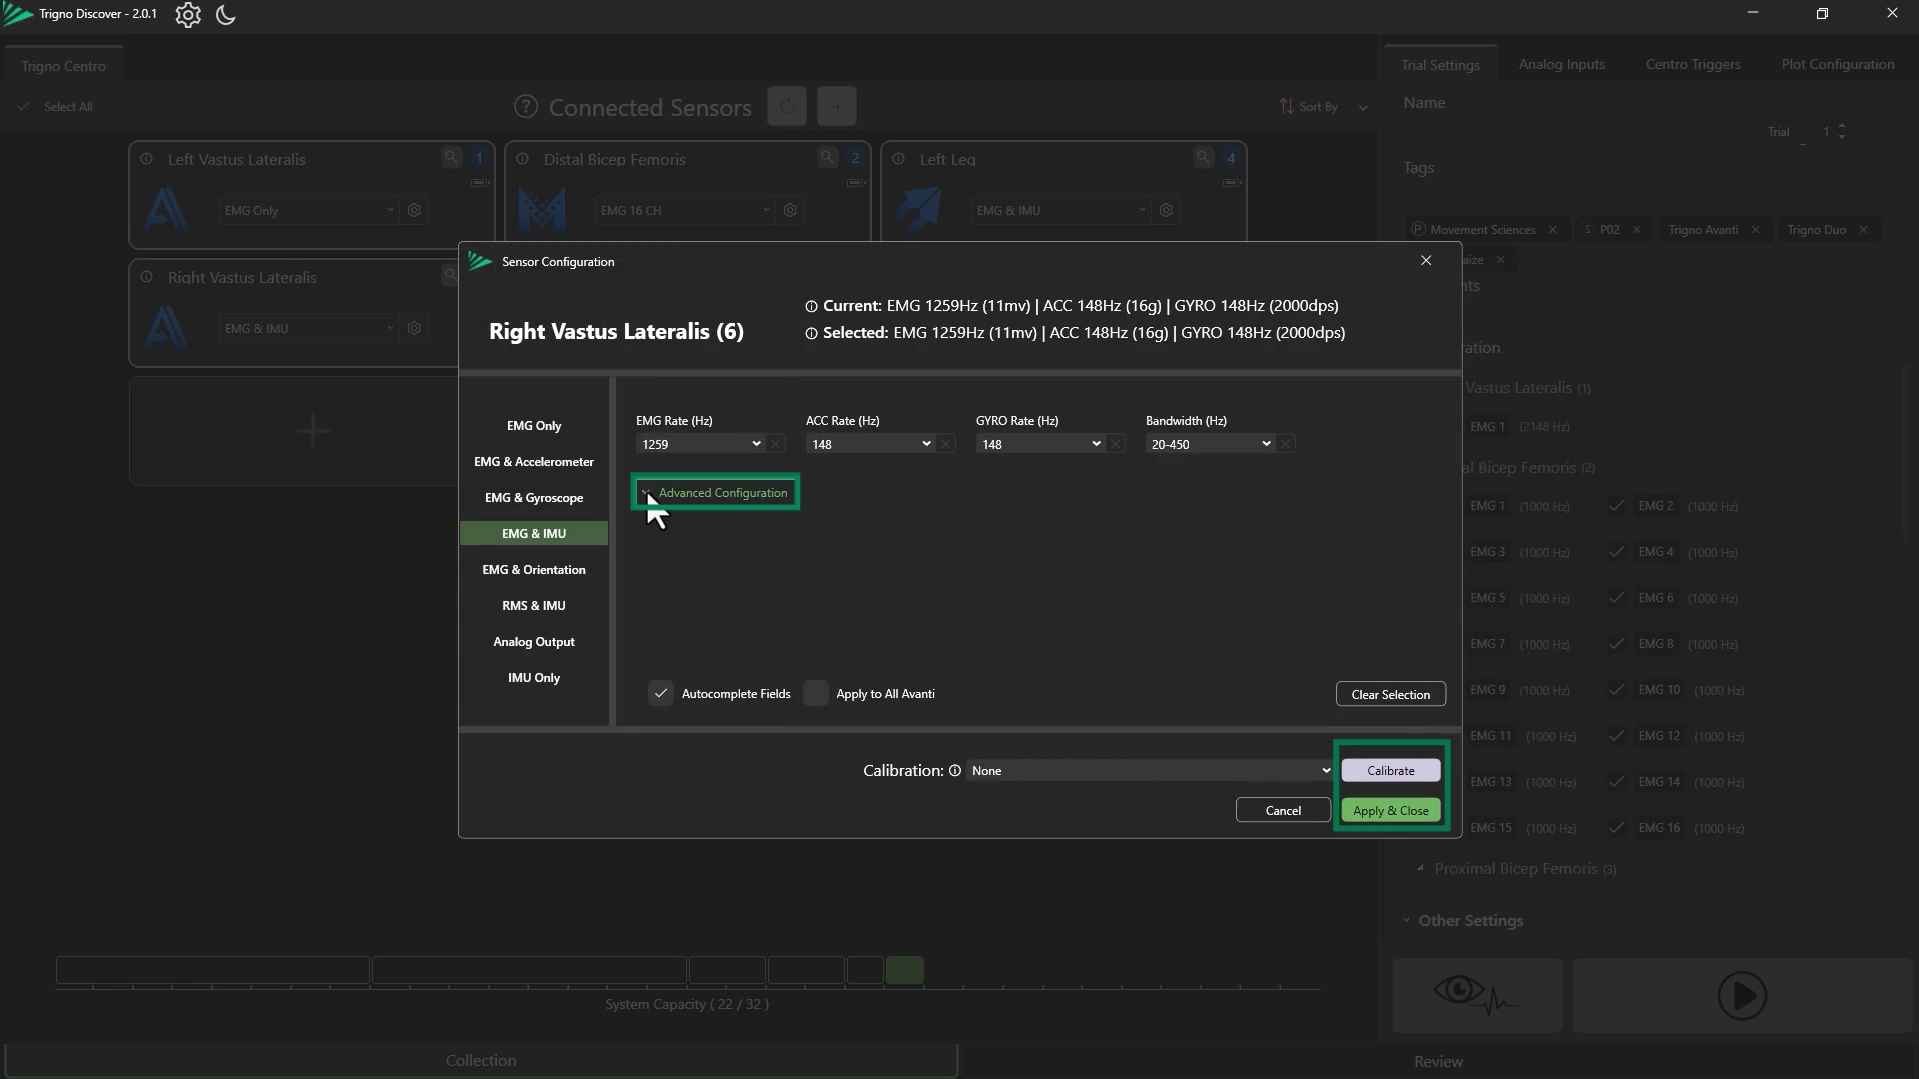
Under “Advanced Configuration”, adjust:
EMG range
IMU range parameters
Apply Configurations
Use the checkbox “Apply to All Avanti” to push settings to all similar sensors.
Click “Apply and Close” to save changes.
Calibration
Click the “Calibrate” button to access calibration options (See the Trigno Discover: MVC Calibration article).
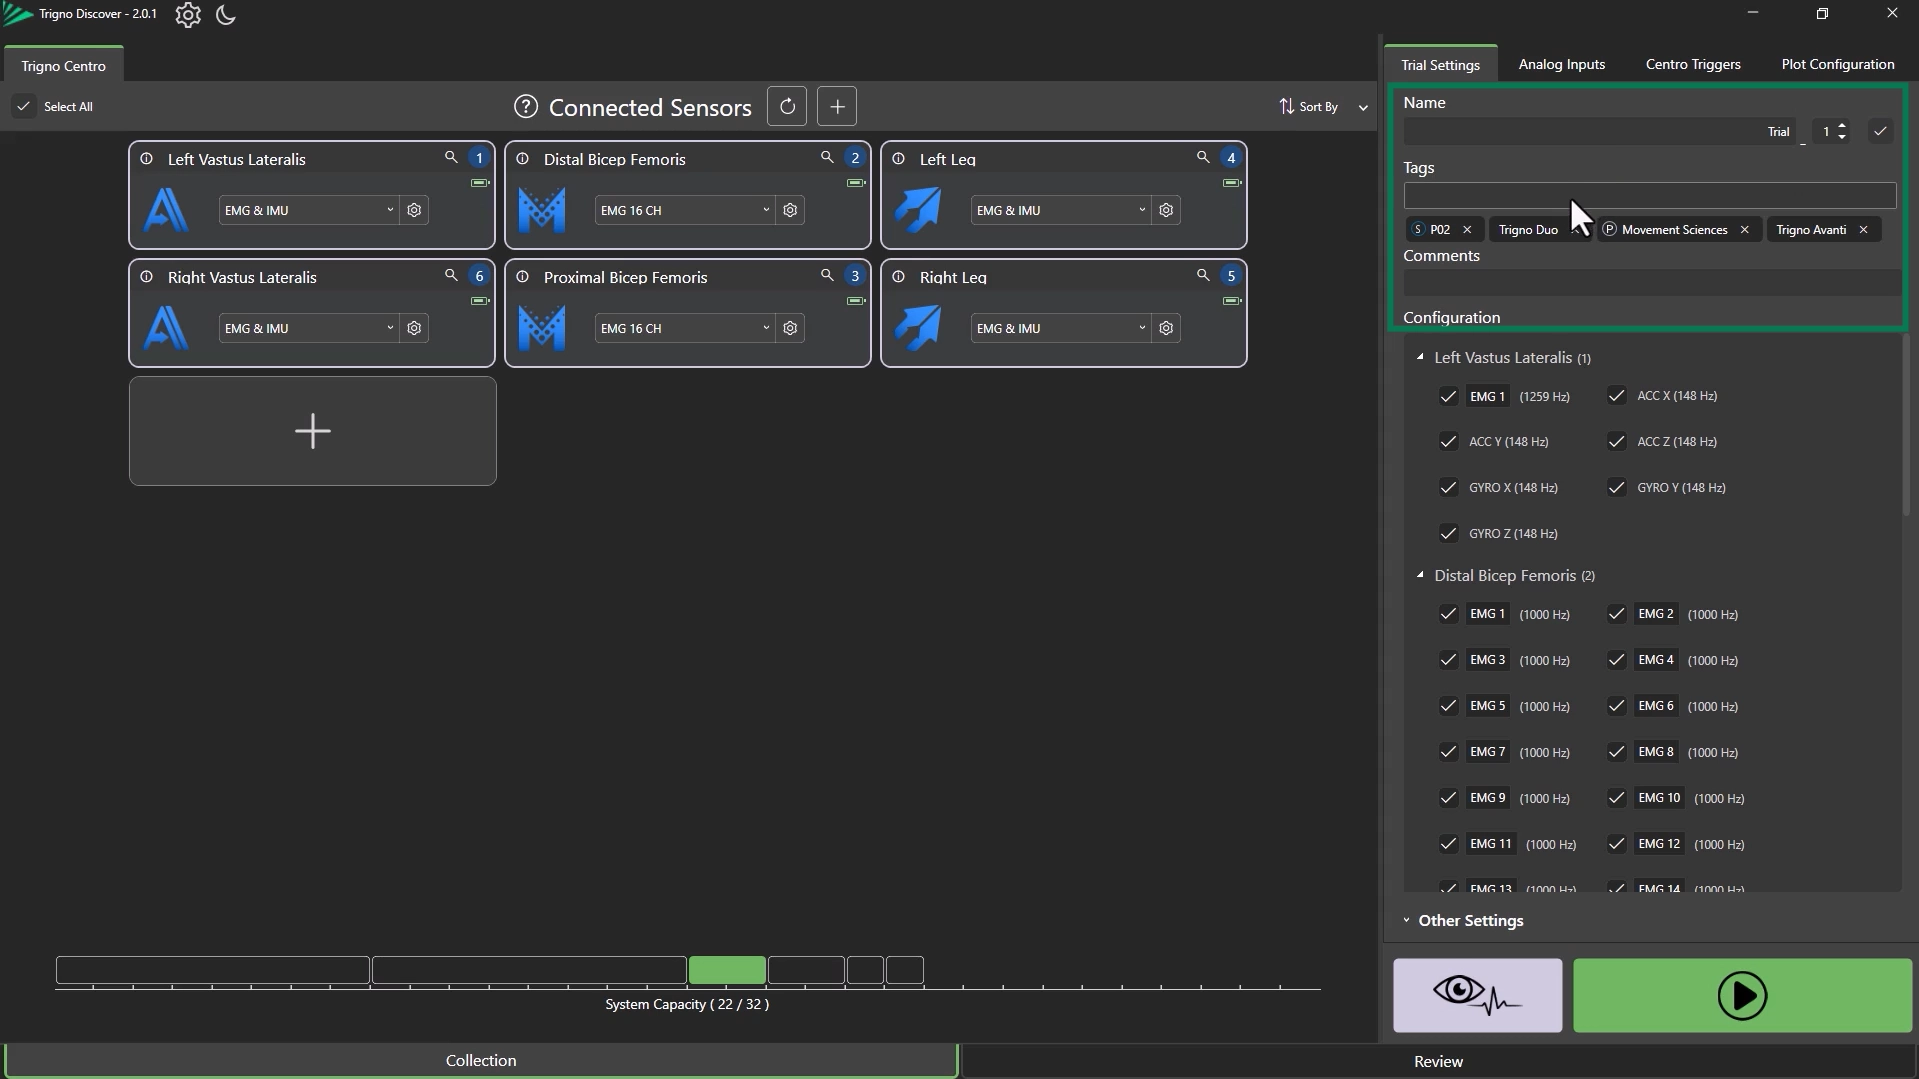
Step 3: Trial Settings
Naming and File Management
Trials can be renamed under Trial Settings.
Enable the checkbox to auto-increment file names after each recording.
Organizing with Tags and Comments
Use Tags for organizing files by project, subject, etc.
Type in the name of the tag and click “Create Tag”.
There is an option to make the tag a Project, Subject, or Other via the drop-down menu.
Add notes in the Comments section (e.g., methodology, conditions).
Channel Selection
Select/deselect channels in the Configuration panel.
Rename EMG Channels, especially for multi-headed sensors.
Important
Only selected channels will be collected and exported.
Deselected channels will not be saved.
Step 4: Timed Collection and Delayed Start
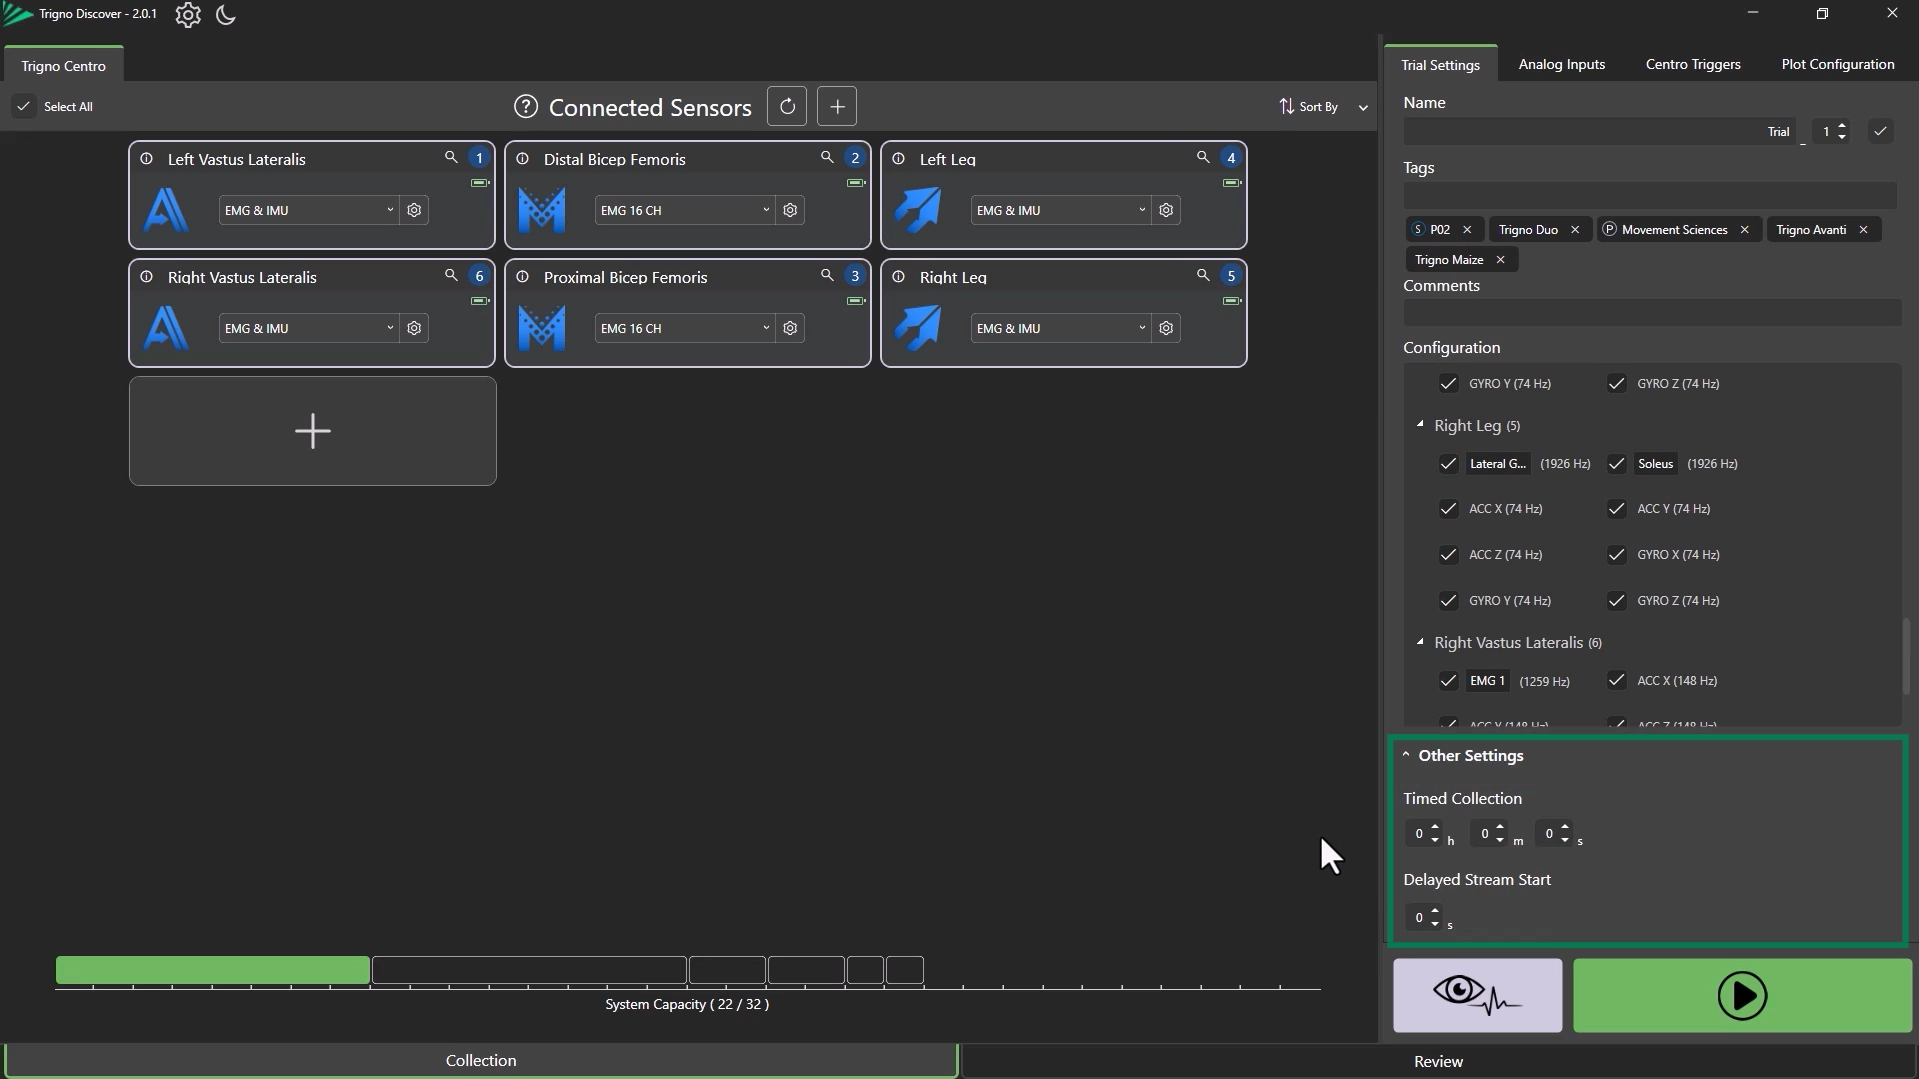
Timed Collection
Under Other Settings, there is the option to set a collection duration (seconds, minutes, hours).
Delayed Stream Start
The option exists to configure a delay time in seconds after starting a collection before data streaming begins.
Step 5: Analog Inputs Configuration (Trigno Centro Only)
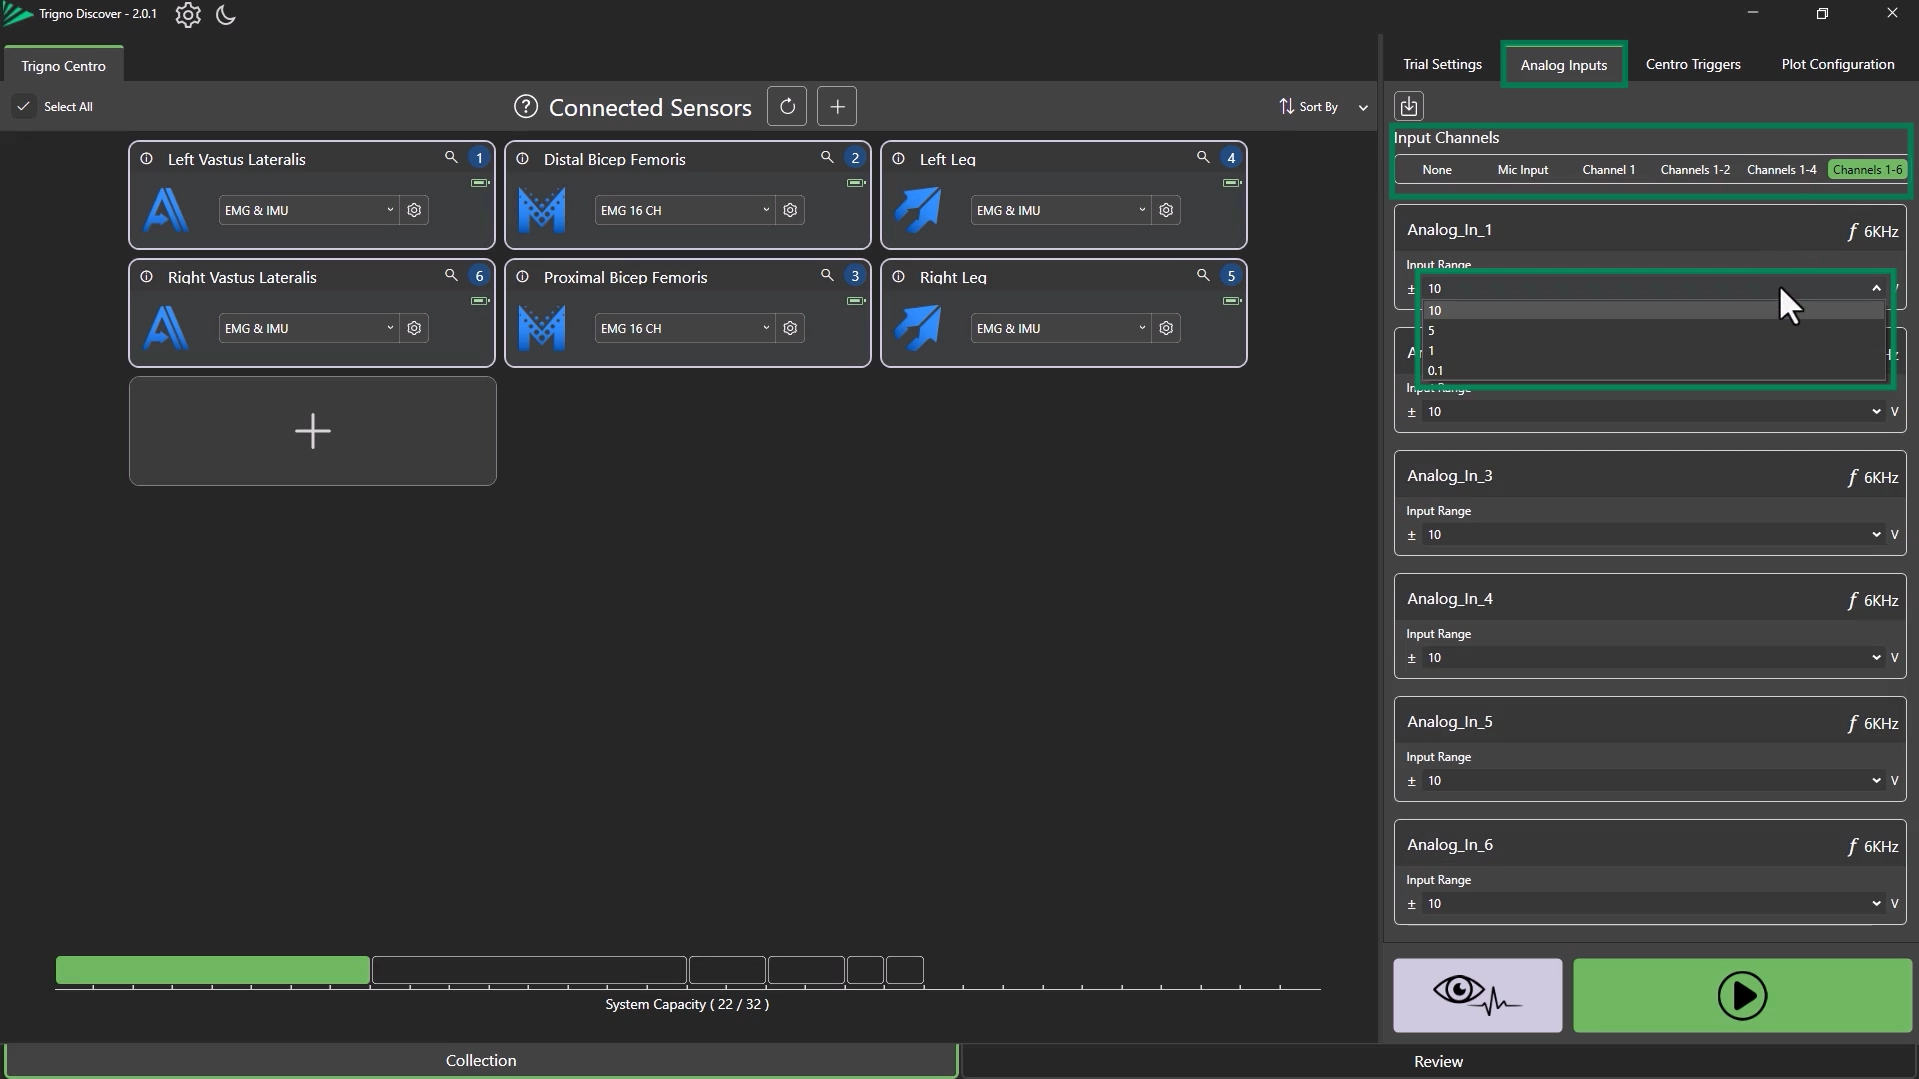
Configuring Analog & Microphone Inputs
Access the Analog Inputs panel.
Set the number of analog channels by selecting the corresponding header.
Adjust voltage input range from dropdown.
Information
Analog and Mic channels collectively can only be configured to a maximum of 48kHz.
Step 6: Centro Trigger Configuration
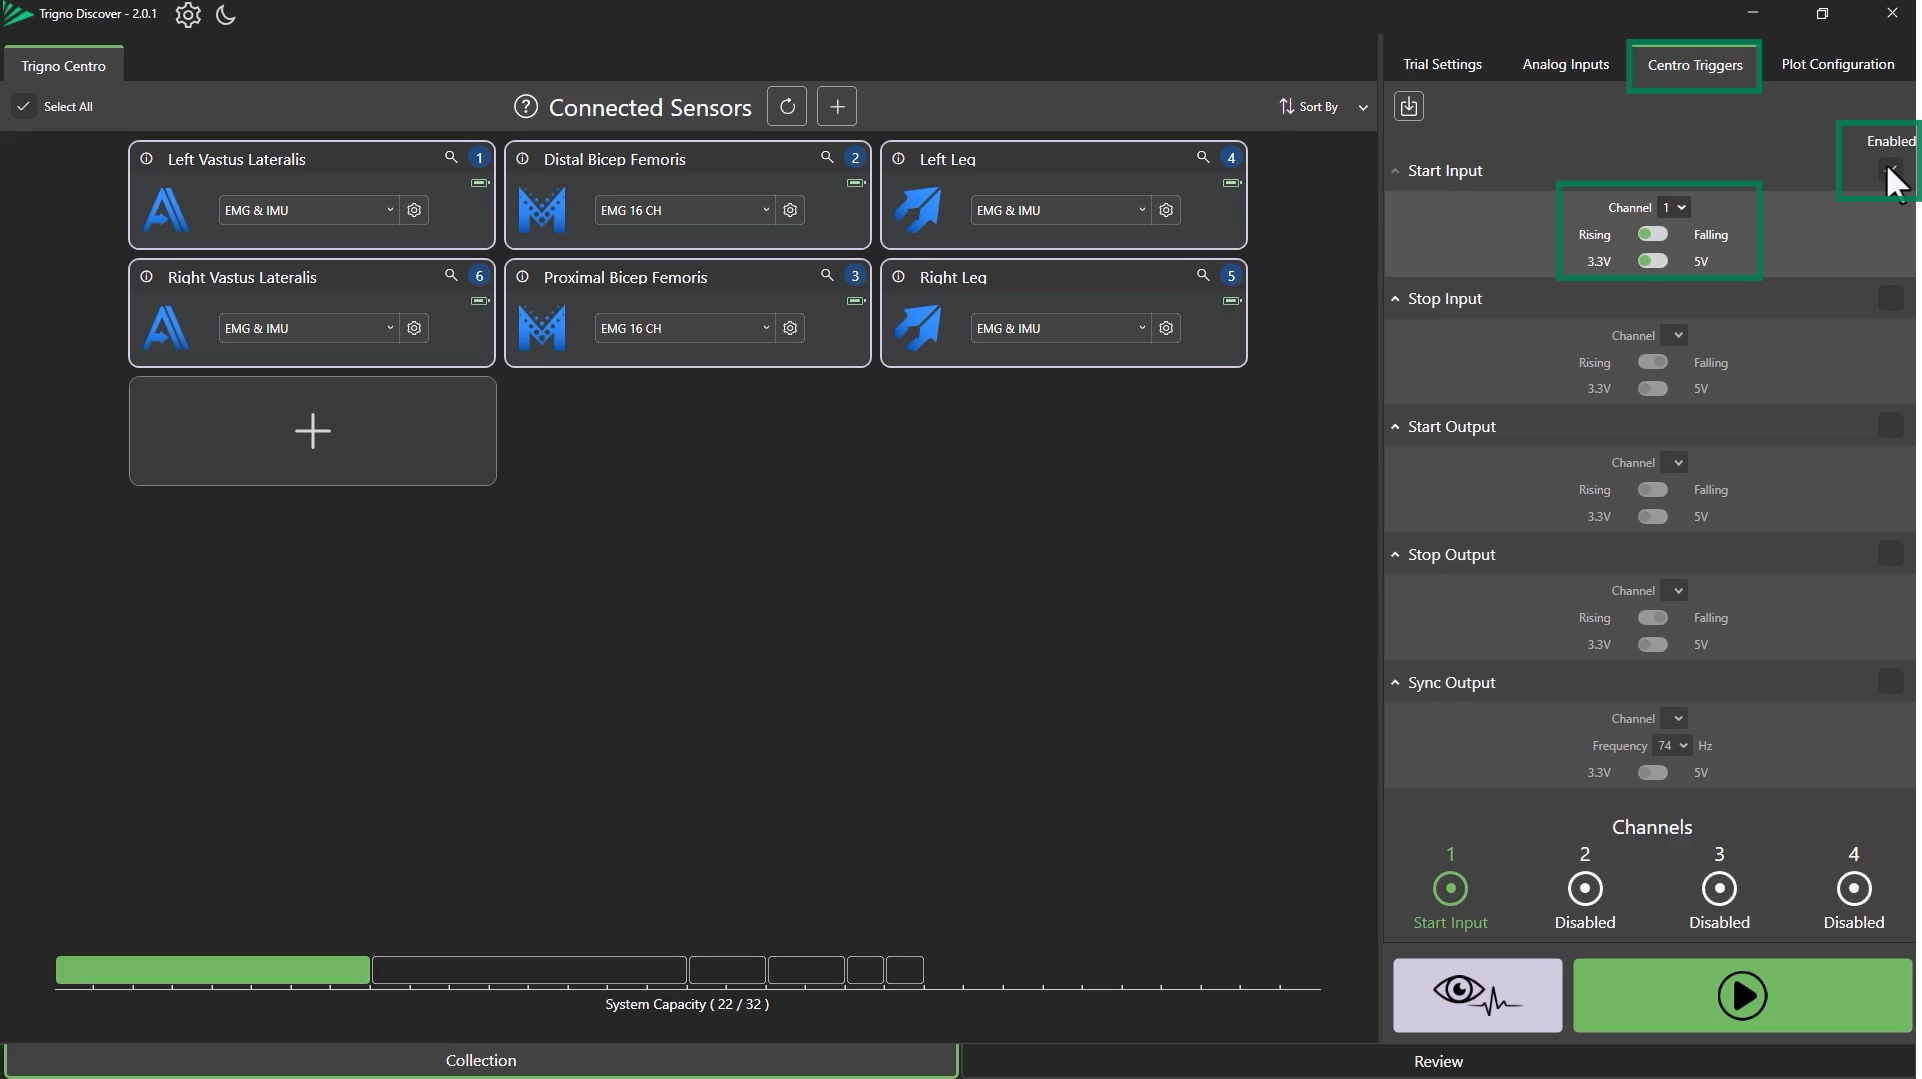
Accessing Centro Triggers
Open the Centro Trigger menu.
Here, input and output start and stop triggers can be configured.
Setting Trigger Options
Enable triggers by checking the box next to each setting.
Configure:
BNC port number
Rising/Falling edge
Pulse voltage
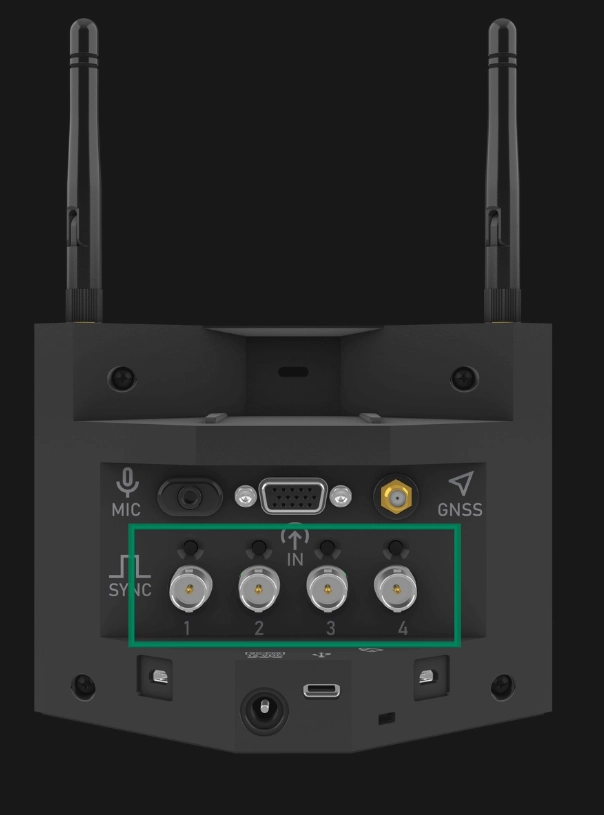
Information
Refer to the Trigno Hardware Overview article to identify BNC port numbers.
Step 7: Plot Configuration
Managing Display Plots
Select/deselect plots of specific channel data in the Plot Configuration panel.
Deselecting a live trace here will hide it during collection, but still save the data for export.
Alternative Display Options
Available visual display types (See Trigno Discover: Biofeedback Displays):
Step 8: Starting a Trial
Finalizing Setup
After all configurations are complete:
Click “Preview Signal” to check signal quality (data will not be saved).
Click “Start Collection” to begin data collection and save the trial to the database.
Information
Ensure all configurations are finalized before selecting “Start Collection”.
Preview is useful for troubleshooting signal quality before a live trial.
For more information on Trigno Discover, please refer to the next article in the Trigno Discover Getting Started Series: Trigno Discover: Database Management.
DOC-666-1-0

