Overview
This guide walks you through the new database system in Trigno Discover 2.0, which simplifies file management, tagging, and data retrieval across projects. Trigno Discover 2.0 introduces a built-in database system for managing and storing all collected Trigno data. Key benefits of this system include:
Centralized storage of all Trigno data in one place.
The ability to use tags for efficient filtering and organization.
Improved searchability within the Review tab, making it easier to locate relevant data quickly.
Organizing data from different projects into their own databases.
You’ll learn how to migrate old files, create and manage databases, apply and filter tags, and perform backups or imports. This ensures an organized workflow and supports collaboration across sessions and users. For a visual walkthrough, please refer to the Trigno Discover video tutorials on Database Management.
Information
This article refers to Trigno Discover version 2.0.1. Please note that the user interface may vary depending on the version you have installed. You can find your current version of Trigno Discover in the top left corner of the application window.
System Requirements
Material/Tool | Description |
|---|---|
Software | Trigno Discover 2.0 + |
Hardware: System | Trigno Centro; Trigno Lite; Trigno Research Base Station |
Firmware: System | Trigno Centro: 06-05-00 | 04-01 + Trigno Lite: 02-02 + Trigno Research Base Station: Digital: 2919 | 1506 | 0806 | 2008 | 0000 Analog: 2919| 1506 | 0806 | 2008| 0901 |
Hardware: Sensors | Avanti-Style Sensors |
Firmware: Sensors | Avanti-Style Sensor: 40-49 Maize Sensor: 60-29 |
Operating System | Windows 11 |
PC Specifications |
|
Step-by-Step Instructions
Step 1: Migrating Existing Data (First-Time Use)
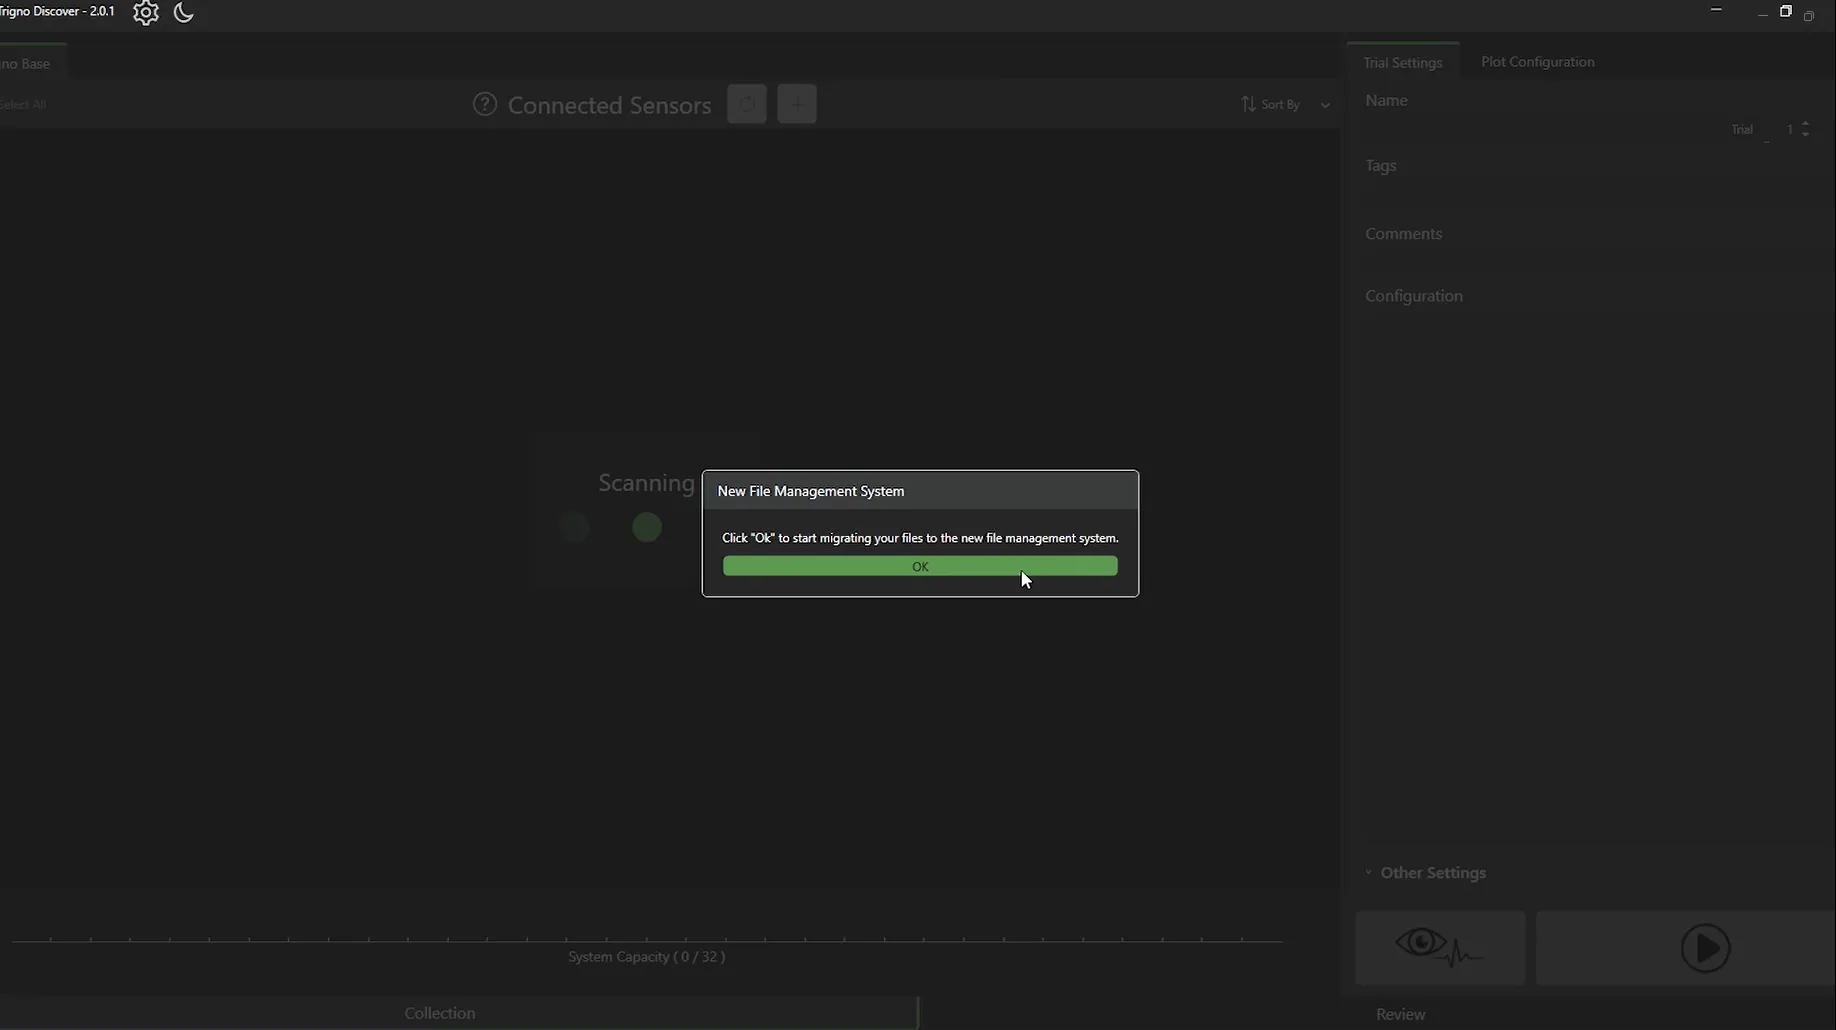
Migration Prompt
On first launch, a prompt will appear to convert old Trigno Discover data to the new database format.
. Migration Process
If accepted:
All previous Trigno Discover data is copied into the new database.
Existing file metadata (e.g., trial names, tags) is preserved.
If denied:
Previously collected Trigno Discover files will not be copied over. You can import them manually using the 'Import' button in the database.
Important
The migration prompt will appear only if the user has previously collected data using Trigno Discover 1.7 or lower. This notification will be shown only once, upon the first launch of Trigno Discover 2.0 after installation
Step 2: Accessing & Creating Databases
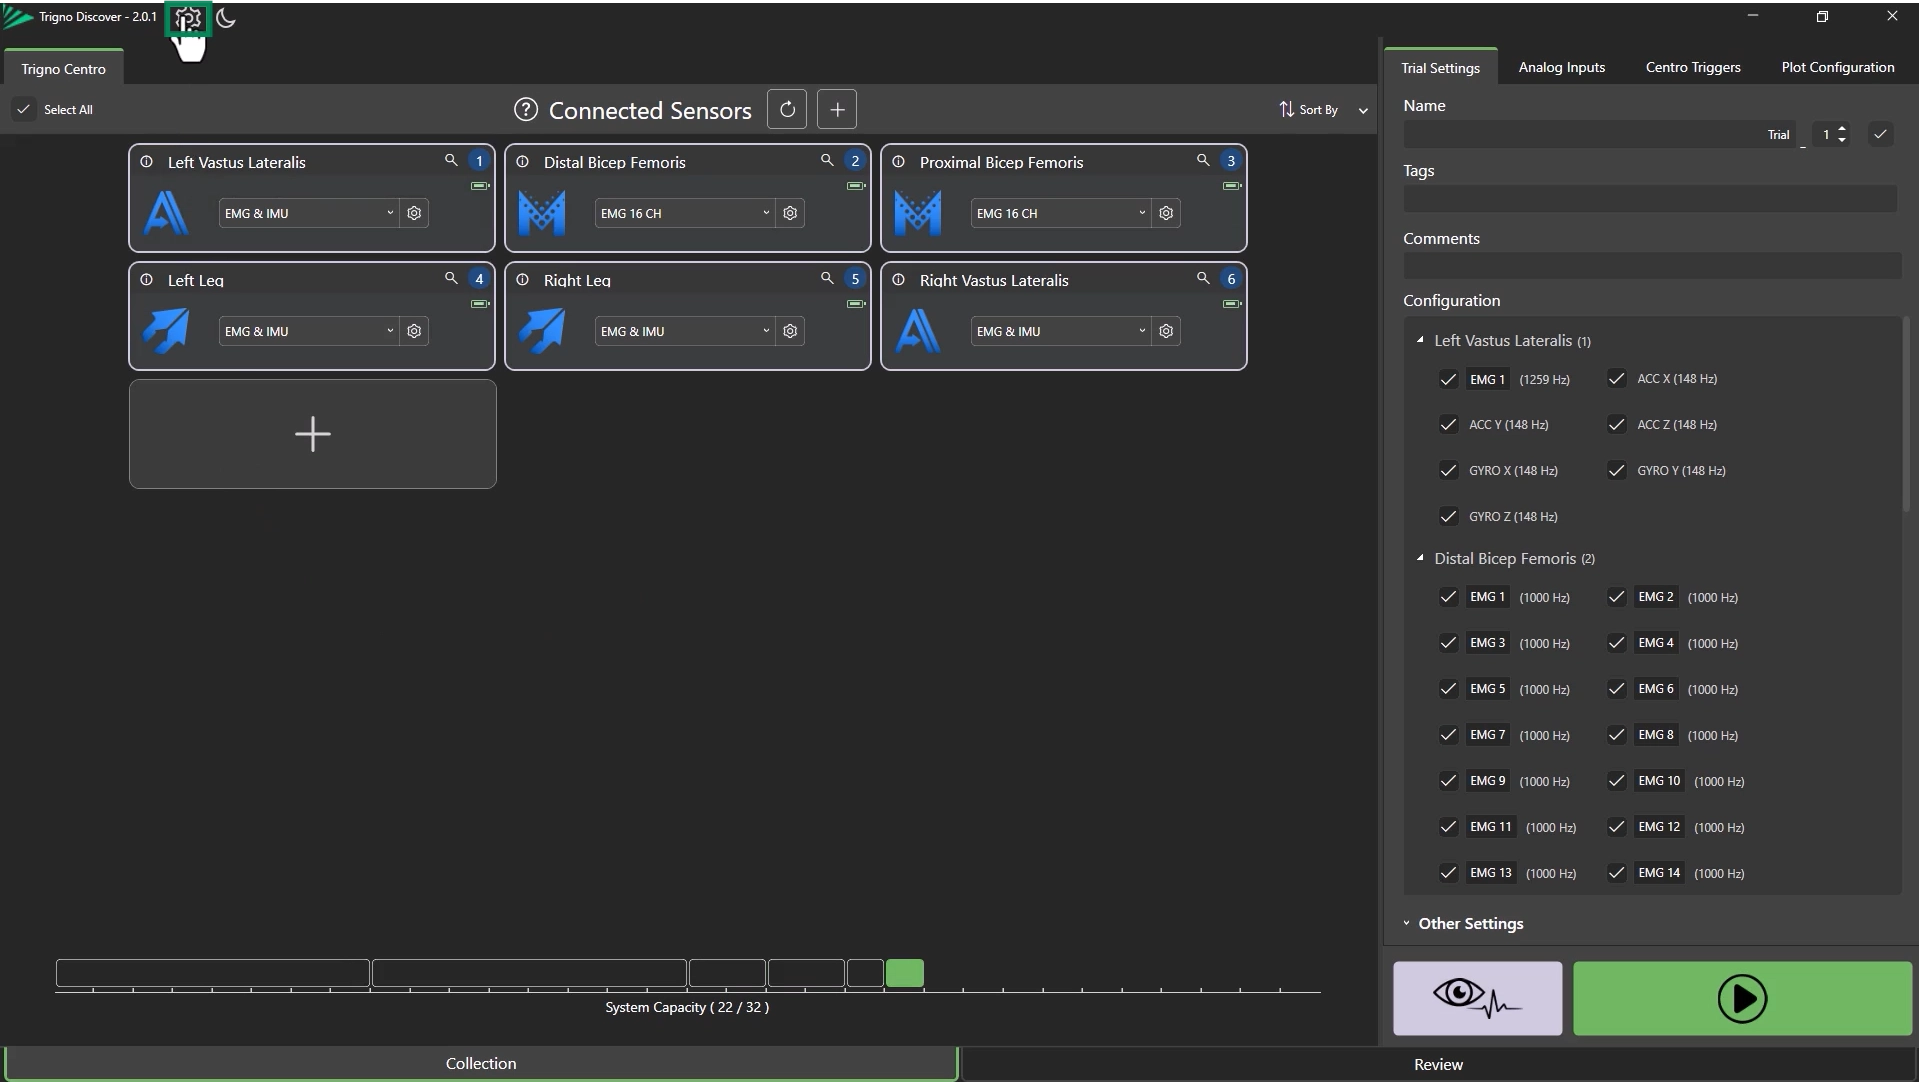
Accessing the Database Panel
Click the Settings Icon in the top left corner, then open the Database tab.
A default database will already exist.
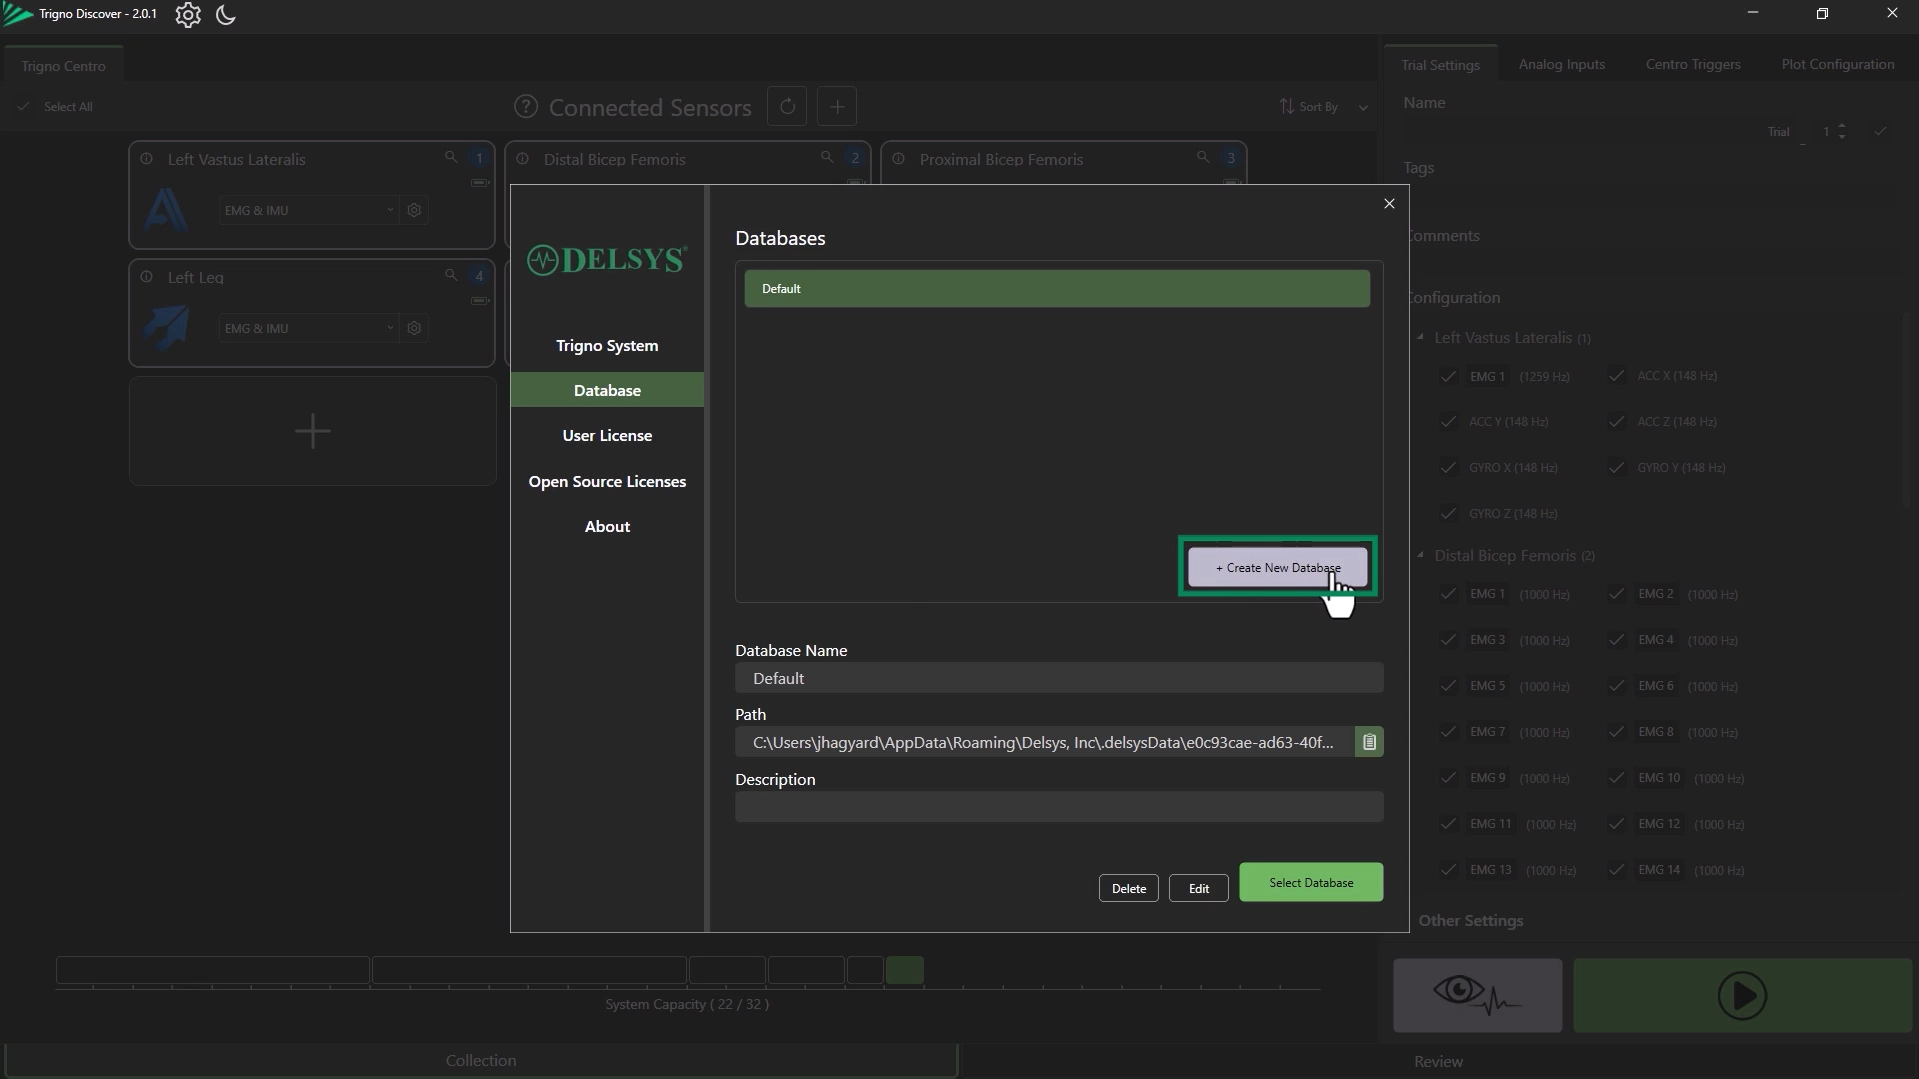
Creating a New Database
Click “Create New Database”
Enter:
Database Name
File Location
Optional Description
Click “Create Database”.
Select the newly created database from the list.
Managing Existing Databases
You can edit or delete databases using the buttons at the bottom of the panel.
Important
Deleting a database will permanently delete all trial data within it.
Information
A new folder will need to be created in your directory to save the database. Otherwise, an error message saying “This must be an empty directory” will be displayed.
Step 3: Using Tags for Organization
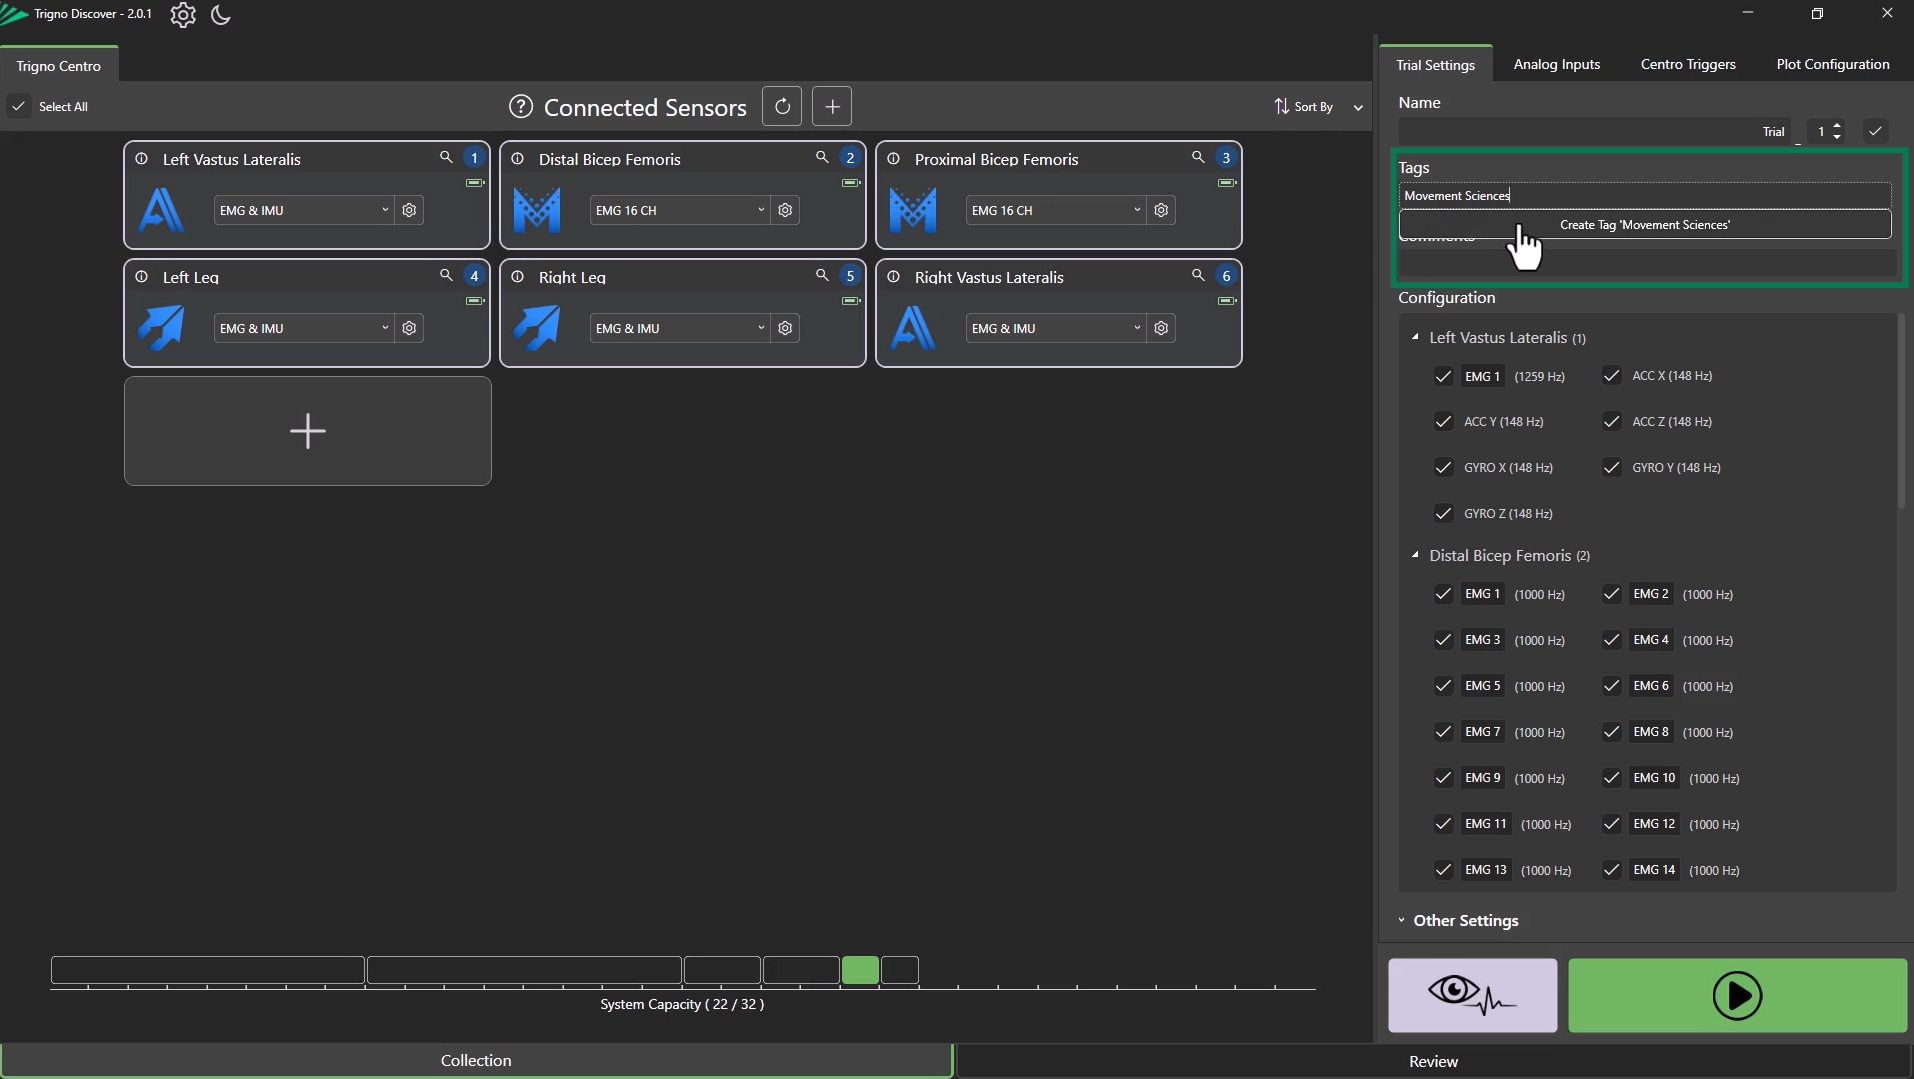
Adding Tags During Data Collection
In the Trial Settings panel, add tags for:
Project
Subject
Other (custom use)
Tags are saved and exported for easy reuse in future sessions. Tags can also be searched in the review pane.
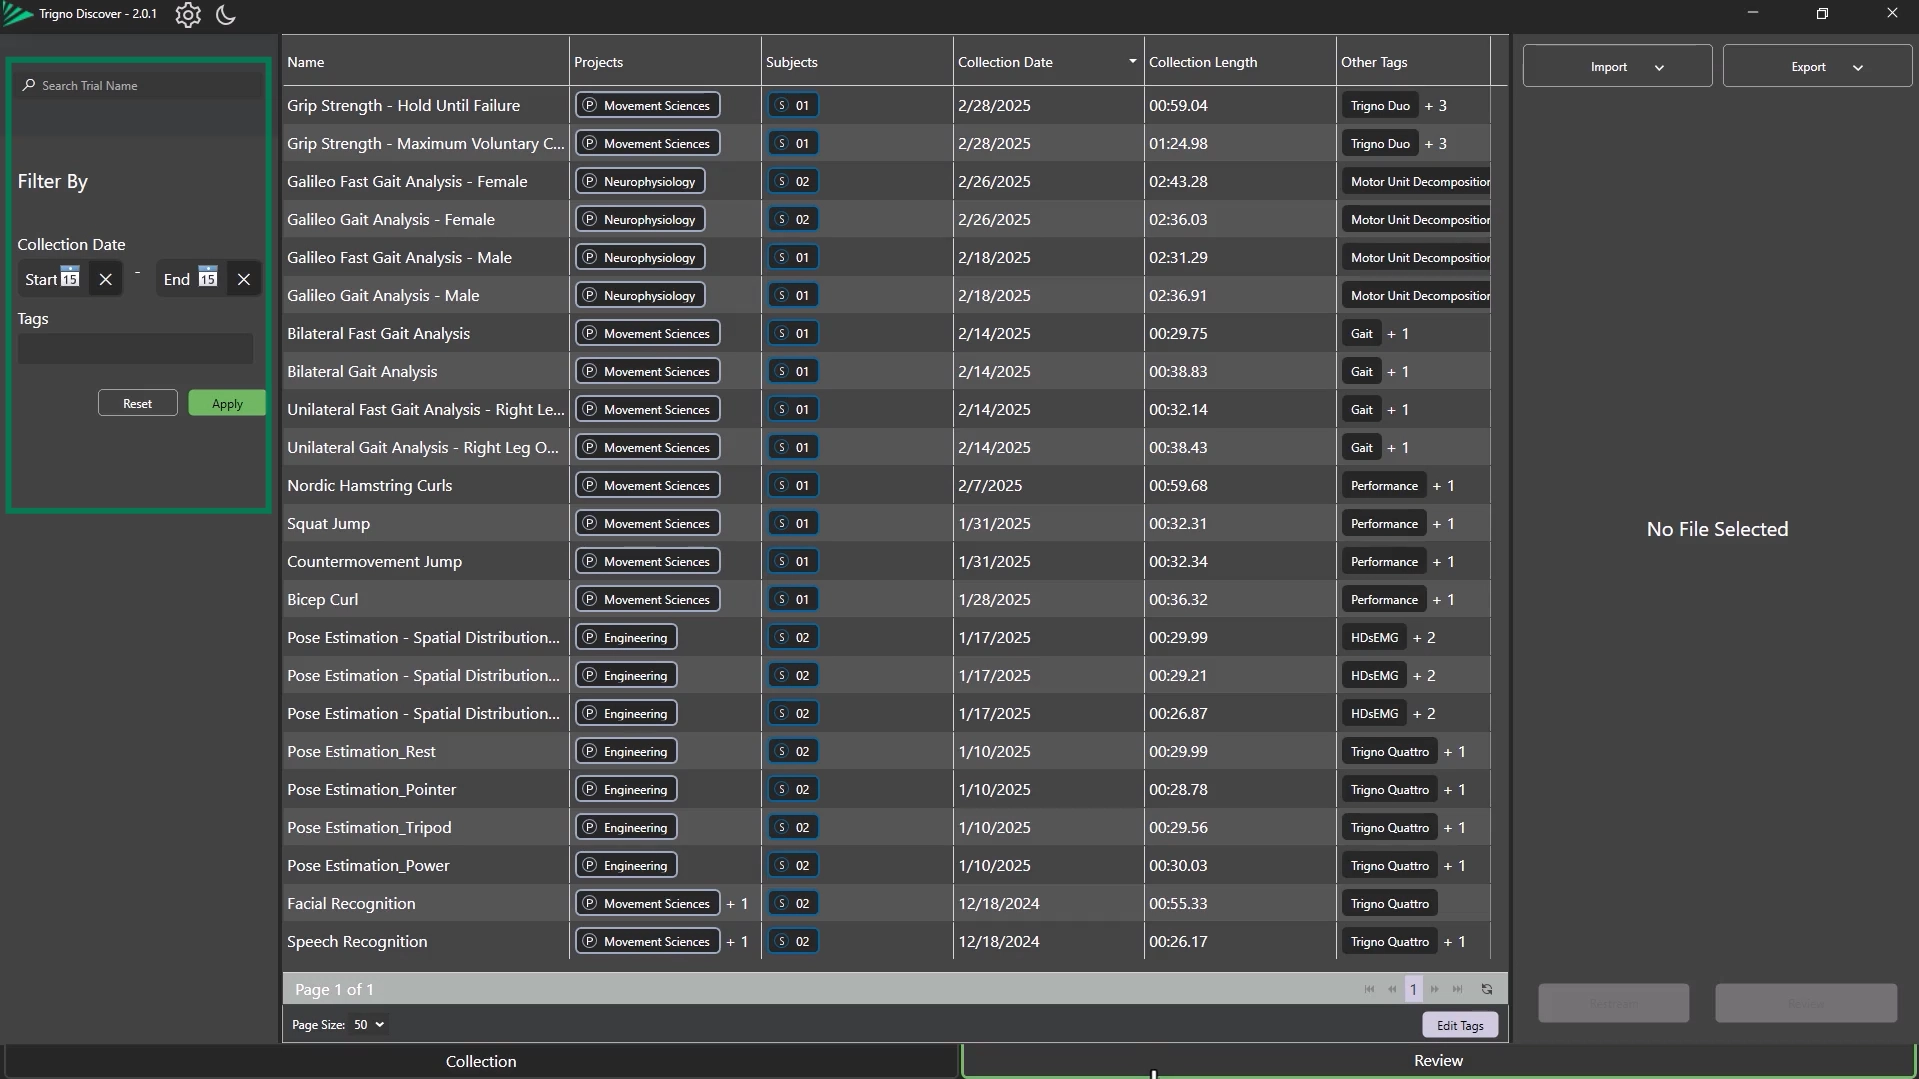
Filtering & Searching Trials
In the Review Tab in the lower left corner, filter trials by:
Tag category (Project, Subject, Other)
Date range
Trial name (search in the lookup field)
Click “Reset” to remove all filters and show all available data.
Step 4: Viewing and Sorting Trial Data
Trials are listed by default in descending date order (newest first).
You can reorder trials by clicking column headers:
Collection length
Trial name
Date
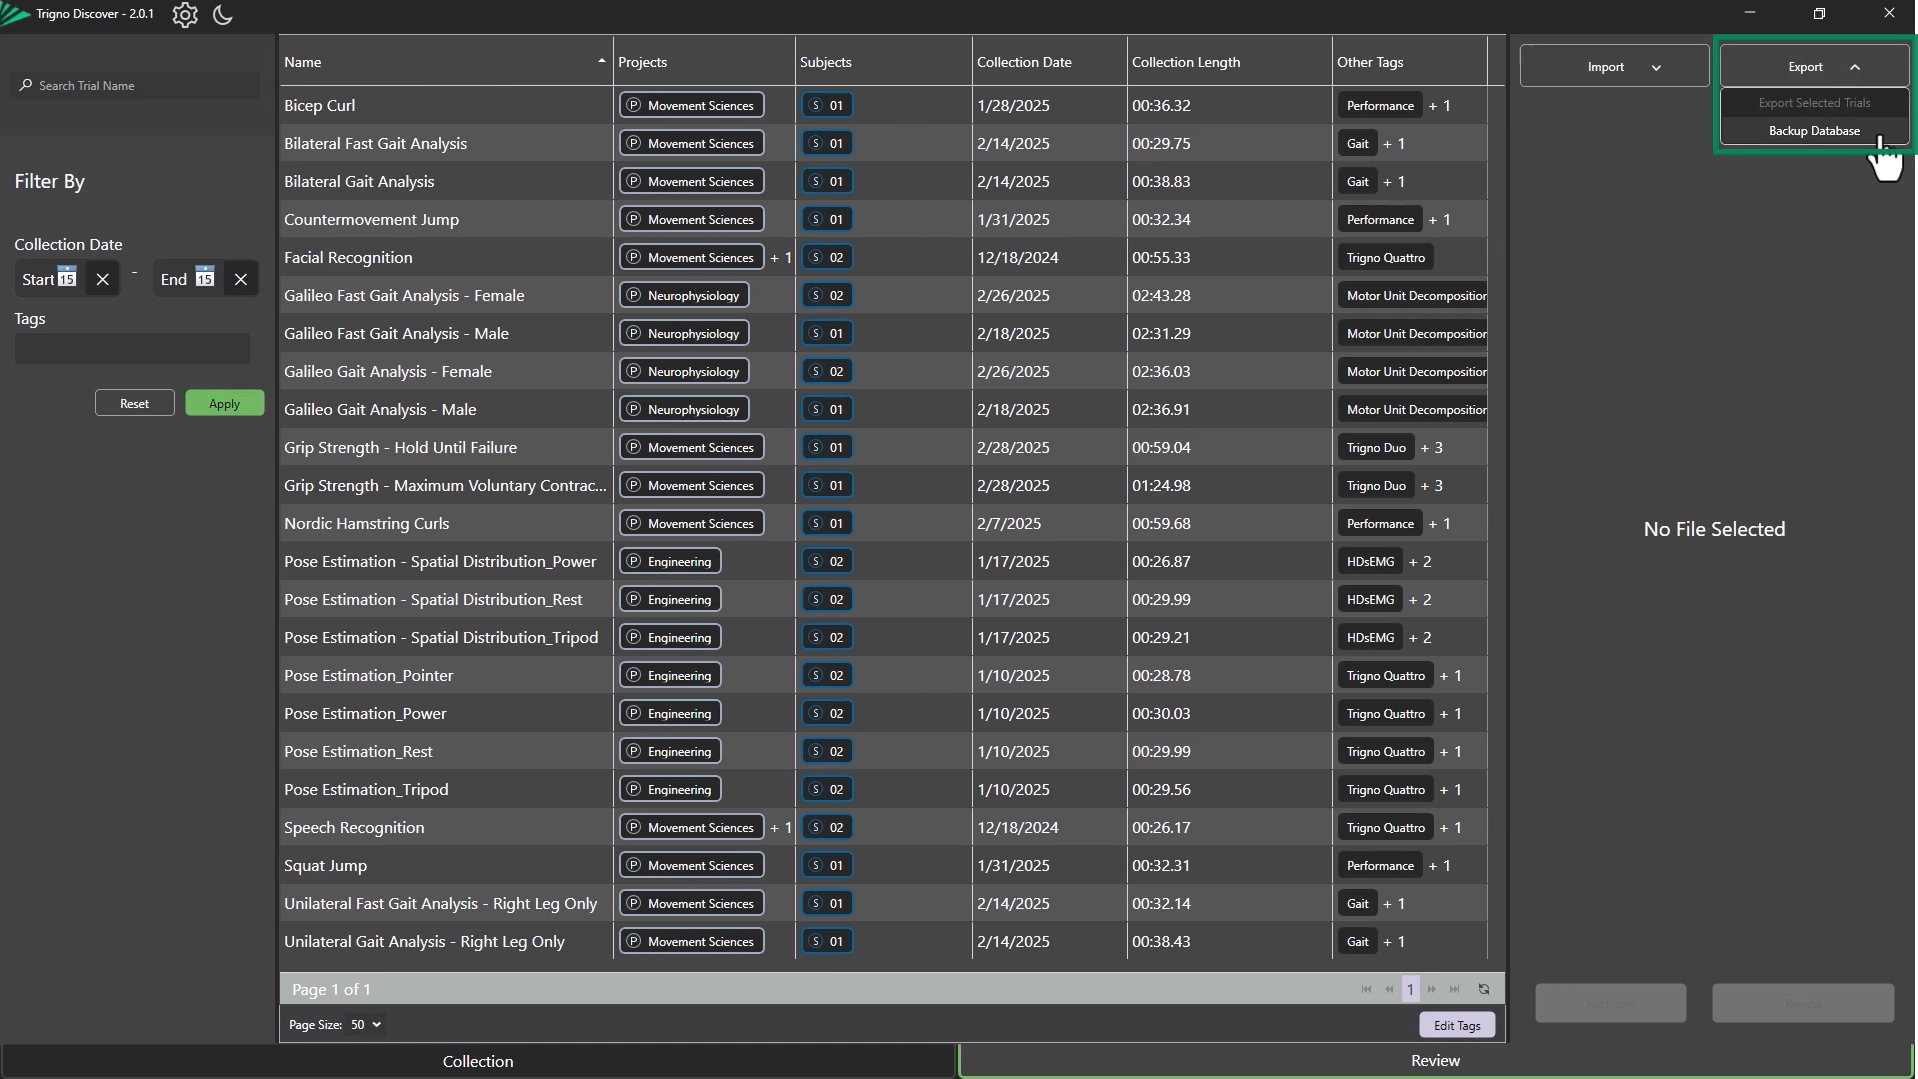
Step 5: Backing Up the Entire Database
Go to the Export dropdown and choose “Backup Database”.
A .DELSYS file is created, containing all trial data from the database.
This file can be shared or imported into another user’s Trigno Discover setup (See the Trigno Discover Getting Started: Advanced Data Export article).
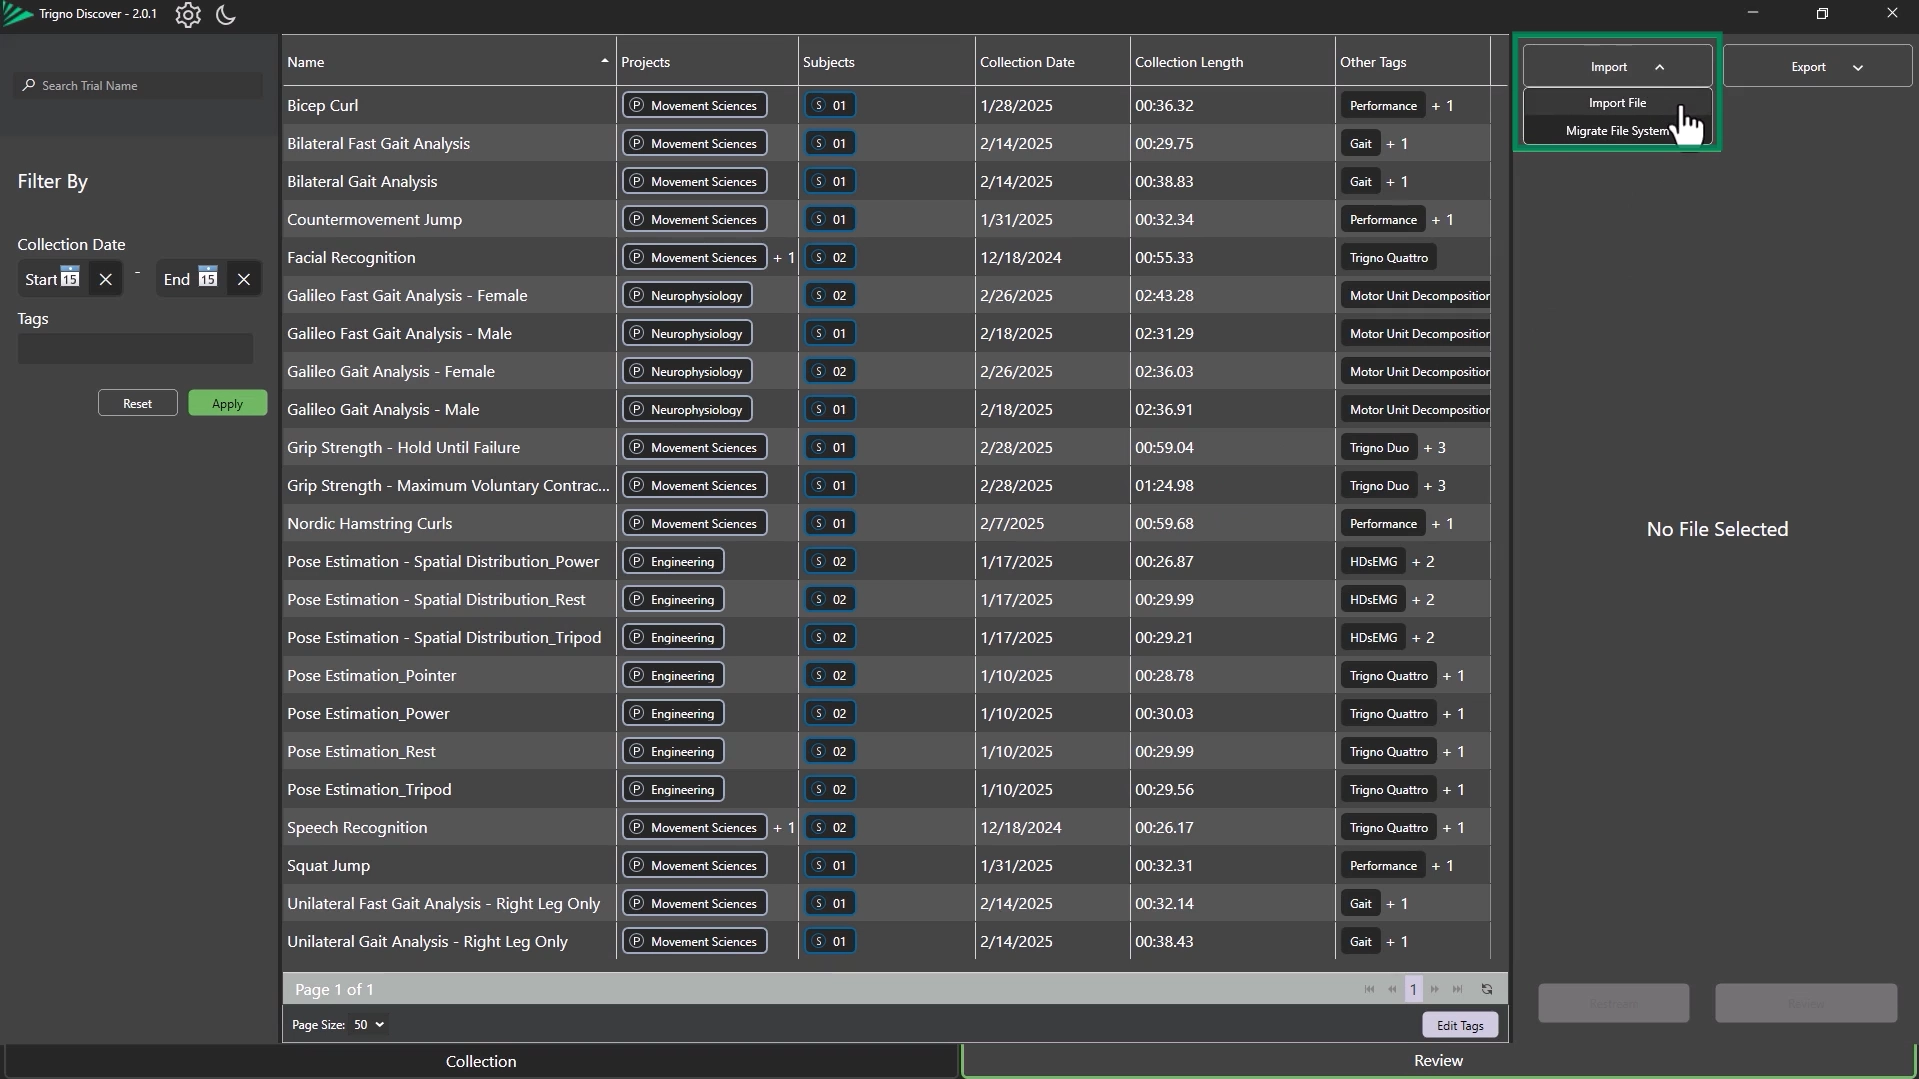
Step 6: Importing Files and Databases
Use the Import dropdown to:
Import individual trial files
Import entire databases ( .DELSYS or .SHPF files)
All metadata (tags, properties) will be retained during import
Information
Only a .DELSYS and .shpf files can be imported into the Trigno Discover database.
Step 7: Editing and Managing Tags
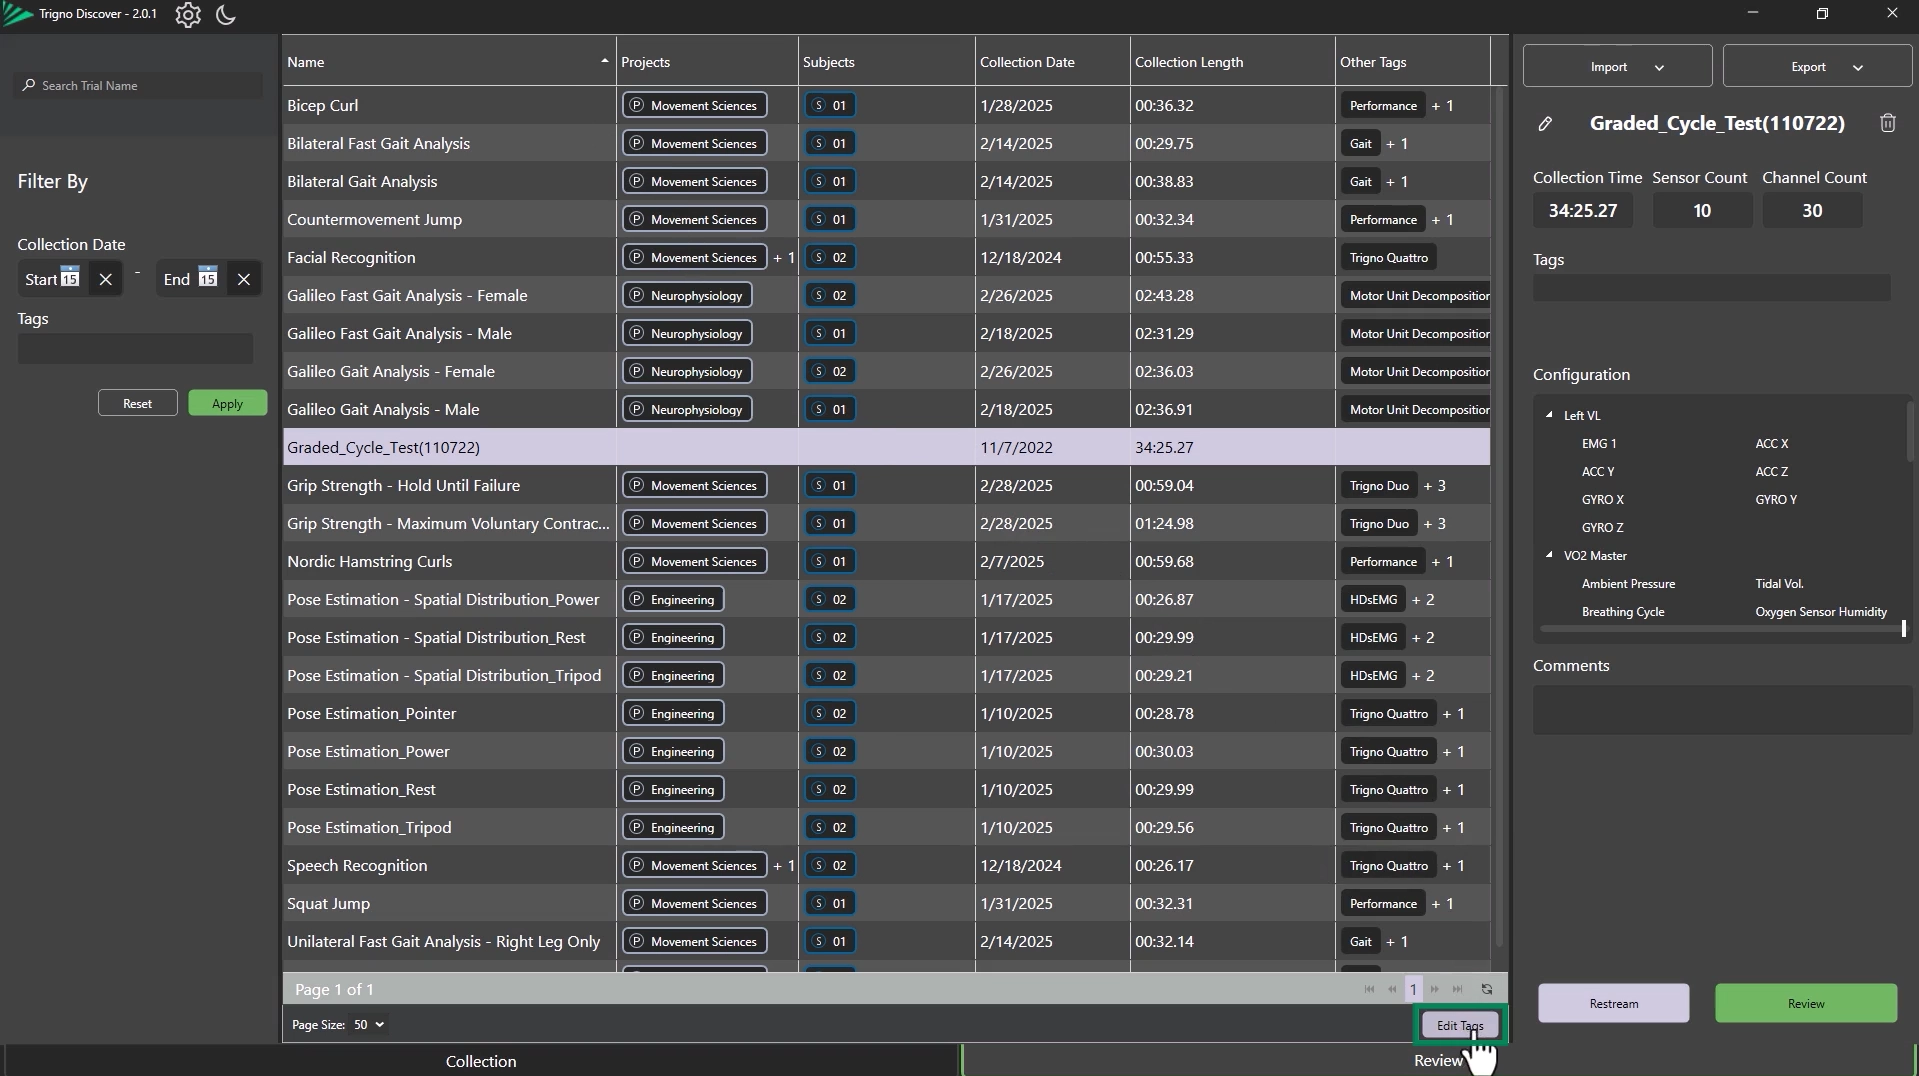
Editing Existing Tags
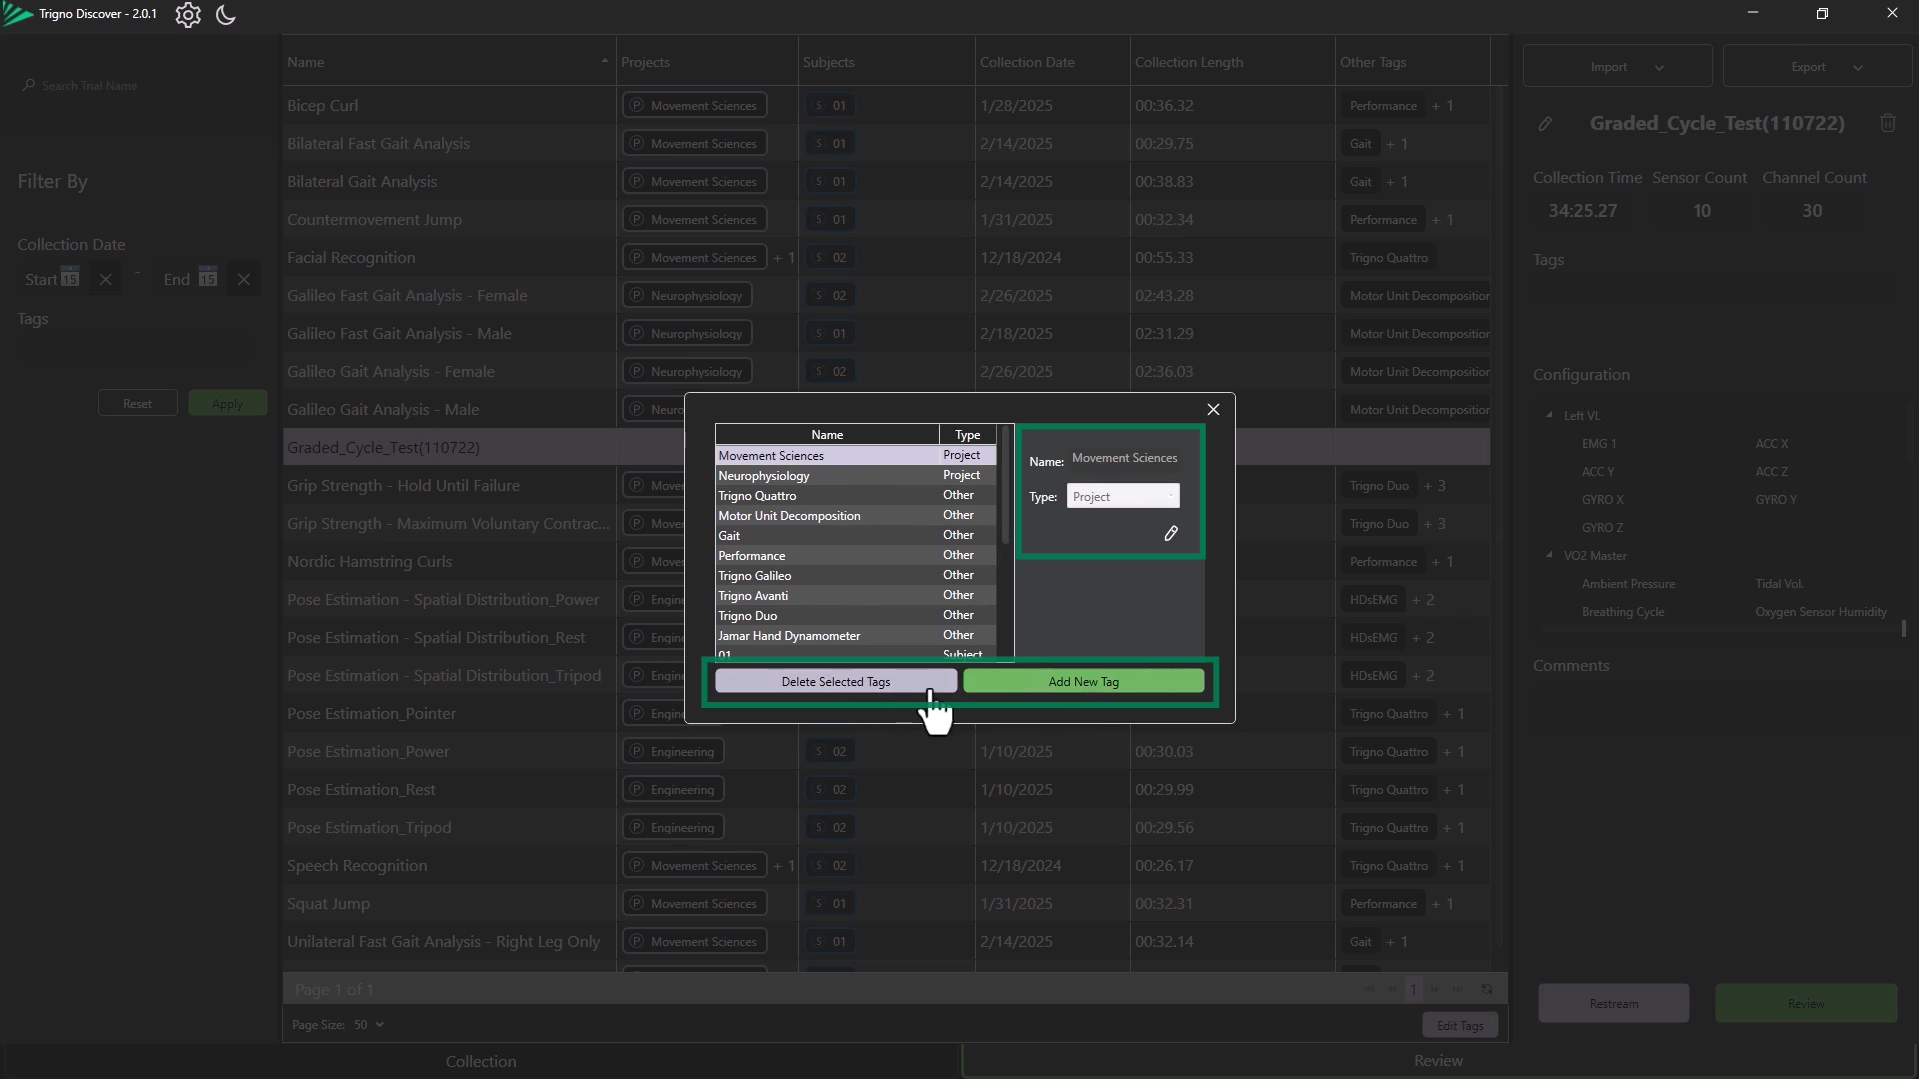
Click Edit Tags in the lower right corner.
Choose a tag and click the pen icon to:
Rename it
Change its category (Project, Subject, Other)
Delete it
All changes will automatically apply to all associated trials.
Creating New Tags
From the same menu, click “Add New Tag”
Assign it a name and category — it will now be available during trial creation.
Information
Edits made to tags are retroactively applied to all associated trials.
For more information on Trigno Discover, please refer to the next article in the Trigno Discover Getting Started Series: Trigno Discover: MVC Calibration.
DOC-667-1-0
