Overview
This guide walks you through performing an MVC (Maximum Voluntary Contraction) calibration in Trigno Discover to normalize EMG signals and express muscle activity as a percentage of maximum effort. You’ll learn how to access and configure the calibration interface, define contraction protocols, and run a guided sequence of muscle contractions. The guide also covers applying calibrations to sensors and viewing real-time EMG output as a percentage of MVC. This process ensures accurate, repeatable data comparison across sessions and subjects, and between muscles. Auxiliary sensors can be calibrated using either the manual or collected options within the Calibration module of Trigno Discover. However, this article will specifically walk through the MVC calibration process. For a visual walkthrough, please refer to the Trigno Discover video tutorials on MVC Calibration.
Information
This article refers to Trigno Discover version 2.0.1. Please note that the user interface may vary depending on the version you have installed. You can find your current version of Trigno Discover in the top left corner of the application window.
Trigno Discover Getting Started Video Tutorial: MVC Calibration
System Requirements
Material/Tool | Description |
|---|---|
Software | Trigno Discover 2.0 + |
Hardware: System | Trigno Centro; Trigno Lite; Trigno Research Base Station |
Firmware: System | Trigno Centro: 06-05-00 | 04-01 + Trigno Lite: 02-02 + Trigno Research Base Station: Digital: 2919 | 1506 | 0806 | 2008 | 0000 Analog: 2919| 1506 | 0806 | 2008| 0901 |
Hardware: Sensors | Avanti-Style Sensors |
Firmware: Sensors | Avanti-Style Sensor: 40-49 Maize Sensor: 60-29 |
Operating System | Windows 11 |
PC Specifications |
|
Step-by-Step Instructions
Step 1: Accessing Calibration Settings
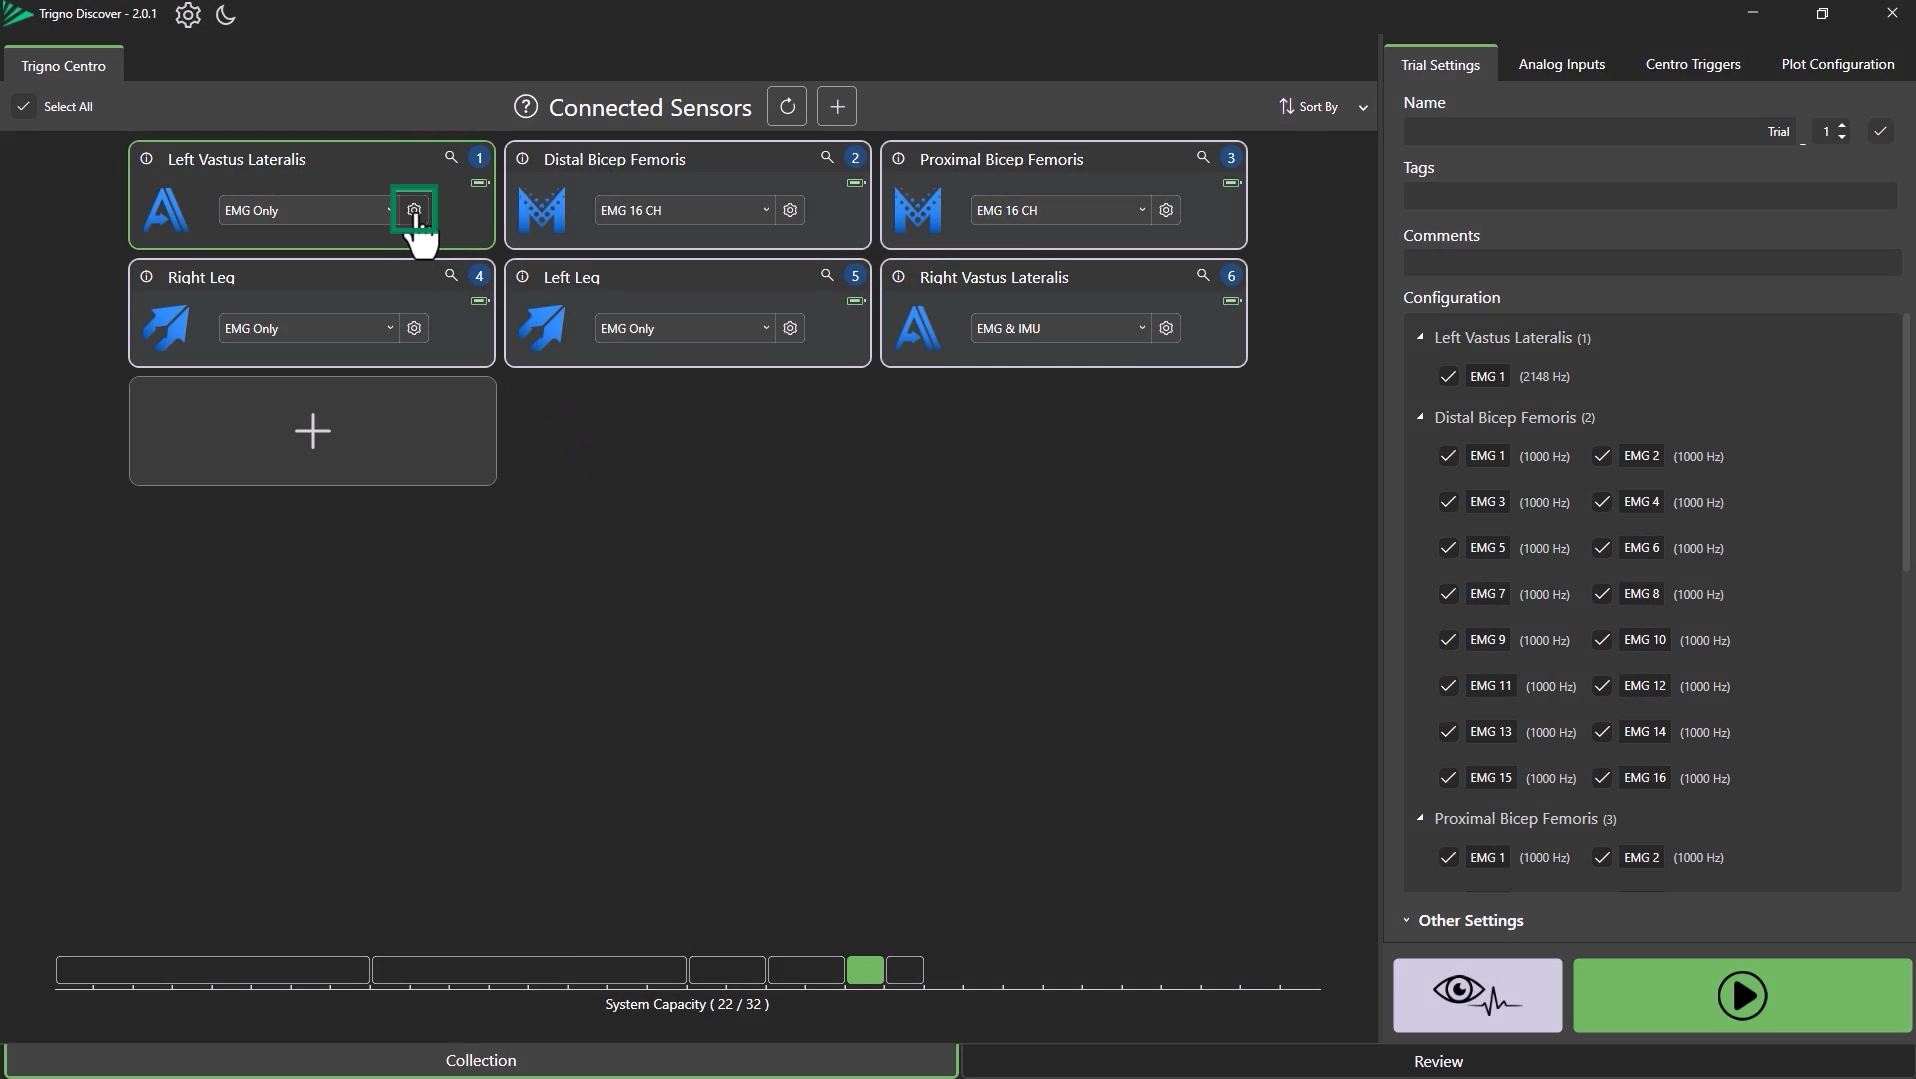
Open the Sensor Settings Panel
Navigate to the Sensor Settings Icon of the sensor you wish to calibrate.
Calibration only applies to:
The selected sensor
The current configuration mode selected
Information
Calibrations are sensor-specific. Switching sensors or modes requires a new calibration.
Step 2: Starting an MVC Calibration
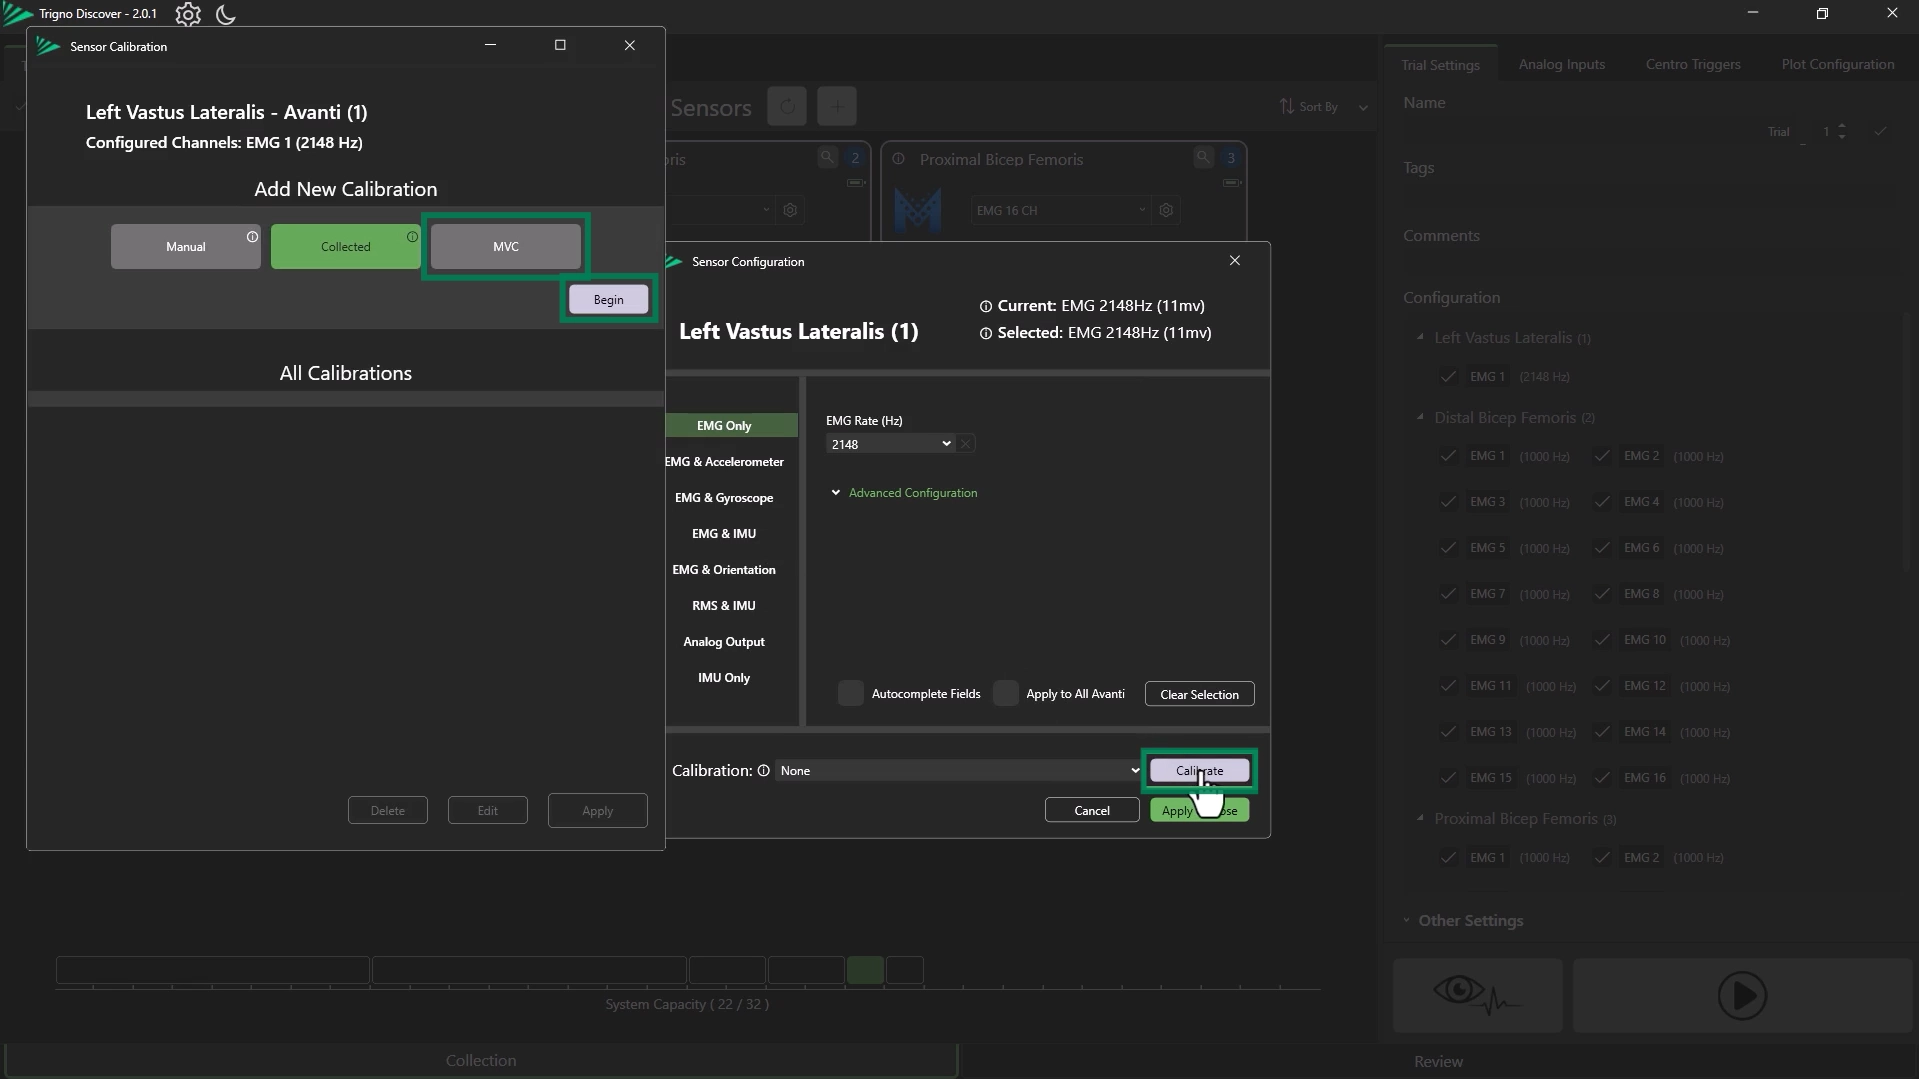
Launch the Calibration Window
Click “Calibrate” to open the Sensor Calibration panel.
Choose MVC Calibration
Select MVC Calibration from the options.
Click “Begin”.
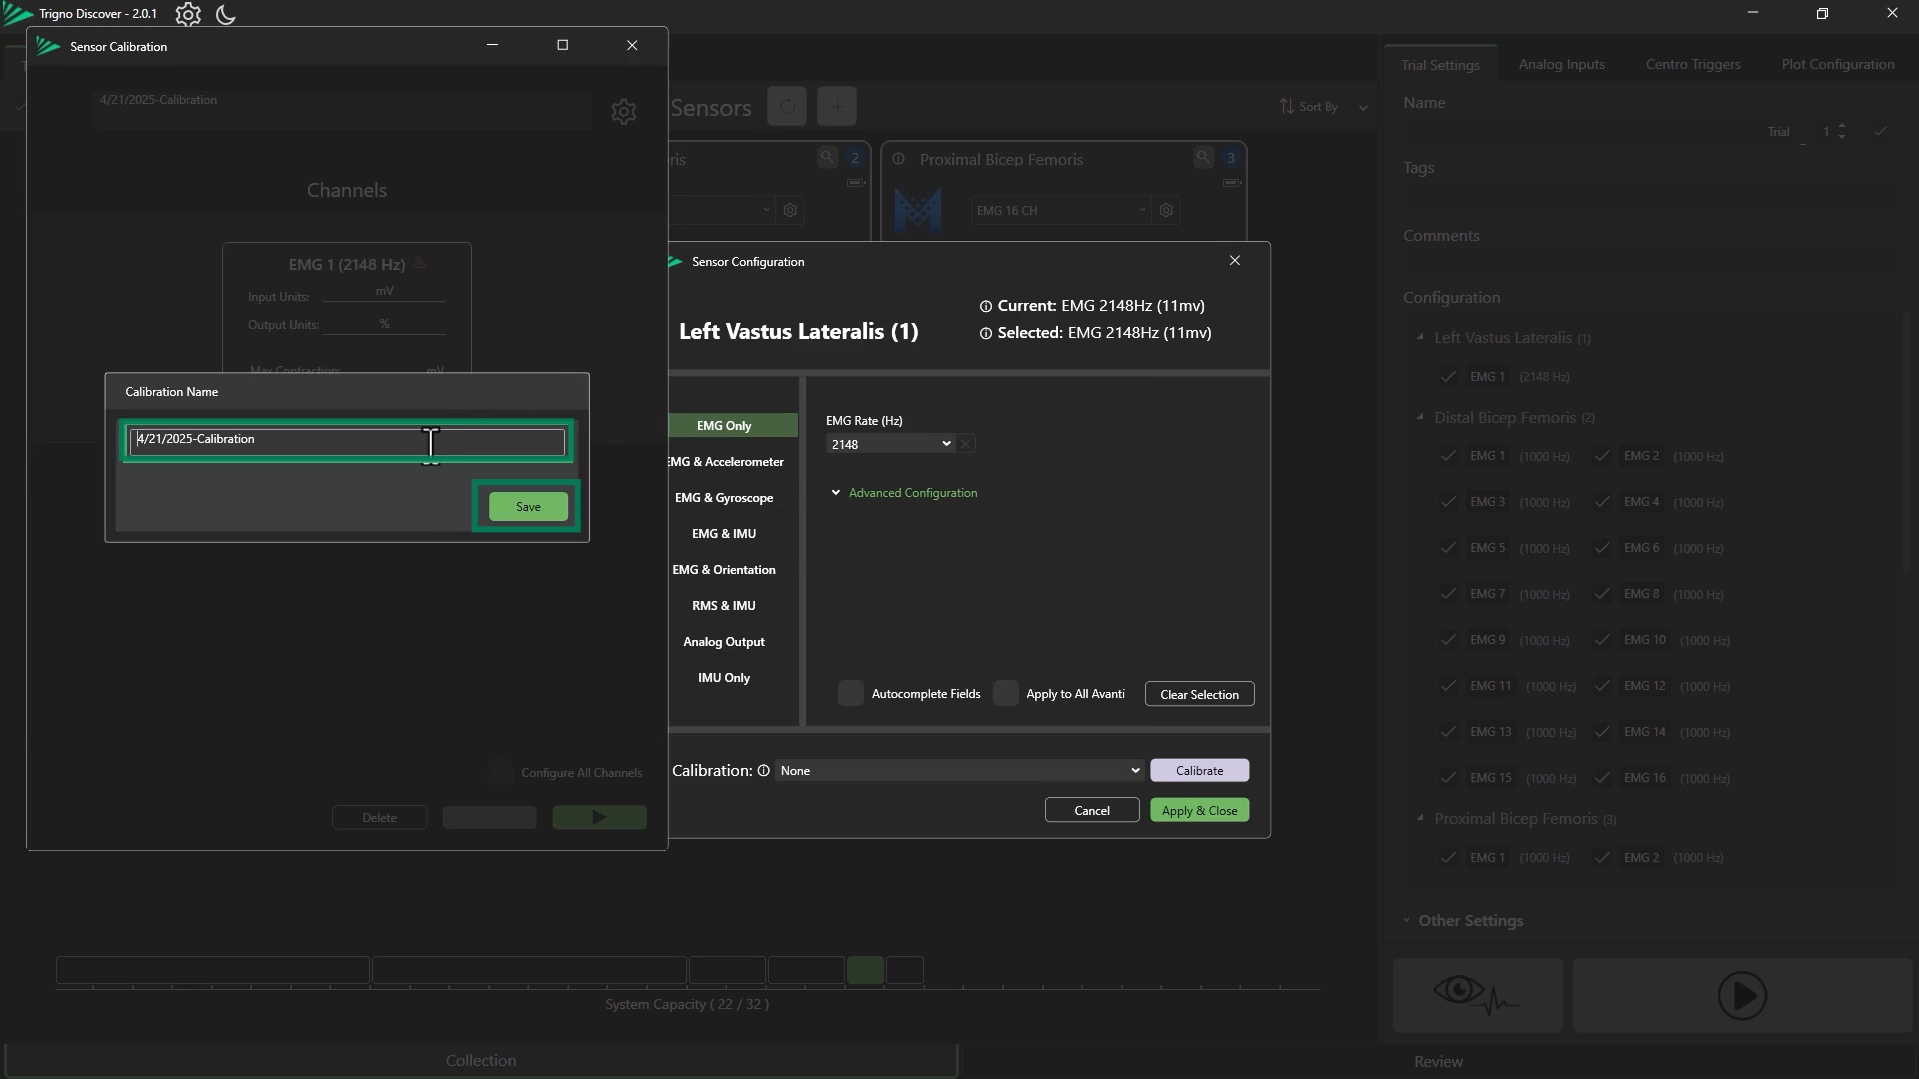
Rename the calibration (optional), then click “Save”.
Step 3: Configuring Calibration Parameters
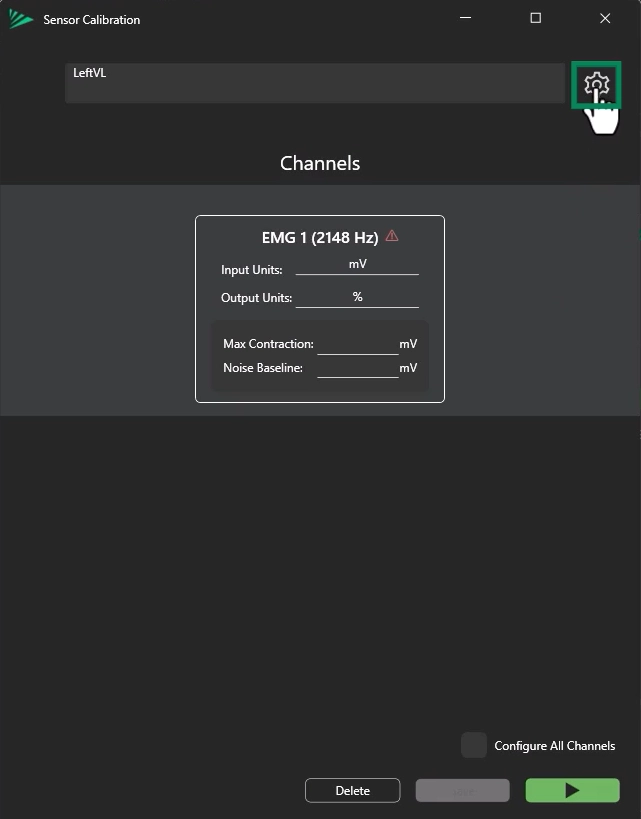
Access Calibration Settings Icon
Click the Calibration Settings icon in the top-right.
Customize Calibration Settings
Set:
Number of contractions (minimum 2)
Contraction and rest durations
Instructional text shown during calibration
Click “Save” to confirm.
Step 4: Optional – Multi-Channel Calibration
Enable Multi-Channel Mode (For Multi-Headed Sensor)
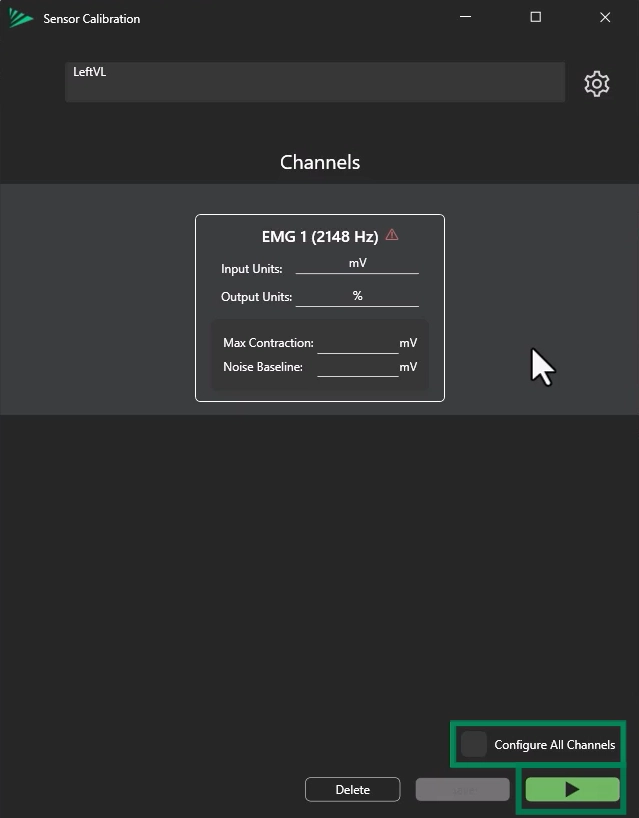
In the lower-right of the calibration window, enable “Configure All Channels.”
This will calibrate all EMG channels on the selected multi-headed sensor.
Step 5: Performing the Calibration Trial
Start the Calibration
Select “Start Collection” to begin the calibration process.
Follow the Instructions on the Screen
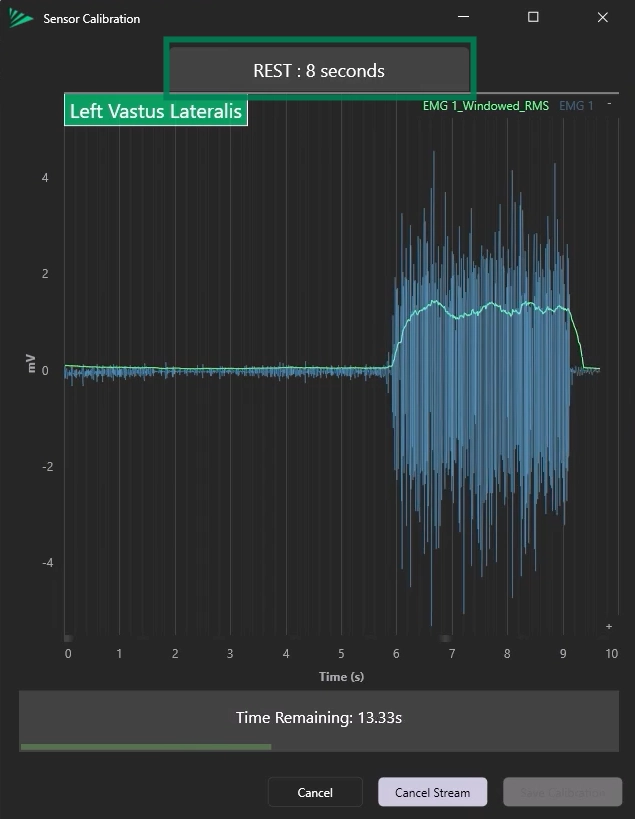
The system will alternate between:
“Contract” – exert maximum voluntary effort
“Rest” – fully relax the muscle
Complete the sequence as instructed on-screen.
Information
Calibrations can only be performed on a single sensor at a time.
Recommendation
Ensure participants give maximum effort during each contraction for reliable results. Participants should aim to relax their muscle completely during the “rest” period to ensure an accurate baseline measurement.
Step 6: Saving or Repeating Calibration
Save the Calibration
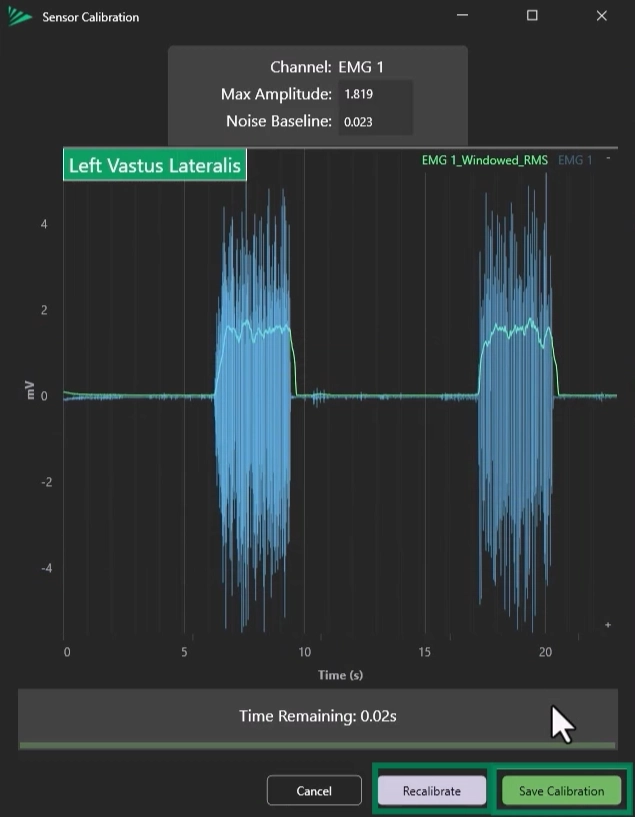
Once the trial completes, click “Save Calibration.”
Recalibrate if Necessary
If data quality is poor or effort was submaximal:
Click “Recalibrate” to repeat the process.
Step 7: Applying the Calibration
Saving the Calibration
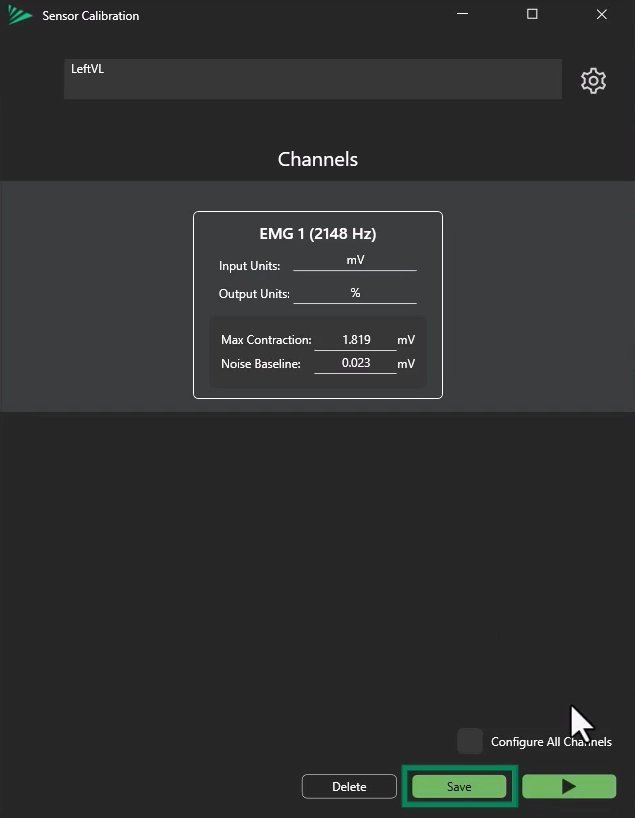
Select the “Save” option
This will automatically apply the calibration
The calibration name will appear under the trial settings configuration pane.
Selecting Other Calibrations
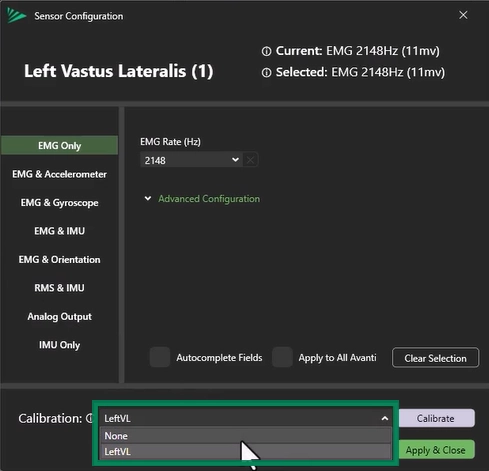
In order to select other calibrations, open the Sensor Configurations Menu.
Use the calibration drop-down menu to choose your saved calibration.
Click “Apply & Close” to confirm.
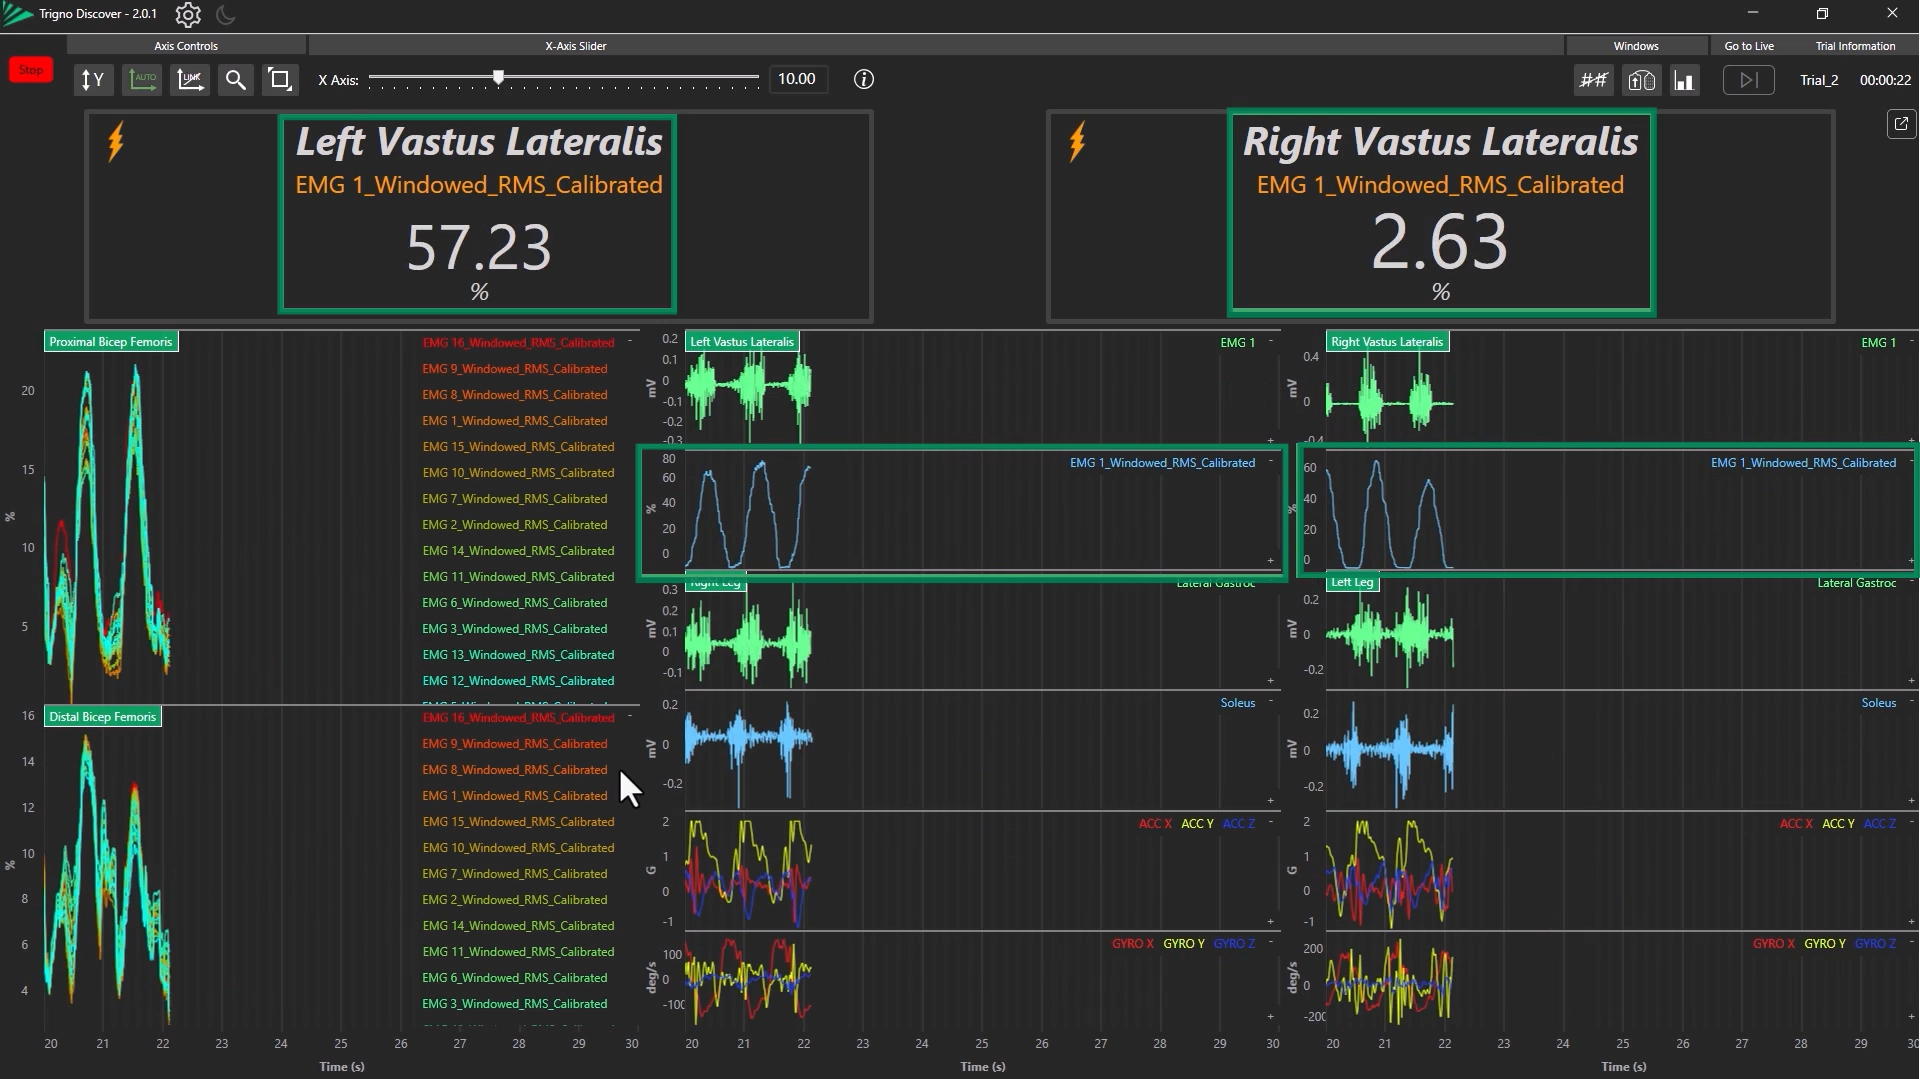
Viewing Calibrated Data in Real Time
During a live stream, calibrated EMG values will be shown as a percentage of the MVC.
Information
Calibrating the sensor will allow for the data to be visualized using the biofeedback tools. (See Trigno Discover: Biofeedback Displays)
For more information on Trigno Discover, please refer to the next article in the Trigno Discover Getting Started Series: Trigno Discover: Data Collection & Review.
DOC-670-1-0

