Overview
This guide introduces Trigno Centro and helps new users understand its core functions. Trigno Centro serves as the central hub of the Trigno System, connecting Avanti-Style Sensors and enabling high-quality EMG data collection.
A high-throughput USB-C port ensures reliable, fast data transfer, while built-in features such as LED indicators, in-built triggering, synchronization outputs, analog channels, and event marking make Trigno Centro flexible and easy to integrate into a wide range of experimental setups.
System Requirements
Material/Tool | Description |
|---|---|
Software | Trigno Discover 1.7+ Delsys API 2.7.1+ |
Accessories | Power adapter, sensor charging station, USB-C cable |
Step-by-Step Instructions
Step 1: Powering and Connecting Trigno Centro
Connect Trigno Centro to power using the supplied adapter.
Connect the provided USB-C cable to the PC.
Important
Only the Delsys provided SC-P09 Trigno medical power supply should be used. Do not use alternate power supplies.
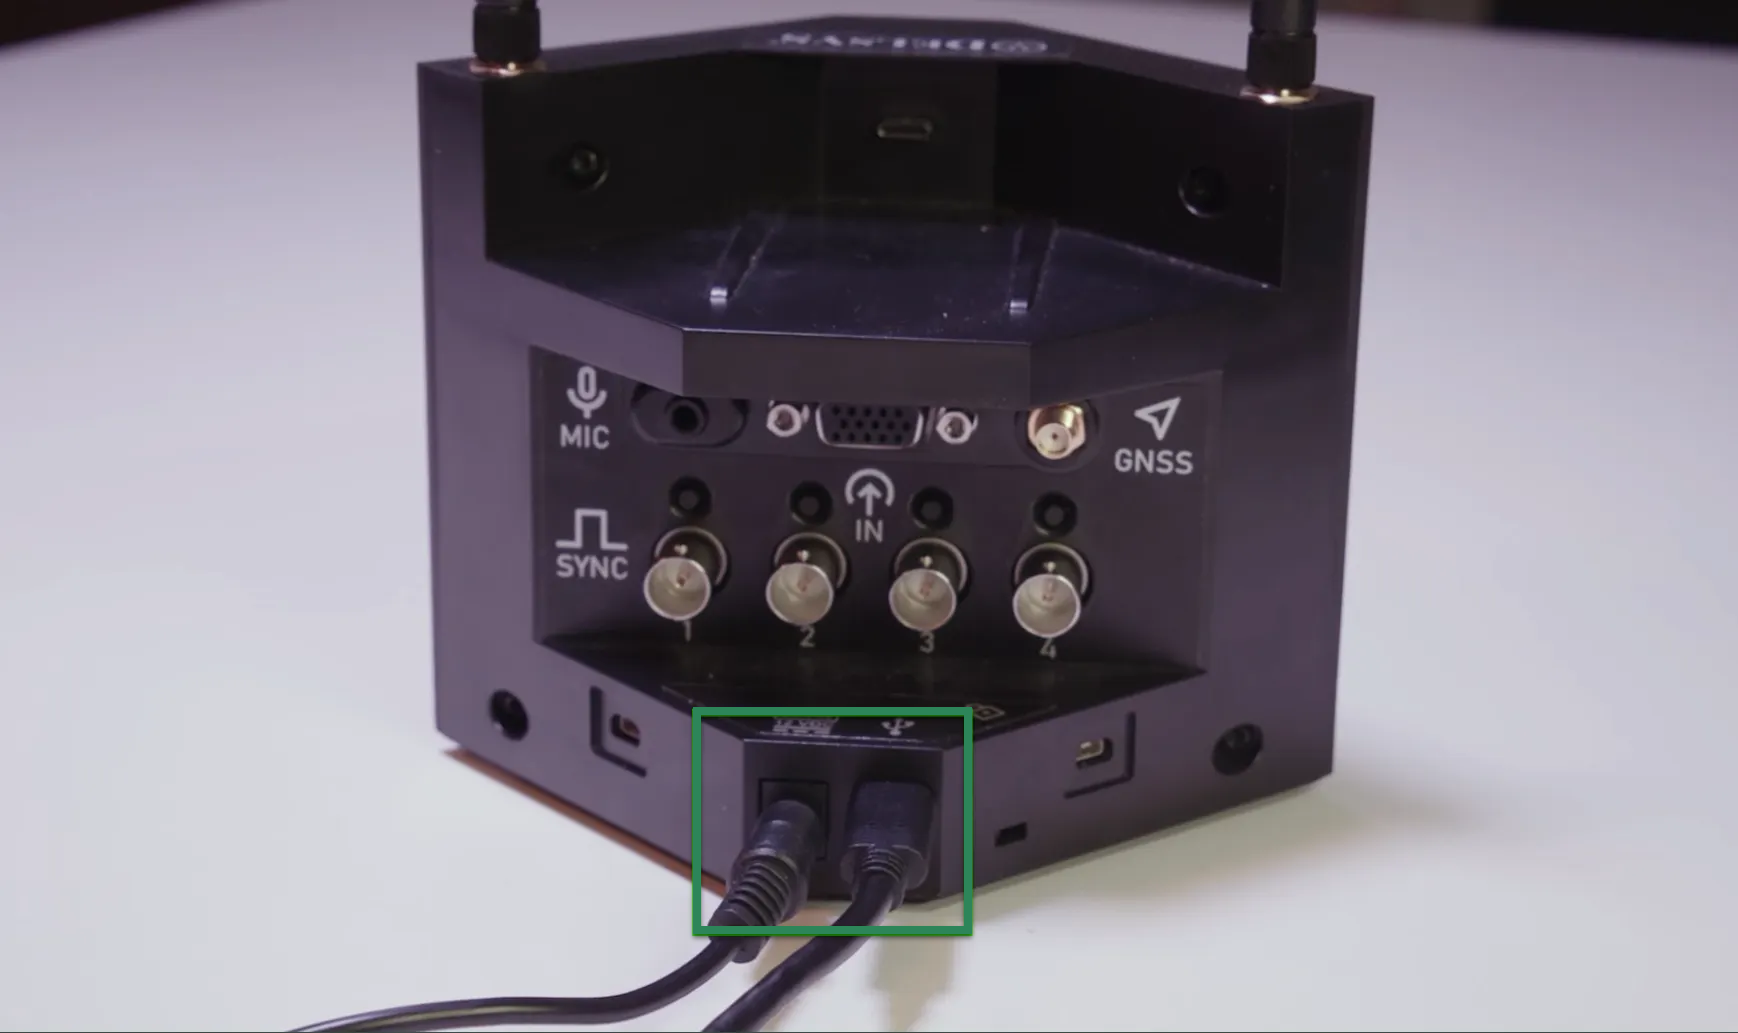
When powered, the front LED on Trigno Centro turns white.
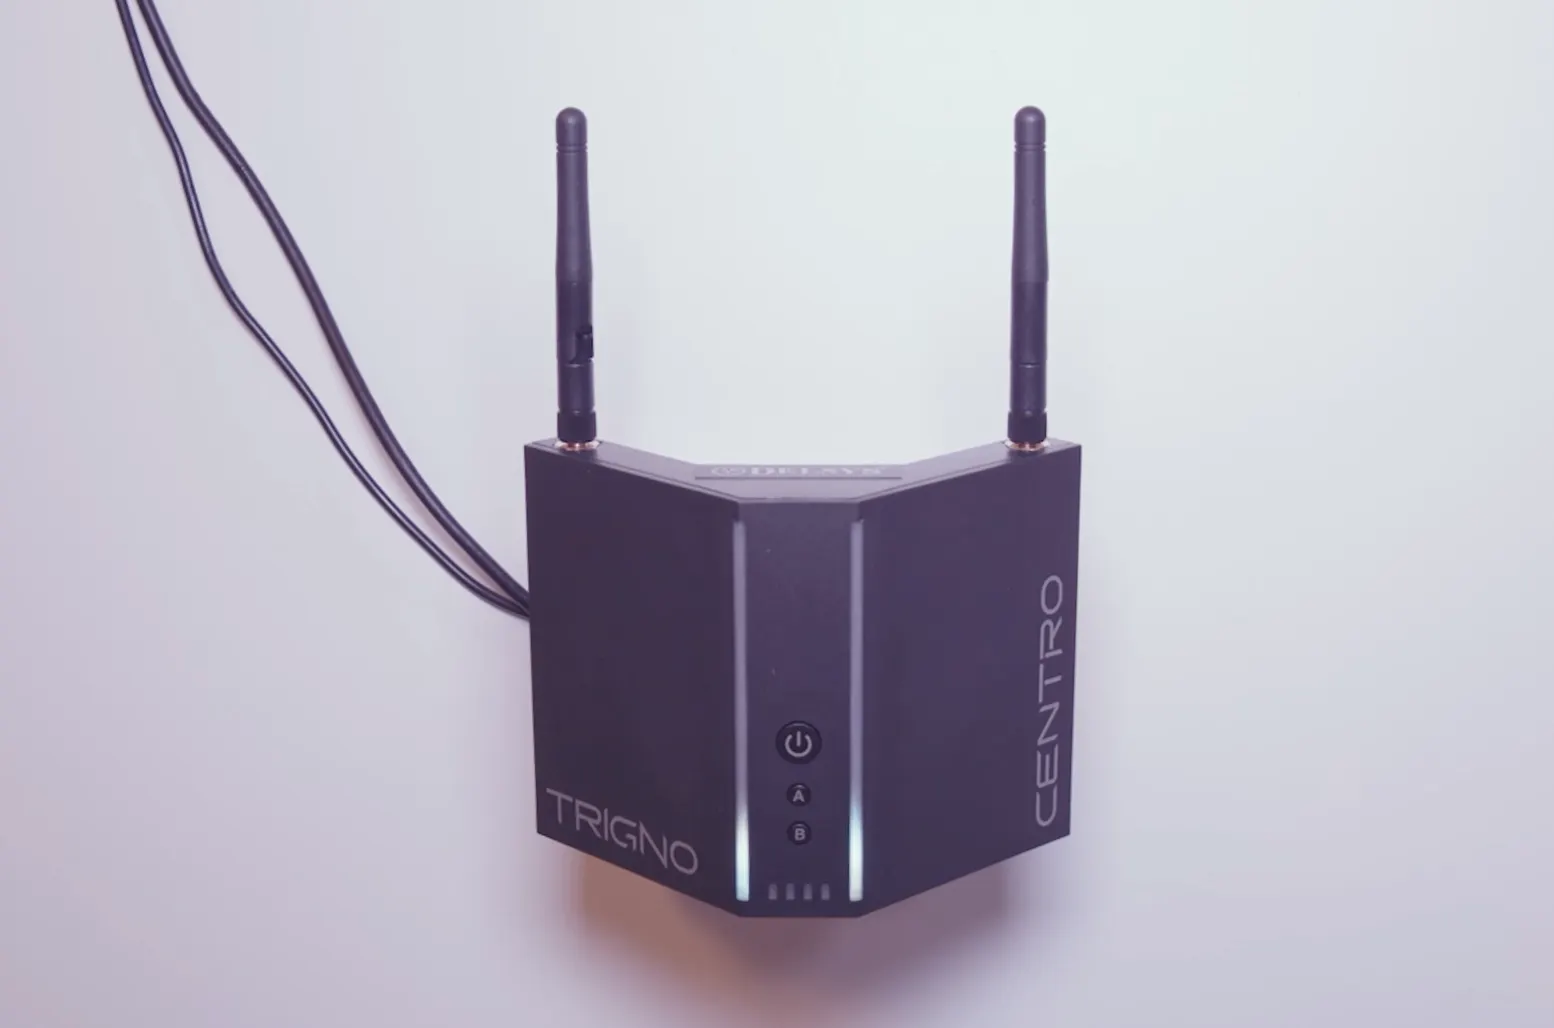
Press the power button on Trigno Centro to begin booting.
LEDs will flash orange during initialization.
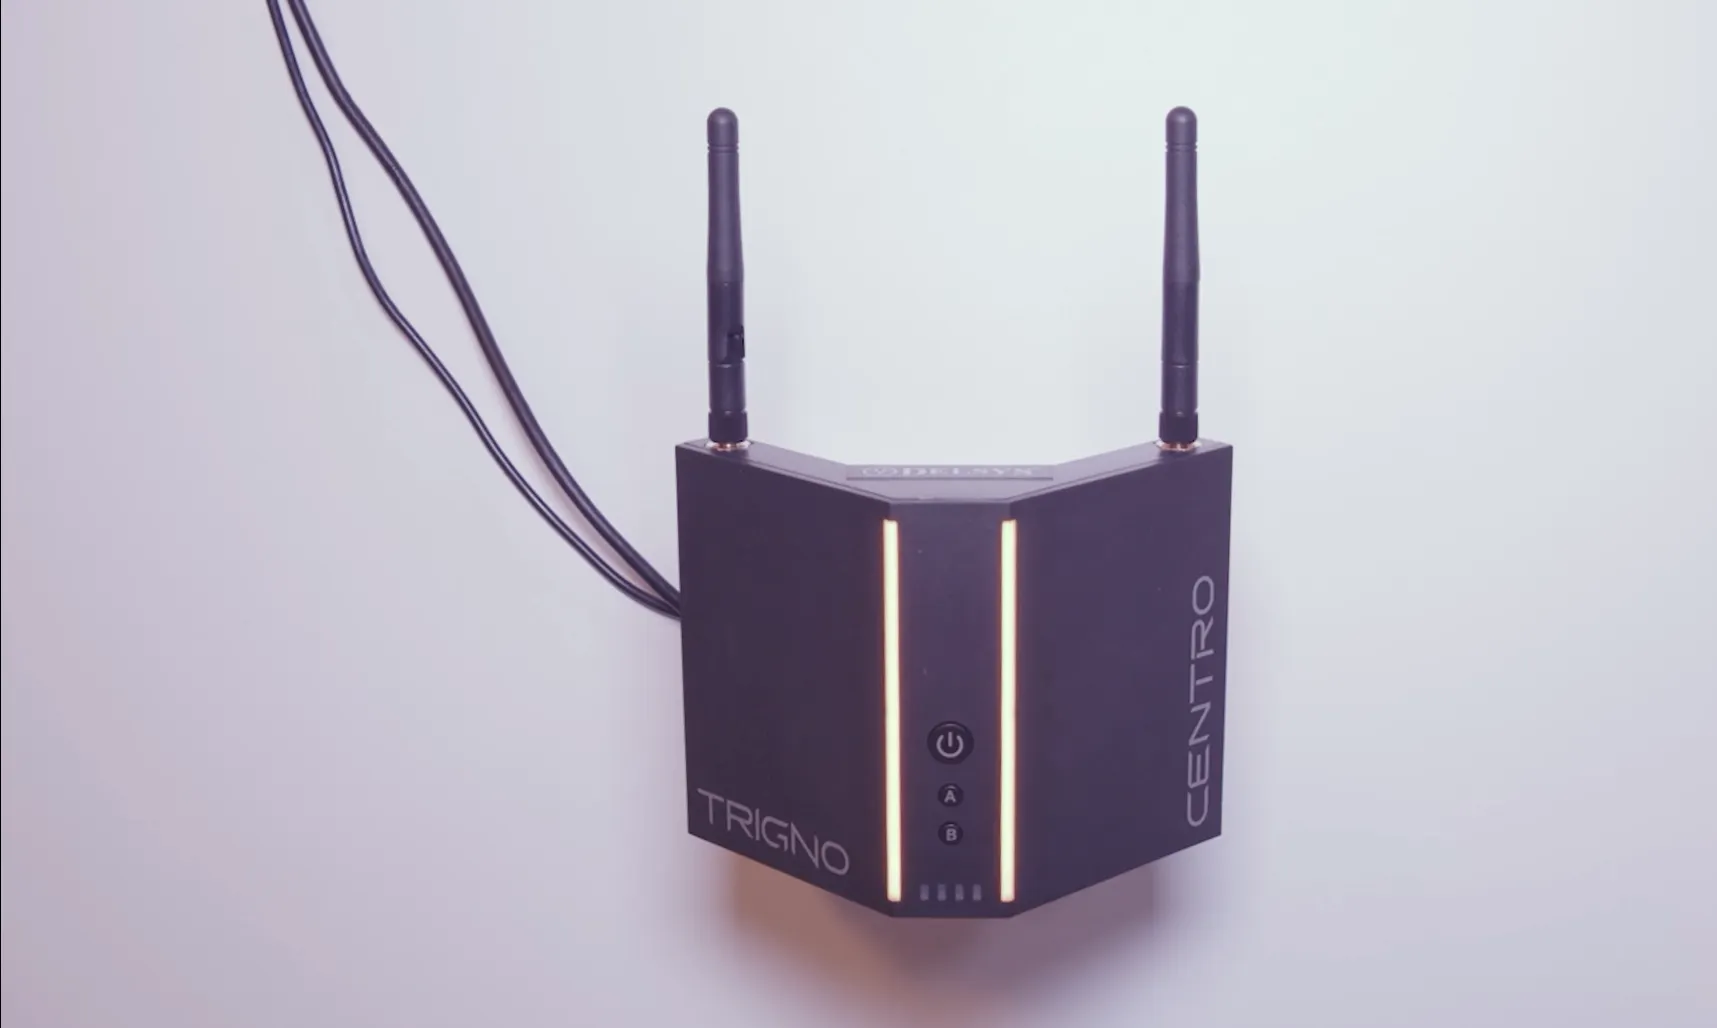
Once booting is complete, LEDs turn solid orange, indicating the system is ready.
Step 2: Understanding Trigno Centro LEDs
Trigno Centro has two LED strips on the front panel that provide clear status feedback.
LED State | Meaning |
|---|---|
No lights | No power connected |
White | Power connected, standby mode |
Flashing orange | Initializing (about 30 seconds) |
Solid orange | Ready to start streaming data |
Cyan | Pairing or Scanning command initiated (looking for Avanti-style sensors) |
Green Flashing | Data from the sensors are streaming to the device |
Magenta | Firmware update in progress (can take up to 30 minutes) |
Red | Internal error — Power Cycle the device |
Step 3: Using Trigno Centro Features
In-built Triggering
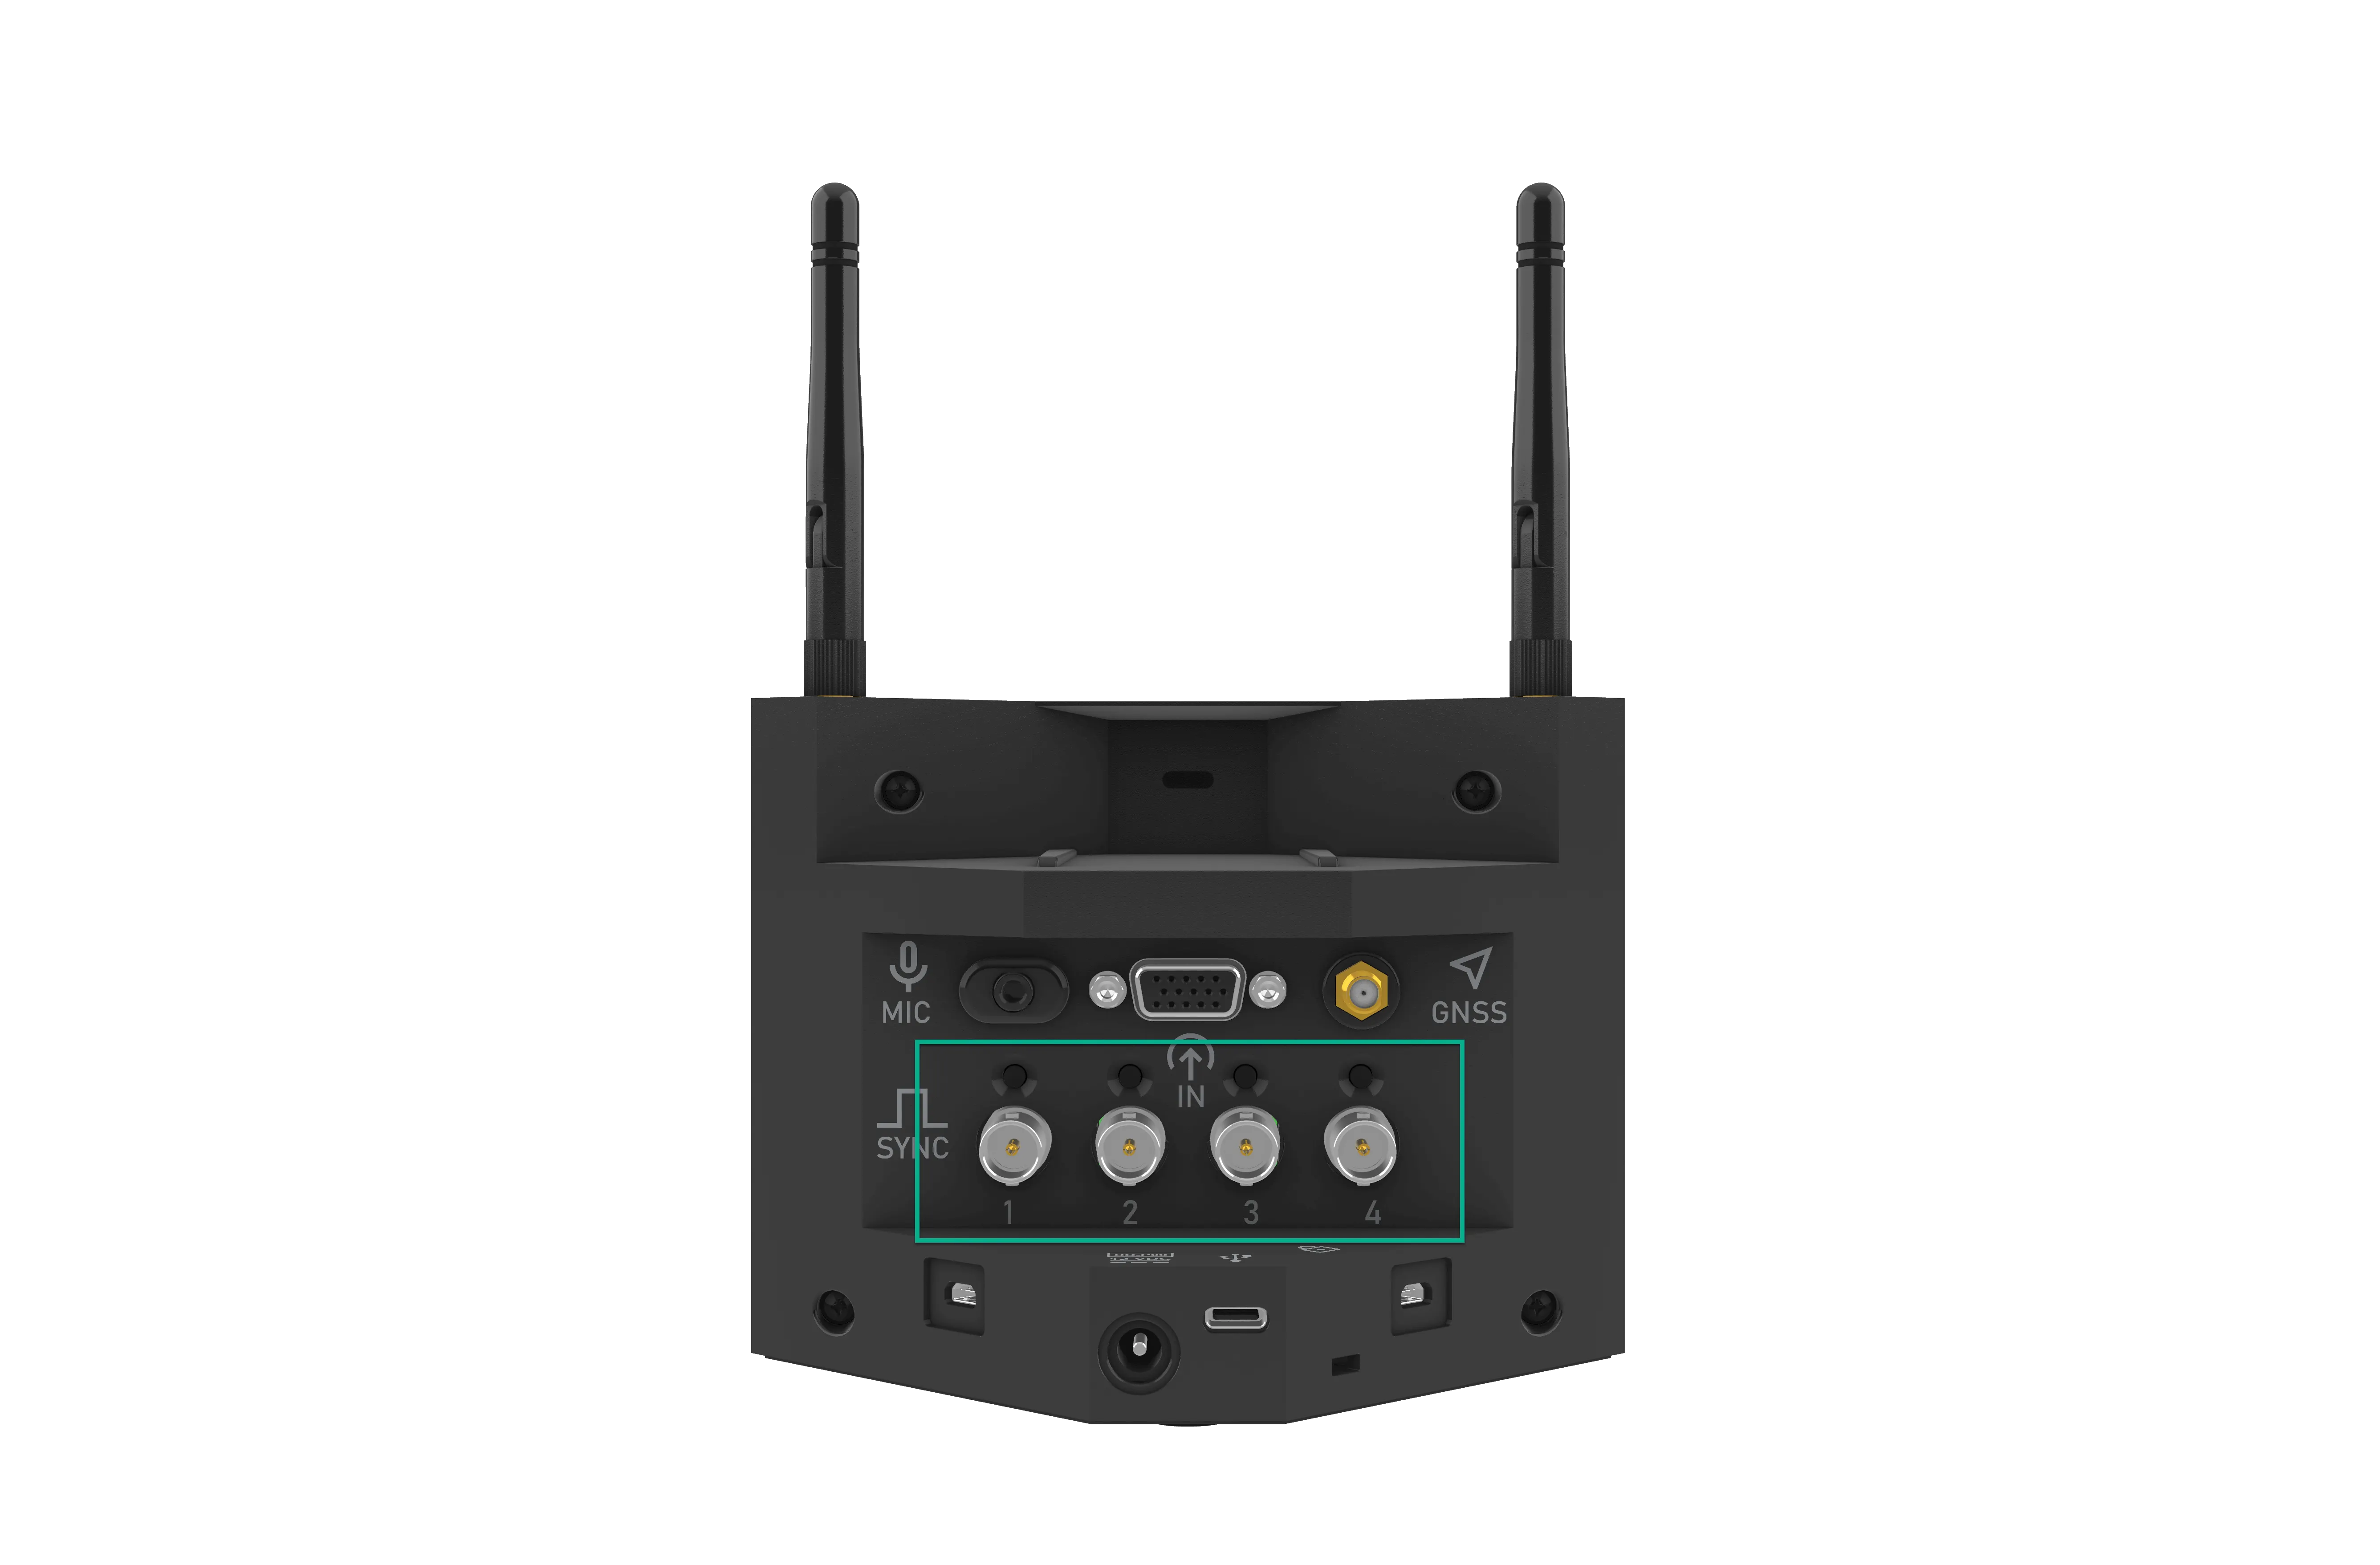
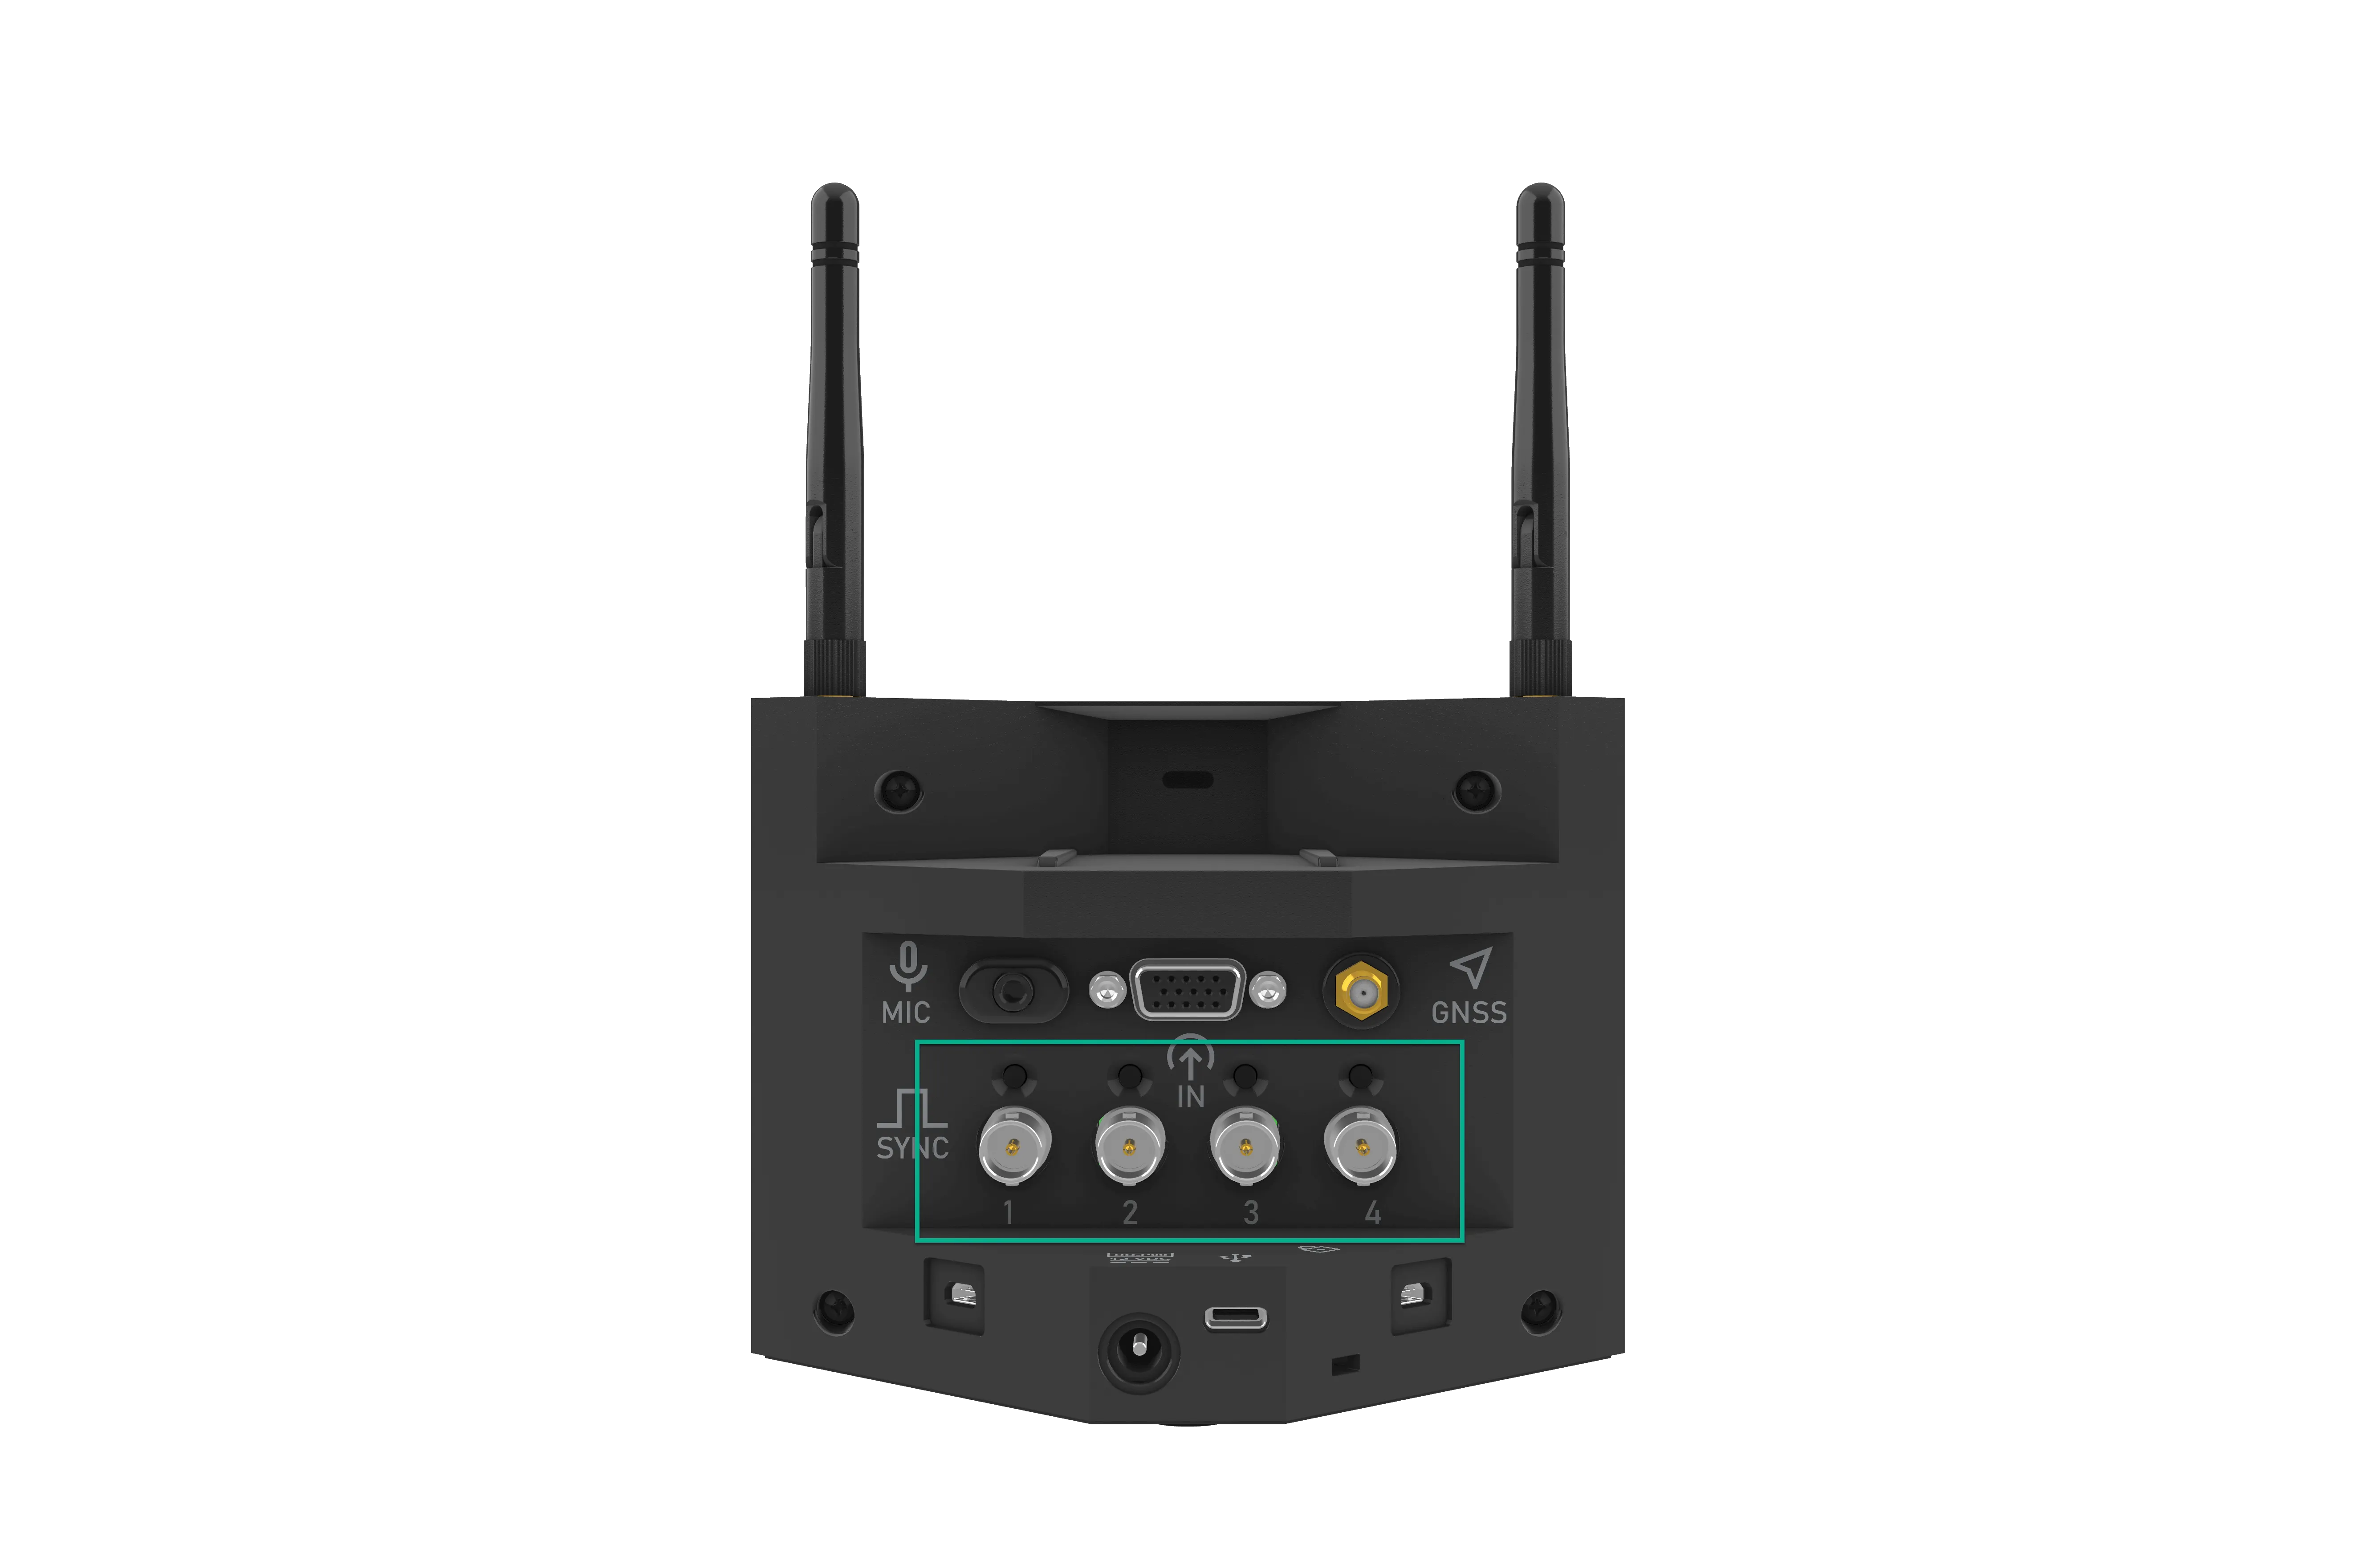
Trigno Centro includes four BNC connectors on the back panel for sending or receiving trigger signals. These can be configured in Trigno Discover to use either a 3.3 V or 5.0 V TTL pulse, acting on rising or falling edges.
Any one of the four BNC connectors can be set as a start/stop trigger input.
Each connector also has a manual push button that can start or stop acquisition if the software command is not provided.
Sync Outputs
Trigno Centro provides a clock pulse synchronized with the Trigno wireless protocol (13.5 ms) via the BNC Connectors. In Trigno Discover, you can select output frequencies of 37, 74, or 148 Hz depending on your acquisition needs. This can be used to synchronize with other 3rd party systems that do not accept a TTL trigger pulse.
In-built Analog Input
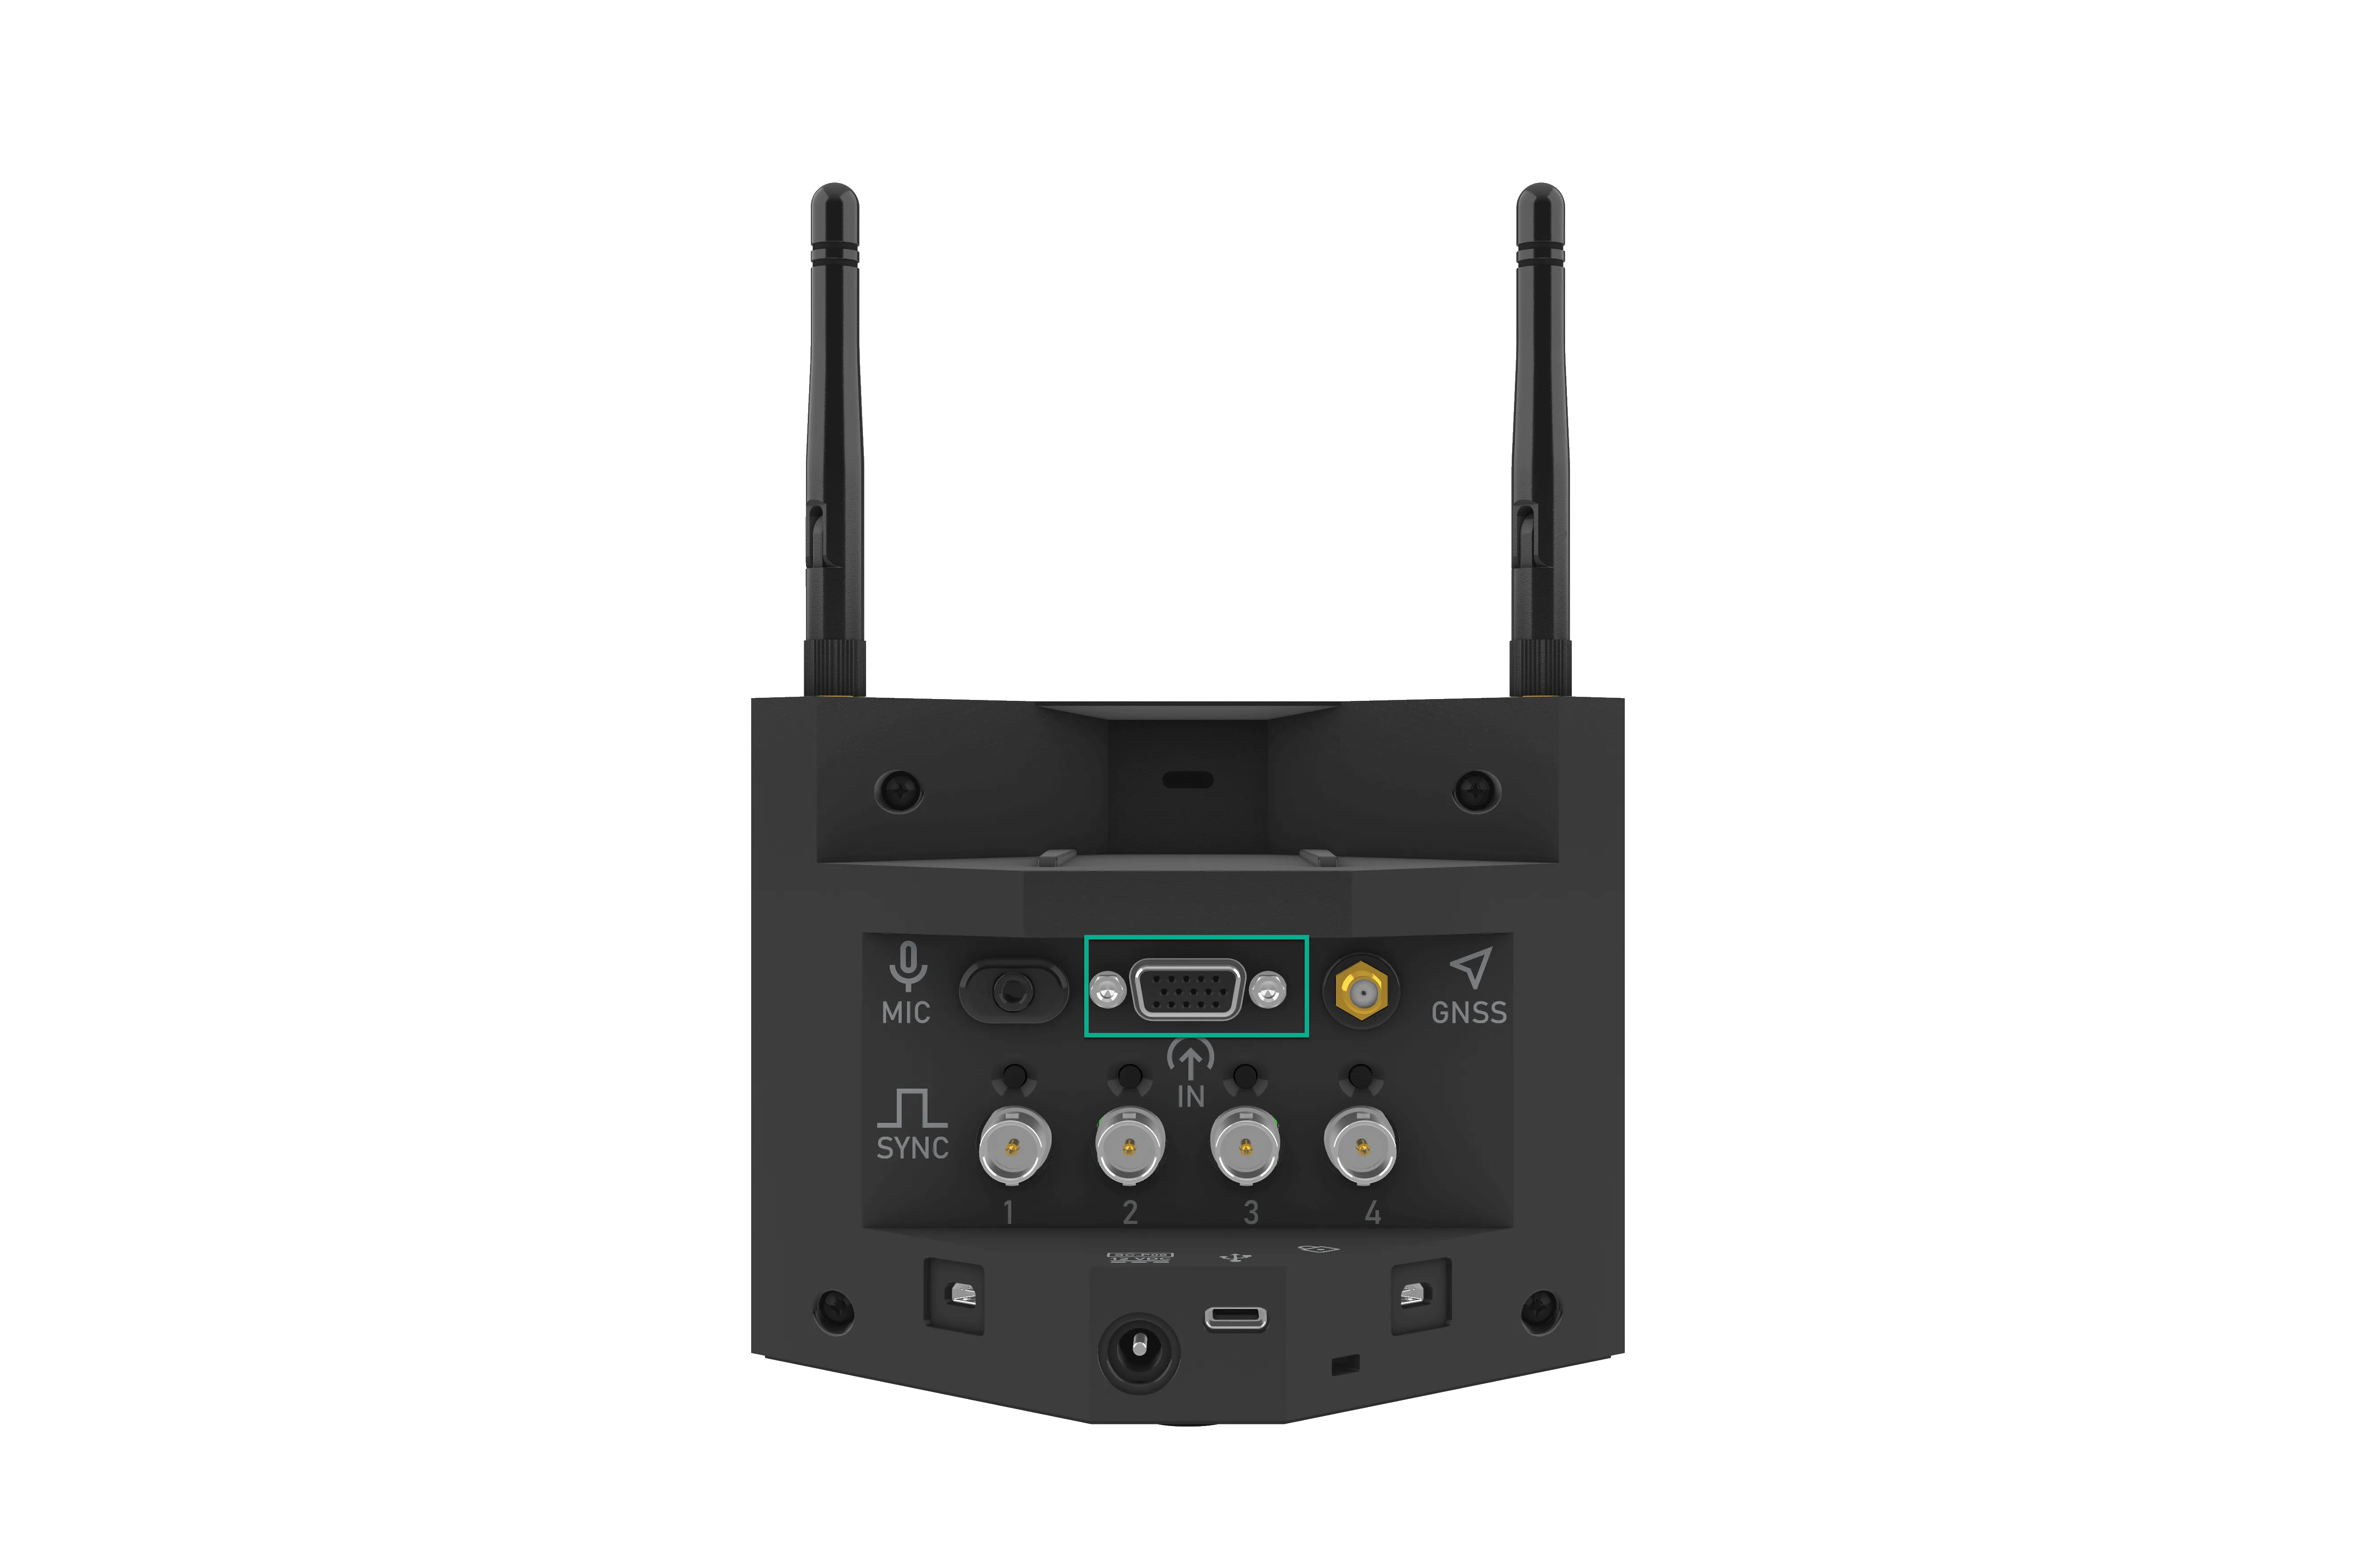
The back panel of Trigno Centro allows integration of third-party analog sensors through a 15-pin female D-sub connection. The Trigno Analog Input Module can be connected to give easier access with 6 BNC connections.
Supports up to six analog input channels at an aggregate sampling rate of 48,000 samples per second
Configurable trigger channel available on pin 11, or on the Trigno Analog Input Module.
Four selectable input ranges from ±10 V to ±0.1 V, enabling optimization of signal-to-noise ratio
For details on configuring analog inputs in Trigno Discover, see Trigno Discover: Trial Set-Up.
Microphone Input
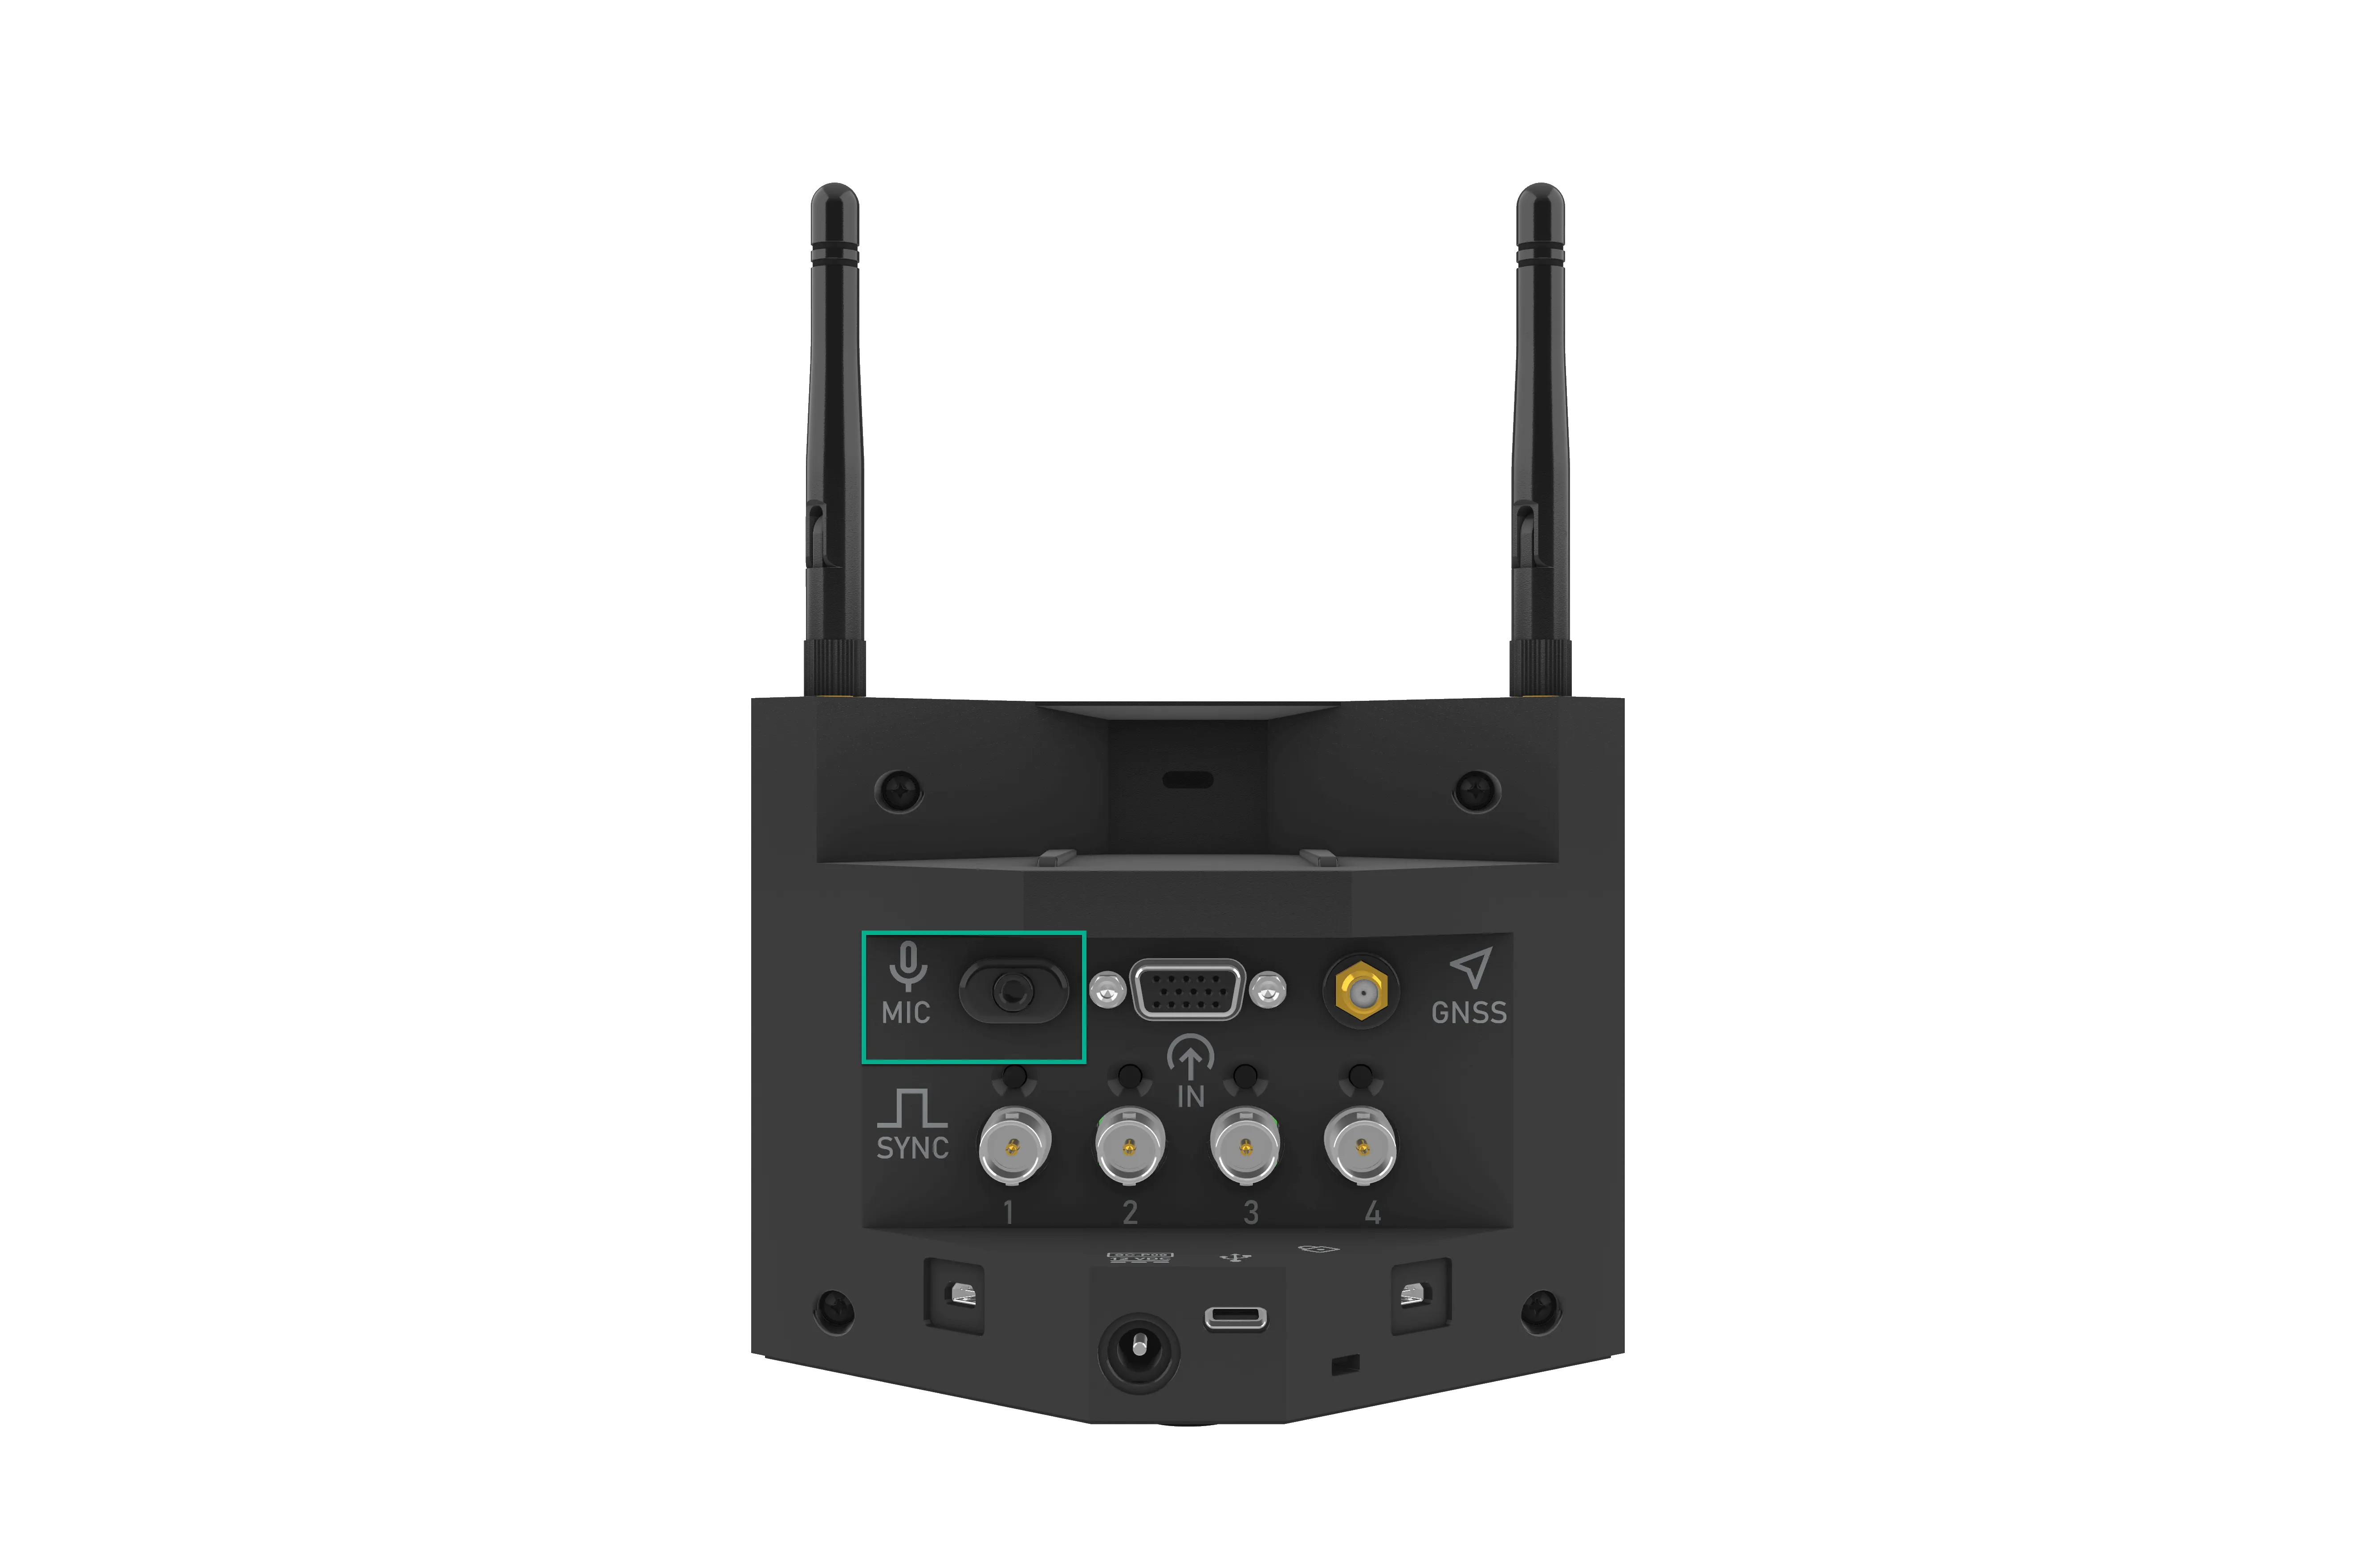
Trigno Centro also includes a 3.5 mm input jack on the back panel for connecting a PC-style condenser microphone. This input allows voice or sound to be sampled in a time-synchronized way with wireless sensor data.
Microphone signals are sampled at 48,000 samples per second with 24-bit resolution.
When the microphone input is active, the six analog input channels on the D-sub connector are suspended.
Information
If microphone inputs are enabled, then analog inputs cannot be used.
Microphone data is recorded in Volts.
Step 4: Key Features
Stream data from up to 32 sensors
High-throughput USB-C connectivity
LED status indicators for quick feedback
Flexible triggering via BNC connectors
Synchronized clock outputs
Integrated analog input with configurable ranges
Troubleshooting
Issue | Solution |
|---|---|
Trigno Centro displays solid red | Power Cycle the device. If the error persists, contact Delsys Support |
Trigno Centro flashes green but there is no software active | Power Cycle the device and reopen the software |
DOC-659-1-0